

Part 2: Project Structure and Syntax
Part 3: Rendering Layouts
Part 4: Routing and Forms (this tutorial)
Part 5: Storage and Services
Throughout this series, we have been building a Progressive Web Application with Ionic and Stencil. We have covered the basics of Stencil and we have started to build out an application with it, and so far it looks like this:
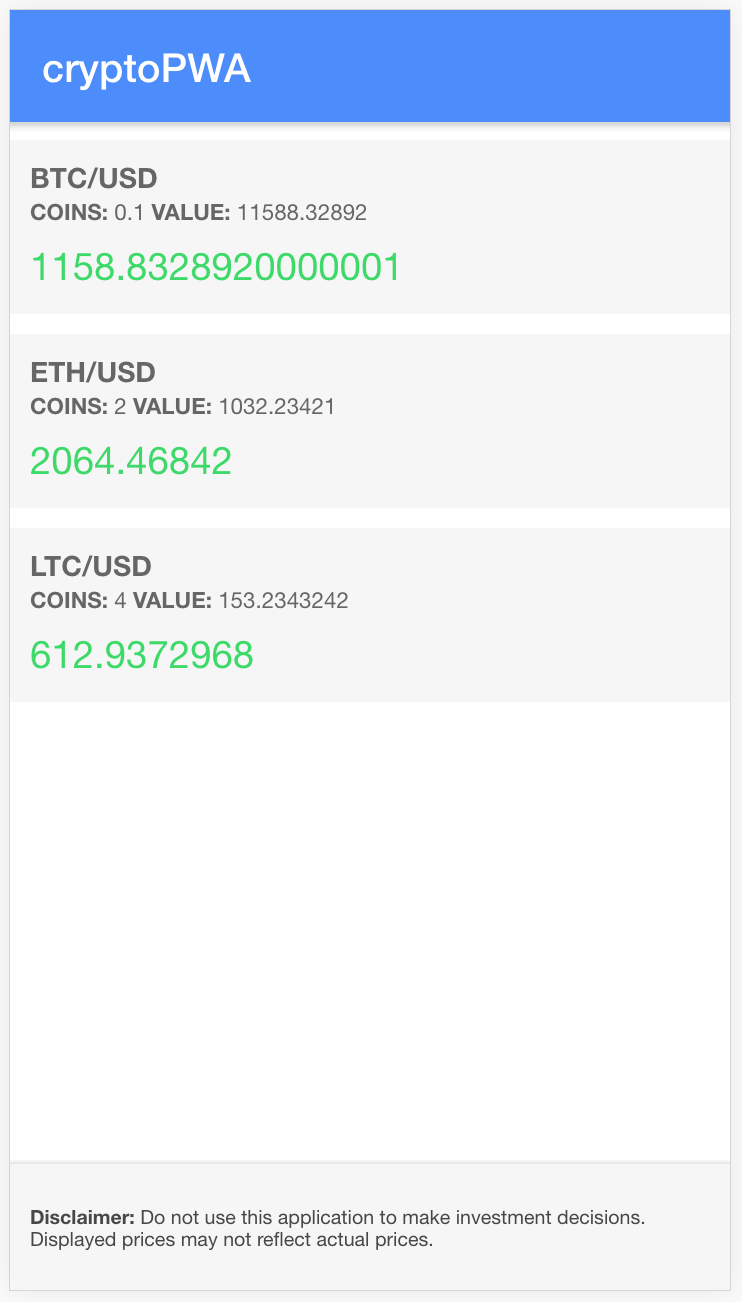
We just have a single page that has a layout created using Ionic web components. In this tutorial, we are going to add an additional page and set up routing so that the user can navigate to it. We will discuss we can handle navigation using Stencil, and we will also be walking through how to set up a simple form. The purpose of this form will be to allow a user to add a new holding to their cryptocurrency portfolio.
Before We Get Started
As this is a continuation of a series, you will need to have completed the other tutorials first in order to follow along step-by-step. If you already understand the basics of Stencil and Ionic, you can skip the first two tutorials and start with: Rendering Layouts.
Creating a New Page component
Since we generated this project using the ionic-pwa starter, we already have a couple of page components generated for us (a component that we are using as a page is no different to any other component). We reused the app-home component to hold the home page for our own application, but instead of reusing the app-profile page that is included by default, we will be deleting that and creating our own from scratch.
Delete the src/components/app-profile folder
Once you have deleted that, we will create our own component by creating a new folder with the appropriate files.
Create a folder at src/components/app-add-holding and add the following files:
- app-add-holding.css
- app-add-holding.tsx
Since we are not worrying about unit testing at this stage, it is not essential that we also add the app-add-holding.spec.ts and app-add-holding.e2e.ts files but you can if you want to.
Adding a Basic Layout
We will eventually be adding a form to our new page, but to begin with, we just want to set up some basic navigation. We are going to need to add some basic code to our new component so that we can navigate to it and see something on the screen.
Modify src/components/app-add-holding/app-add-holding.tsx to reflect the following:
import { Component, h } from '@stencil/core';

@Component({
  tag: 'app-add-holding',
  styleUrl: 'app-add-holding.css',
})
export class AppAddHolding {
  render() {
    return [
      <ion-header>
        <ion-toolbar color="primary">
          <ion-title>Add Holding</ion-title>
        </ion-toolbar>
      </ion-header>,

      <ion-content></ion-content>,
    ];
  }
}
Setting up and Navigating to a Route
In order to be able to navigate to this new page using the <ion-router>, we will need to set up a route for it. The <ion-router> works similarly to the default StencilJS router, except that it is designed specifically for Ionic applications and will enable page transition animations. You will find all of the routes for the application defined in the root AppRoot component at src/components/app-root/app-root.tsx. The render function for that will look something like this:
  render() {
    return (
      <ion-app>
        <ion-router useHash={false}>
          <ion-route url="/" component="app-home" />
          <ion-route url="/add-holding" component="app-add-holding" />
        </ion-router>
        <ion-nav />
      </ion-app>
    );
  }
Inside of the <ion-router> we can define any routes we want using <ion-route>. There are additional configurations we can use, but the basics are that we supply the route we want to use to url and the component we want to display when that route is hit to component. By adding the second route in the example above, the router will know to display the app-add-holding component when the /add-holding URL is activated.
For more of an introduction to routing with Ionic and StencilJS, you can take a look at this video: Using Ionic with Stencil: Navigation with Ion-Router
Make sure to update the
renderfunction in src/components/my-app/my-app.tsx to resemble the example above.
Now that we have our route added, we need to add a way for the user to navigate to it. We are going to modify our home component to include a button in the header that will trigger this route when clicked.
Modify the
<ion-header>section of the template in src/components/app-home/app-home.tsx to reflect the following:
      <ion-header>
        <ion-toolbar color="primary">
          <ion-title>cryptoPWA</ion-title>
          <ion-buttons slot="end">
            <ion-button href="/add-holding" routerDirection="forward">
              <ion-icon slot="icon-only" name="add"></ion-icon>
            </ion-button>
          </ion-buttons>
        </ion-toolbar>
      </ion-header>,
We have added a button to the toolbar, similarly to how we would in a normal Ionic/Angular application. Notice that we are now using slot="end" to specify where in the toolbar the button should sit. We add our button and give it an href of /add-holding so that it links to the correct route, and we also supply a routerDirection of forward so that the screen transition animation can be applied correctly. Now when the user clicks that button, they will be taken to the AppAddHolding component.
We will also need to add a way for the user to get back to the home page once they have navigated to the AppAddHolding page. To do this, we will need to add an <ion-back-button> to the add holding page.
Modify the the template in src/components/app-add-holding/app-add-holding.tsx to reflect the following:
  render() {
    return [
      <ion-header>
        <ion-toolbar color="primary">
          <ion-buttons slot="start">
            <ion-back-button defaultHref="/"></ion-back-button>
          </ion-buttons>
          <ion-title>Add Holding</ion-title>
        </ion-toolbar>
      </ion-header>,

      <ion-content></ion-content>
    ];
  }
The <ion-back-button> component will automatically link back to the previous page, however we also supply a defaultHref in case there is no history available. For example, if you refresh the application when you are already on the add holding page there will be no history available and the back button won’t know what to go back to. By having a defaultHref there is always a value to fall back to.
Creating a Simple Form
The last thing we are going to take a look at in this tutorial is how to create a simple form using StencilJS. In an Ionic/Angular application, we would typically use [(ngModel)] (for a simple form) which can use to set up two-way binding to class members that we have defined. When the user modifies any input with an associated [(ngModel)], the class member would be immediately updated with the new value and be available to us to use.
Again, we are not using a framework so we don’t have features like this built in. Instead, we need to handle form input using standard Javascript features. Let’s implement the form in its entirety and then discuss how it works.
NOTE: We will be taking a very simplistic approach to form handling here. For a much more in-depth guide to implementing forms in a StencilJS application, you should take a look at Handling Forms & User Input which is a preview lesson from Creating Ionic Applications with StencilJS.
Modify src/components/app-add-holding/app-add-holding.tsx to reflect the following:
import { Component, h } from "@stencil/core";

@Component({
  tag: "app-add-holding",
  styleUrl: "app-add-holding.css"
})
export class AppAddHolding {
  private cryptoCode: string;
  private displayCurrency: string;
  private amountHolding: number;

  addHolding() {
    let holding = {
      crypto: this.cryptoCode,
      currency: this.displayCurrency,
      amount: this.amountHolding || 0
    };

    console.log(holding);
    // todo: handle adding holding
  }

  changeValue(ev) {
    const value = ev.target.value;

    switch (ev.target.name) {
      case "cryptoCode": {
        this.cryptoCode = value;
        break;
      }

      case "displayCurrency": {
        this.displayCurrency = value;
      }

      case "amountHolding": {
        this.amountHolding = value;
      }
    }
  }

  render() {
    return [
      <ion-header>
        <ion-toolbar color="primary">
          <ion-buttons slot="start">
            <ion-back-button defaultHref="/"></ion-back-button>
          </ion-buttons>
          <ion-title>Add Holding</ion-title>
        </ion-toolbar>
      </ion-header>,

      <ion-content class="ion-padding">
        <div class="message">
          <p>
            To add a holding you will need to supply the appropriate symbol for the cryptocurrency,
            and the symbol for the currency you would like to display the values in.
          </p>

          <p>
            <strong>Note:</strong> Listed prices are estimated. Rates may vary significantly across
            different exchanges.
          </p>
        </div>

        <ion-list>
          <ion-item>
            <ion-label position="stacked">Crypto Code</ion-label>
            <ion-input
              name="cryptoCode"
              onInput={ev => this.changeValue(ev)}
              placeholder="(e.g. BTC, LTC, ETH)"
              type="text"
            ></ion-input>
          </ion-item>

          <ion-item>
            <ion-label position="stacked">Display Currency Code</ion-label>
            <ion-input
              onInput={ev => this.changeValue(ev)}
              name="displayCurrency"
              placeholder="(e.g. USD, CAD, AUD)"
              type="text"
            ></ion-input>
          </ion-item>

          <ion-item>
            <ion-label position="stacked">Amount Holding</ion-label>
            <ion-input
              onInput={ev => this.changeValue(ev)}
              name="amountHolding"
              type="number"
            ></ion-input>
          </ion-item>
        </ion-list>

        <ion-button expand="full" onClick={() => this.addHolding()}>Add Holding</ion-button>
      </ion-content>,

      <ion-footer>
        <p>
          <strong>Note:</strong> This web application allows you to track your Cryptocurrency
          without creating an account. This means that all data is stored locally, and may be
          permanently deleted without warning.
        </p>
      </ion-footer>
    ];
  }
}
First of all, we have created three class members just like we usually would when setting up [(ngModel)] with Ionic/Angular:
private cryptoCode: string;
private displayCurrency: string;
private amountHolding: number;
However, our form looks a little different:
    <ion-item>
        <ion-label position="stacked">Crypto Code</ion-label>
        <ion-input name="cryptoCode" onInput={(ev) => this.changeValue(ev)} placeholder="(e.g. BTC, LTC, ETH)" type="text"></ion-input>
    </ion-item>

    <ion-item>
        <ion-label position="stacked">Display Currency Code</ion-label>
        <ion-input onInput={(ev) => this.changeValue(ev)} name="displayCurrency" placeholder="(e.g. USD, CAD, AUD)" type="text"></ion-input>
    </ion-item>

    <ion-item>
        <ion-label position="stacked">Amount Holding</ion-label>
        <ion-input onInput={(ev) => this.changeValue(ev)} name="amountHolding" type="number"></ion-input>
    </ion-item>
Instead of adding an [(ngModel)] we set up a listener for the onInput event that will trigger the changeValue function. That function looks like this:
changeValue(ev){

        const value = ev.target.value;

        switch(ev.target.name){

            case 'cryptoCode': {
                this.cryptoCode = value;
                break;
            }

            case 'displayCurrency': {
                this.displayCurrency = value;
            }

            case 'amountHolding': {
                this.amountHolding = value;
            }

        }
    }
We pass in the input event, and we check the name to see which input has been changed. We then update the appropriate variables with the value passed in from the event (i.e. the value that the user has entered). This is similar to what [(ngModel)] achieves, except that we aren’t also binding the value back to the input (we have one-way binding, not two-way binding). If we were to change the value programmatically it would not be updated in the template (there is no need for us to do that in this instance).
We also have an onClick listener set up for the Add Holding button that will call the addHolding() function:
addHolding(){

        let holding = {
            crypto: this.cryptoCode,
            currency: this.displayCurrency,
            amount: this.amountHolding || 0
        };

        console.log(holding);
        // todo: handle adding holding

    }
All this is doing for now is dumping the values into an object, and then logging that out to the console. We will handle actually using this information in the next tutorial. Finally, let’s also just add a couple of styles to this component to make it look a little nicer.
Modify src/components/app-add-holding/app-add-holding.css to reflect the following:
ion-footer {
padding: 10px;
font-size: 0.7em;
color: #474747;
background-color: #f6f6f6;
}
app-add-holding ion-item {
background: #fff;
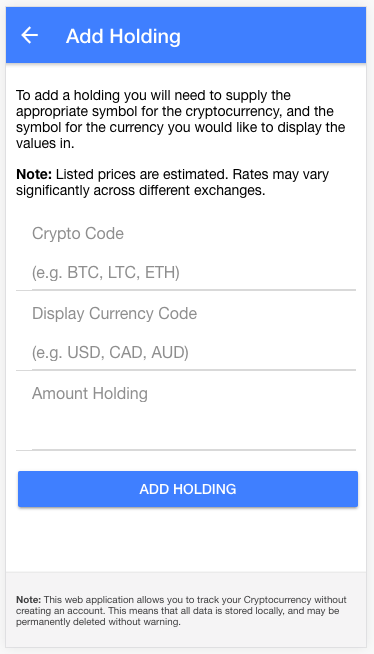
}Once you have completed that change, the Add Holding page should now look like this:
Summary
We are getting pretty close to finishing the application now. In the next tutorial, we will focus on saving holdings to storage and fetching prices from an API.
Part 2: Project Structure and Syntax
Part 3: Rendering Layouts
Part 4: Routing and Forms (this tutorial)
Part 5: Storage and Services