

I keep going on about how important atmosphere is in a game, and the last two Phaser tutorials I have created have focused on that. First we learned how to create a parallax background effect which adds more depth to a game, and then we learned how to create a day and night cycle so that the game would transition from day to night and repeat that process over and over.
This tutorial is again going to focus on adding some atmosphere to your Phaser games, this time by adding weather effects to the game. We will be creating both a fog effect and a rain effect. Once again, this tutorial series has been inspired by the game Alto which also does a spectacular job at creating atmosphere with weather:
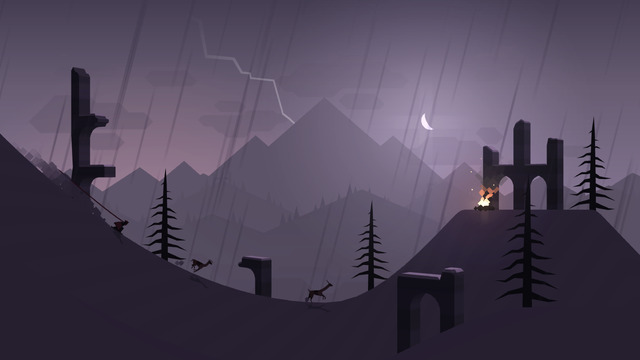
Of course these are just pictures, it is much more immersive when you actually play the game. If you are looking for a fun little game to unwind with it’s well worth the purchase, I must have spent at least 10 hours playing it.
Before we Get Started
So that we have something to work with we are going to be building on from the previous tutorial where we added a day night cycle to a Phaser game. If you want to follow along with this tutorial step by step then make sure you have finished that tutorial first. To refresh your memory, this is what we had at the end of the last tutorial:
and in this tutorial, we will be aiming to create something like this:

The example above has both the fog and the rain effect activated (I’m not sure if you can make out the rain with the quality of the GIF but it is there!). The cool thing about the way we will set this up is that you will be able to combine any number of different weather effects at the same time.
Creating a Weather Plugin
If you’ve read the last tutorial then you will know that we created a plugin to handle the day and night cycle for us, and we are going to do the same for the weather too.
Create a file at objects/Weather.js and add the following code:
class Weather {
  constructor(game) {
    this.game = game;
  }

  addFog() {}

  removeFog() {}

  addRain() {}

  removeRain() {}
}

export default Weather;
This uses the same structure as the DayCycle plugin we created – we pass in a reference to the game through the constructor and then define a bunch of functions. These will handle adding and removing the weather effects, and we are going to implement them one by one now.
Modify the
addFogfunction to reflect the following:
addFog(){

        let fog = this.game.add.bitmapData(this.game.width, this.game.height);

        fog.ctx.rect(0, 0, this.game.width, this.game.height);
        fog.ctx.fillStyle = '#b2ddc8';
        fog.ctx.fill();

        this.fogSprite = this.game.add.sprite(0, 0, fog);

        this.fogSprite.alpha = 0;
        this.game.add.tween(this.fogSprite).to( { alpha: 0.7 }, 6000, null, true);

    }
To create our fog effect we are simply going to place a solid colour sprite over the top of our entire game area, and then make that slightly transparent. So that we don’t have to add a giant screen sized sprite to our game, we create the sprite with bitmap data so that we can easily scale the game to any size.
The fog sprite will be as wide and tall as the game area and we fill it with a blueish colour. We add the sprite to the game with an alpha of 0. The alpha channel controls the transparency of the sprite, so by setting it to 0 we are making it completely transparent. This is because we don’t want the fog to just immediately flash on to the screen, we want it to slowly fade in. We then animate the alpha with a tween which will run over 6 seconds until it reaches an opacity of 70%.
Here’s what the transition for the fog will look like:
Spooky! It’s a pretty cool effect but we don’t want it to hang around forever, so we are also going to add the ability to remove it.
Modify the
removeFogfunction to reflect the following:
removeFog(){
        let fogTween = this.game.add.tween(this.fogSprite).to( { alpha: 0 }, 6000, null, true);
        fogTween.onComplete.add(() => {
            this.fogSprite.kill();
        }, this);
    }
Rather than just removing the fog sprite right away with the kill method, we first tween its transparency again, but this time we reverse the animation so that it becomes more and more transparent. We add an onComplete listener to the tween so that once the animation has completed we remove the sprite entirely.
Now let’s work on our rain effect.
Modify the
addRainfunction to reflect the following:
addRain(){

        let rainParticle = this.game.add.bitmapData(15, 50);

        rainParticle.ctx.rect(0, 0, 15, 50);
        rainParticle.ctx.fillStyle = '#9cc9de';
        rainParticle.ctx.fill();

        this.emitter = this.game.add.emitter(this.game.world.centerX, -300, 400);

        this.emitter.width = this.game.world.width;
        this.emitter.angle = 10;

        this.emitter.makeParticles(rainParticle);

        this.emitter.minParticleScale = 0.1;
        this.emitter.maxParticleScale = 0.3;

        this.emitter.setYSpeed(600, 1000);
        this.emitter.setXSpeed(-5, 5);

        this.emitter.minRotation = 0;
        this.emitter.maxRotation = 0;

        this.emitter.start(false, 1600, 5, 0);

    }
Once again, rather than using an image sprite that we load in to use for our rain we just create one manually using bitmap data. If you would like you could use your own rain sprite and just load it in like any other sprite, and then add it with the following code:
this.emitter.makeParticles('rain');
which references the 'rain' asset, rather than the bitmap variable we created. I like the idea of using bitmap data though because it means you can easily use this plugin in other projects without having to worry about adding other assets as well.
We’re creating an emitter using our rain particle, which will create the rain effect. An emitter in Phaser basically crates a bunch of sprites or particles, so in this case it will take our one rain sprite and create a lot of them. There’s a lot of different settings you can apply to change how the emitter behaves (one single explosion of lots of particles, a constant stream of particles over time, particles with varying sizes, speeds and so on). We have added settings that will create a “rainy” effect.
Here’s what the rain effect will look like when it is started:
and of course we need the ability to remove the rain as well.
Modify the
removeRainfunction to reflect the following:
removeRain(){
        this.emitter.kill();
    }
Much simpler this time, all we do is remove the emitter immediately.
Using the Weather Plugin
Now that we’ve created the plugin, all we have to do is make use of it.
Modify the Main.js state to include the following import:
import Weather from 'objects/Weather';This will import our Weather class, but we will also need to initialise it.
Add the following code inside of the
createmethod in Main.js:
this.weather = new Weather(this.game);Now you will be able to access this weather object from anywhere within your Main state. So you could call any of these methods:
this.weather.addRain();
this.weather.removeRain();
this.weather.addFog();
this.weather.removeFog();
So you could of course call these immediately in the create method, or more likely you would call them at some point later on during your game (maybe based on some timer, or perhaps when the player does something specific).
Summary
This will likely be the end of this Alto inspired “atmosphere” tutorial series. There’s been absolutely no gameplay added over the last three tutorials but hopefully you agree that the effects we’ve created can add a lot of enjoyment and immersiveness to a game. The parallax background, day cycle, and weather effects we’ve created can serve as a great backdrop for many different types of games.