

Creating a login system for any kind of application, mobile or desktop, has historically been a pretty hard task. In the case of a mobile app it would at least involve:
- Setting up a secure server
- Creating a database to hold user information
- Posting information from the app to a script on the server which would create and store a user
- Posting information from the app to a script on the server which would check the users existing credentials
- Sending user and session data from the server back to the app
- and so on…
Not only is this difficult to set up, but it adds many more layers of complexity to your app which means more places things can go wrong. Services like Parse make this process a lot easier. It provides a simple API for doing a lot of things that many mobile applications require like:
- User Authentication
- Data Storage
- Using Social APIs
- Push Notifications
which is great because it means you can just focus on building your app, without having to worry about servers and databases. Plus, their platform will scale a lot more easily as your users grow as well. Parse is a paid service of course, but it does have a very decent pricing structure and a free tier for apps without much traffic.
So, Parse does a lot of fancy stuff but in this tutorial I’m going to show you how we can set up user authentication with an email login in an Ionic application with Parse. If you’ve never used a service like Parse before you’ll probably be surprised at how few steps this tutorial has.
NOTE: Ionic’s ionic.io platform seems to be heading in the direction of Parse, so in the not too distant future you may be able to do all of this within Ionic’s ecosystem.
Creating an Application in Parse
Before you can use Parse you will need to sign up, and then create a new app in Parse. You can follow their quickstart guide to get up and running quickly. First, choose the service you want to use:

In this case we will be using Social. Next you will choose your environment:
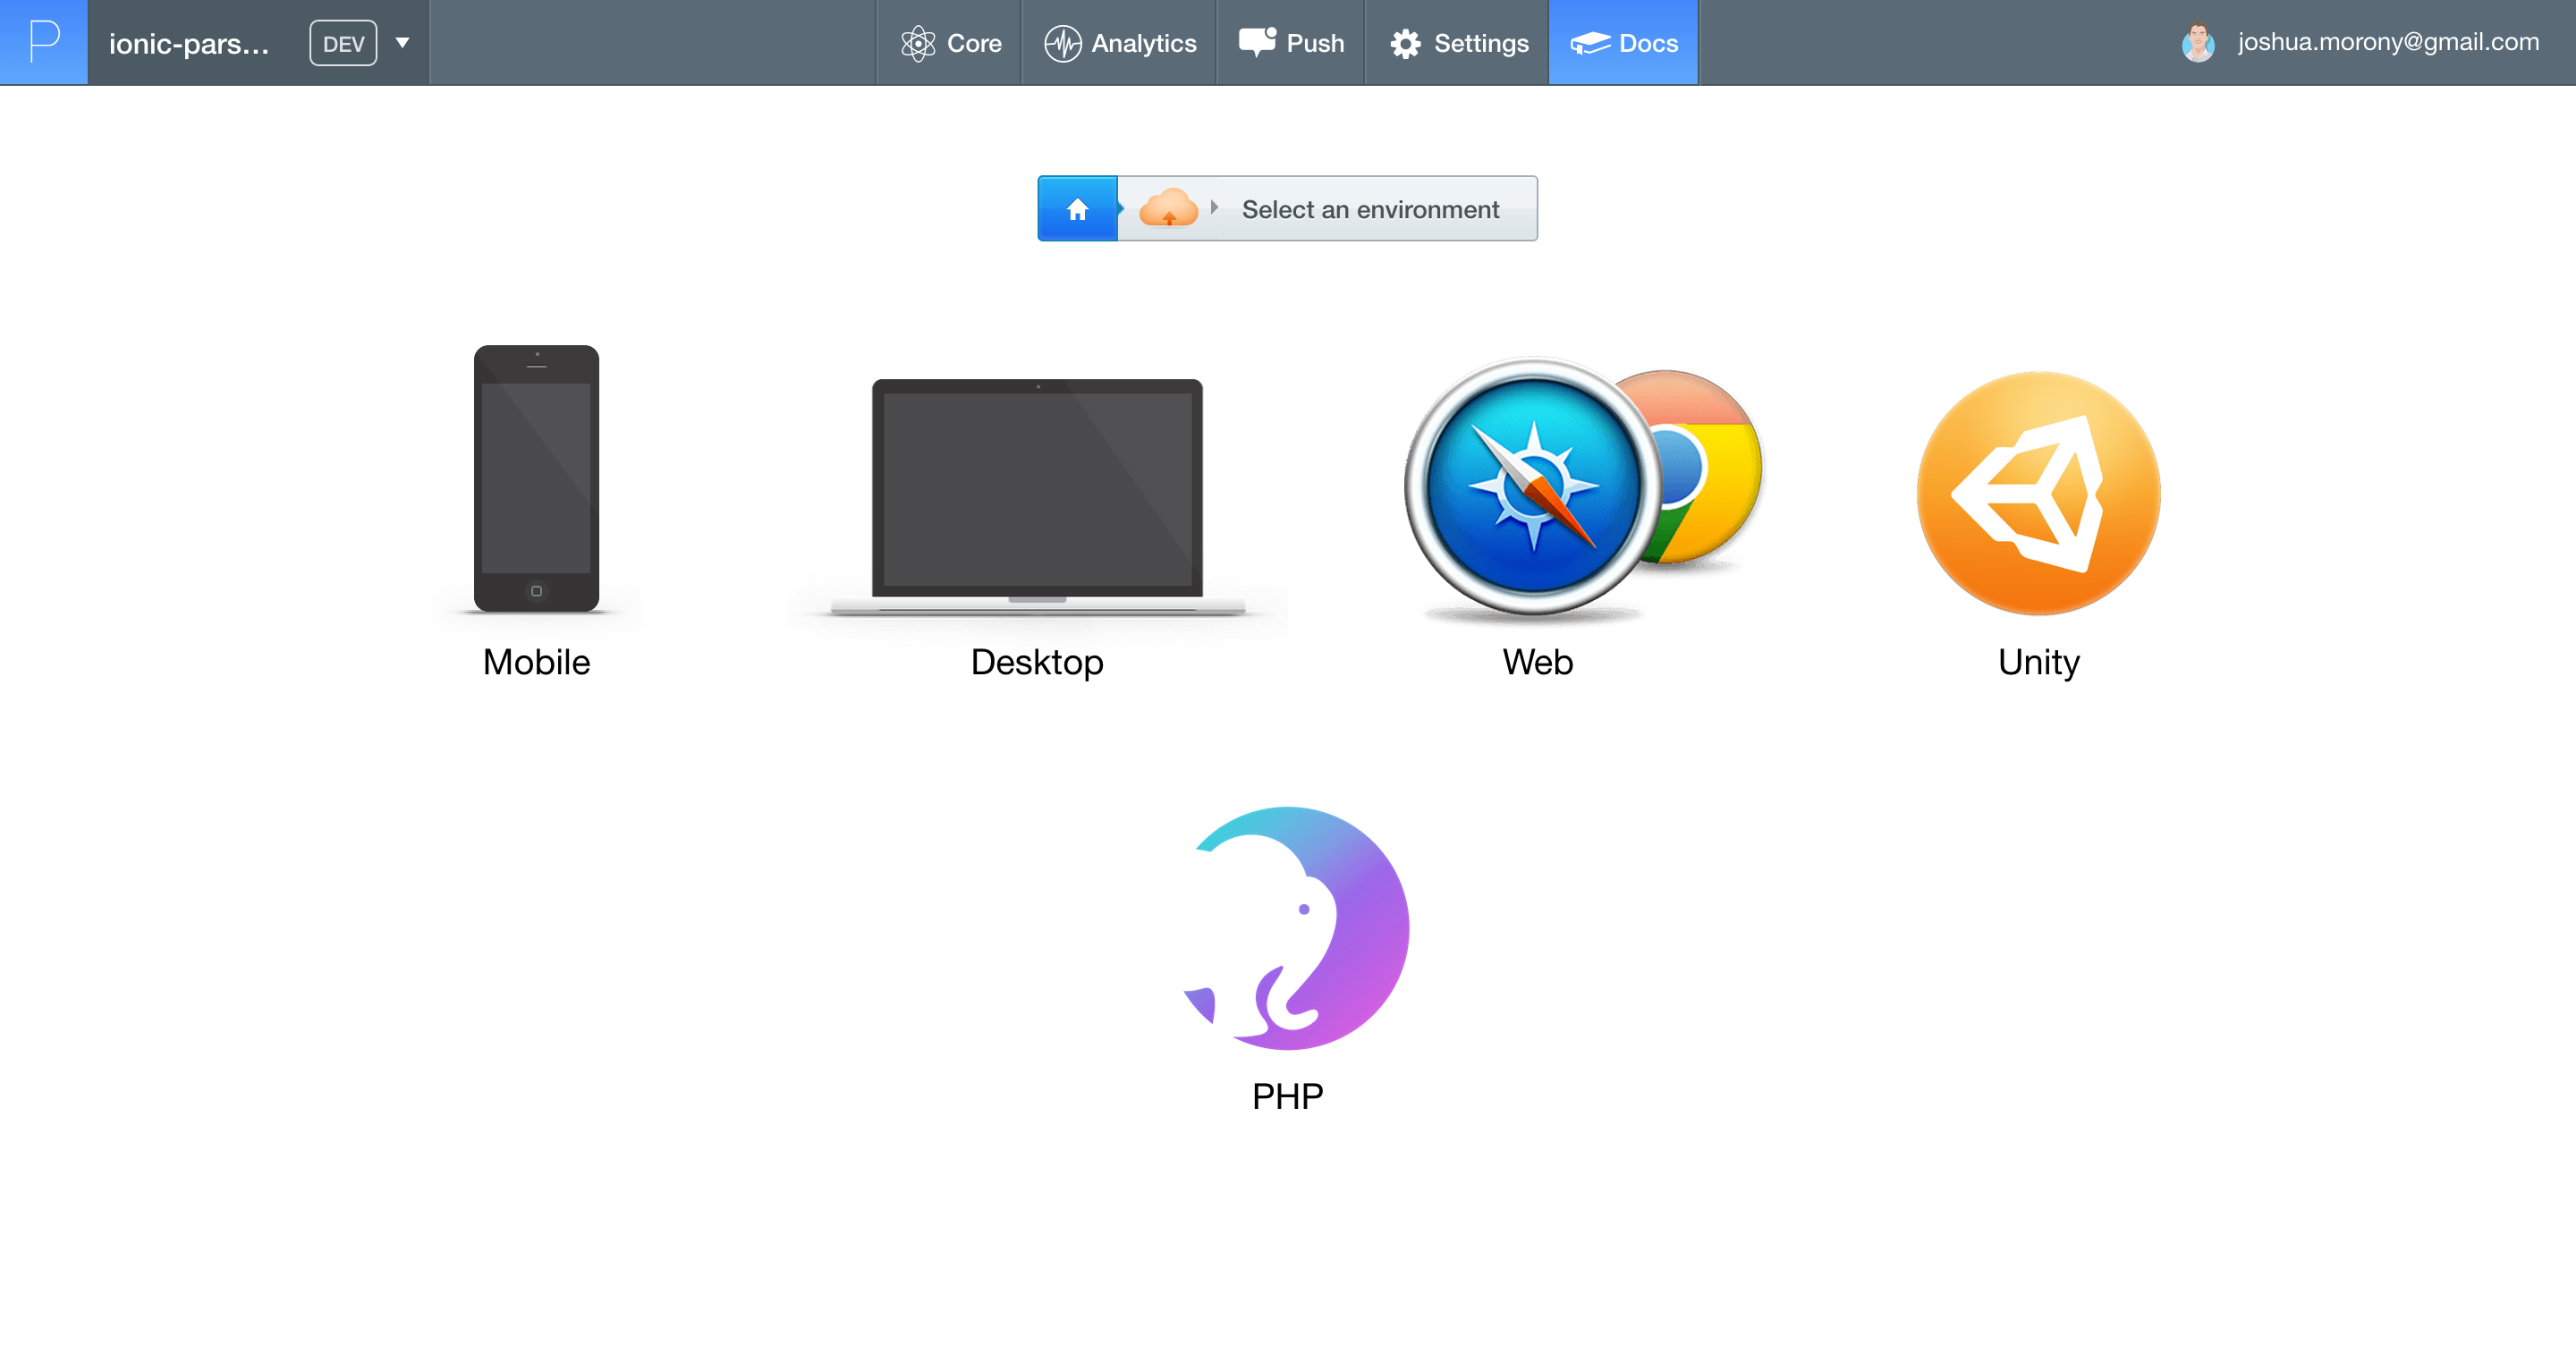
You might assume we would want to choose Mobile but we will actually be using Web. Since we are using a HTML5 mobile framework we want to use the JavaScript SDK, not the native SDKs in the mobile section. On the next screen, you should choose Existing Project:

and then you will come to a screen with some installation instructions:

It doesn’t really matter which service you choose and the setup is always the same anyway, but by choosing Social we also get an example of how to implement some user authentication in our application. I’ll be walking you through how you can set that up in an Ionic application now.
Generate a new Ionic Application
Let’s generate a new blank Ionic application by running:
ionic start ionic-parse blank
If you don’t have Ionic installed on your machine yet, take a look at this post for getting started with Ionic. If you’re new to Ionic though, you’re probably jumping the gun a bit by building a login system! If you want to take a look at a comprehensive course on building an Ionic application from scratch you should check out Mobile Development for Web Developers.
Although we won’t really be using it in this tutorial, it’s a good idea to set up SASS when starting any new Ionic application, so you should also run:
ionic setup sass
Setting up Parse in an Ionic Application
In an Ionic project you will need to add the Parse library to your index.html file before you can use it in your application.
Add the following code to your index.html file
<!-- ionic/angularjs js -->
<script src="lib/ionic/js/ionic.bundle.js"></script>
<script
  type="text/javascript"
  src="http://www.parsecdn.com/js/parse-1.4.2.min.js"
></script>
Once you’ve included that you can then initialize Parse by adding some code to your run method.
Add the following code to app.js
.run(function($ionicPlatform) {
  $ionicPlatform.ready(function() {
    // Hide the accessory bar by default (remove this to show the accessory bar above the keyboard
    // for form inputs)
    if(window.cordova && window.cordova.plugins.Keyboard) {
      cordova.plugins.Keyboard.hideKeyboardAccessoryBar(true);
    }
    if(window.StatusBar) {
      StatusBar.styleDefault();
    }

    Parse.initialize("YOUR APP ID", "JAVASCRIPT KEY");

  });
});
Parse is now ready to use within your application.
Users
Users are one of the core features of Parse. Essentially, we can create a User object with Parse, store data on that user object including login information, and easily authenticate users and manage sessions. First we will need to create a new User on Parse with some information provided by the person signing up, and then we need to allow that user to sign in with their existing account later.
Creating a new User with Parse
Let’s create an email sign up form to to create a new user. I’ve built a form that looks like this:
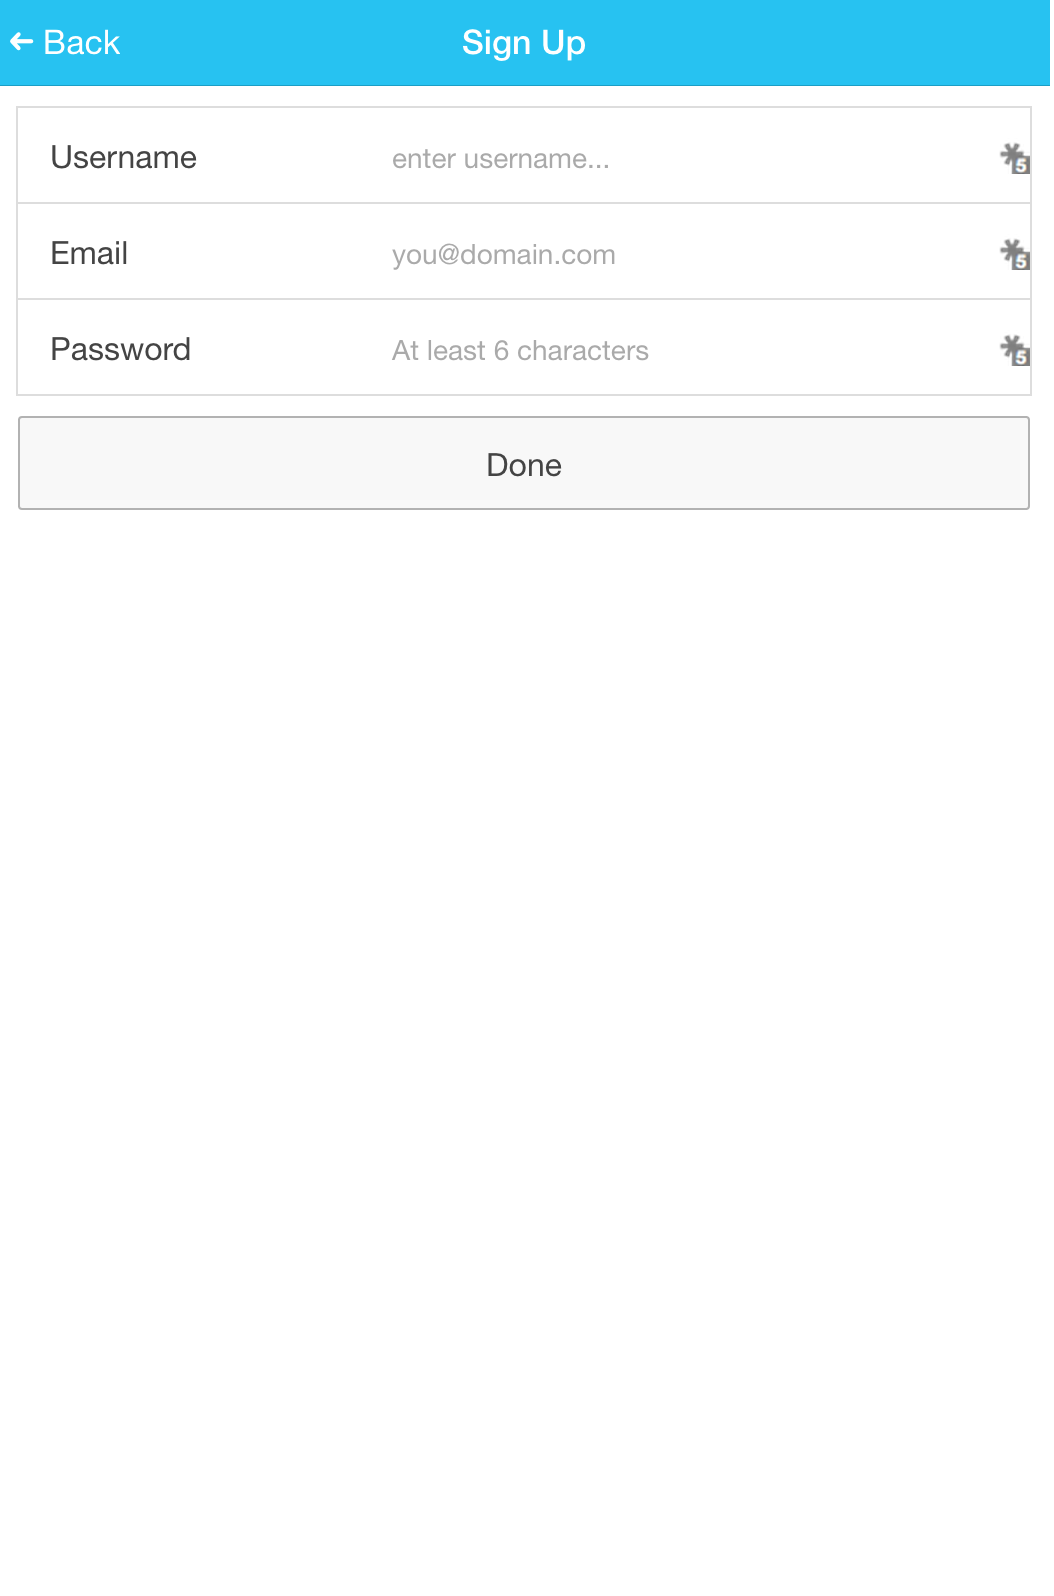
to create that we will first create a template for it.
Create a new folder called templates at www/templates
Create a new file in templates called signup.html and add the following code:
<ion-view title="Sign Up">
    <ion-content padding="true" class="has-header">
        <form>
            <ion-list>
                <label class="item item-input">
                    <span class="input-label">Username</span>
                    <input type="text" placeholder="enter username..." ng-model="data.username">
                </label>
                <label class="item item-input">
                    <span class="input-label">Email</span>
                    <input type="email" placeholder="you@domain.com" ng-model="data.email">
                </label>
                <label class="item item-input">
                    <span class="input-label">Password</span>
                    <input type="password" placeholder="At least 6 characters" ng-model="data.password">
                </label>
            </ion-list>
            <button class="button button-stable button-block" ng-click="signupEmail()">Done</button>
        </form>
    </ion-content>
</ion-view>
We’re also going to need a way to activate that view, so let’s add some routing to the application. First we will modify our index.html file to use an <ion-view>.
Make the following changes to index.html
<body ng-app="starter">
  <ion-nav-bar align-title="center" class="bar-calm nav-title-slide-ios7">
    <ion-nav-back-button class="button-clear">
      <i class="ion-arrow-left-c"></i> Back
    </ion-nav-back-button>
  </ion-nav-bar>
  <ion-nav-view></ion-nav-view>
</body>
We’ve also added an <ion-nav-bar> so that the user can navigate around the application. Now we’ll need to add some routes in app.js.
Make the following changes to app.js
.config(function($stateProvider, $urlRouterProvider) {

  $stateProvider
  .state('login', {
    url: '/',
    templateUrl: 'templates/login.html',
    controller: 'LoginCtrl'
  })
  .state('signup', {
    url: '/signup',
    templateUrl: 'templates/signup.html',
    controller: 'LoginCtrl'
  });

  $urlRouterProvider.otherwise("/");

})
So we have two routes here, one that uses the singup.html template we have already created, and one that uses login.html. We’ll need to create another template now called login.html which will allow the user to choose to either sign up or sign in (we will add sign in functionality later).
Create a new file in the templates folder called login.html and add the following code
<ion-view title="Welcome!">
  <ion-content>
    <a
      href="#/signup"
      class="button button-positive"
      style="width: 100%; margin: 20px 0;"
    >
      Sign Up
    </a>

    <a
      href="#/signin"
      class="button button-positive"
      style="width: 100%; margin: 20px 0;"
    >
      Sign In
    </a>
  </ion-content>
</ion-view>
You will also notice that we have supplied a controller called LoginCtrl in the routing which we have not created yet. If you take a look at signup.html you will see that when the user clicks Done a function called signupEmail() is triggered. This function will live in the login controller and since we can bind data between a view and a controller in Ionic, once we create this LoginCtrl we will be able to access all of the values for the form since we have defined ng-model on them.
Add the following controller to your app.js file
.controller('LoginCtrl', function($scope, $state) {

  $scope.data = {};

  $scope.signupEmail = function(){

  };

  $scope.loginEmail = function(){

  };

});
Now that we have all of that information available in the controller, and we have Parse set up, we want to create a new Parse User object, set some values on that User and then trigger the signUp method. We can do that by expanding upon the signupEmail function.
Modify the
signupEmailfunction in your Login controller in app.js to reflect the following:
$scope.signupEmail = function () {
  //Create a new user on Parse
  var user = new Parse.User();
  user.set('username', $scope.data.username);
  user.set('password', $scope.data.password);
  user.set('email', $scope.data.email);

  // other fields can be set just like with Parse.Object
  user.set('somethingelse', 'like this!');

  user.signUp(null, {
    success: function (user) {
      // Hooray! Let them use the app now.
      alert('success!');
    },
    error: function (user, error) {
      // Show the error message somewhere and let the user try again.
      alert('Error: ' + error.code + ' ' + error.message);
    },
  });
};
You can see that I’m setting the username, password and email as you might expect, but I’m also setting another property called “somethingelse”. You can define absolutely anything you like on the object, which is obviously very useful since different apps will have very different goals. Some might want to store standard data like phone numbers and addresses, but maybe you want to store your users star sign or favourite celebrity, it doesn’t matter.
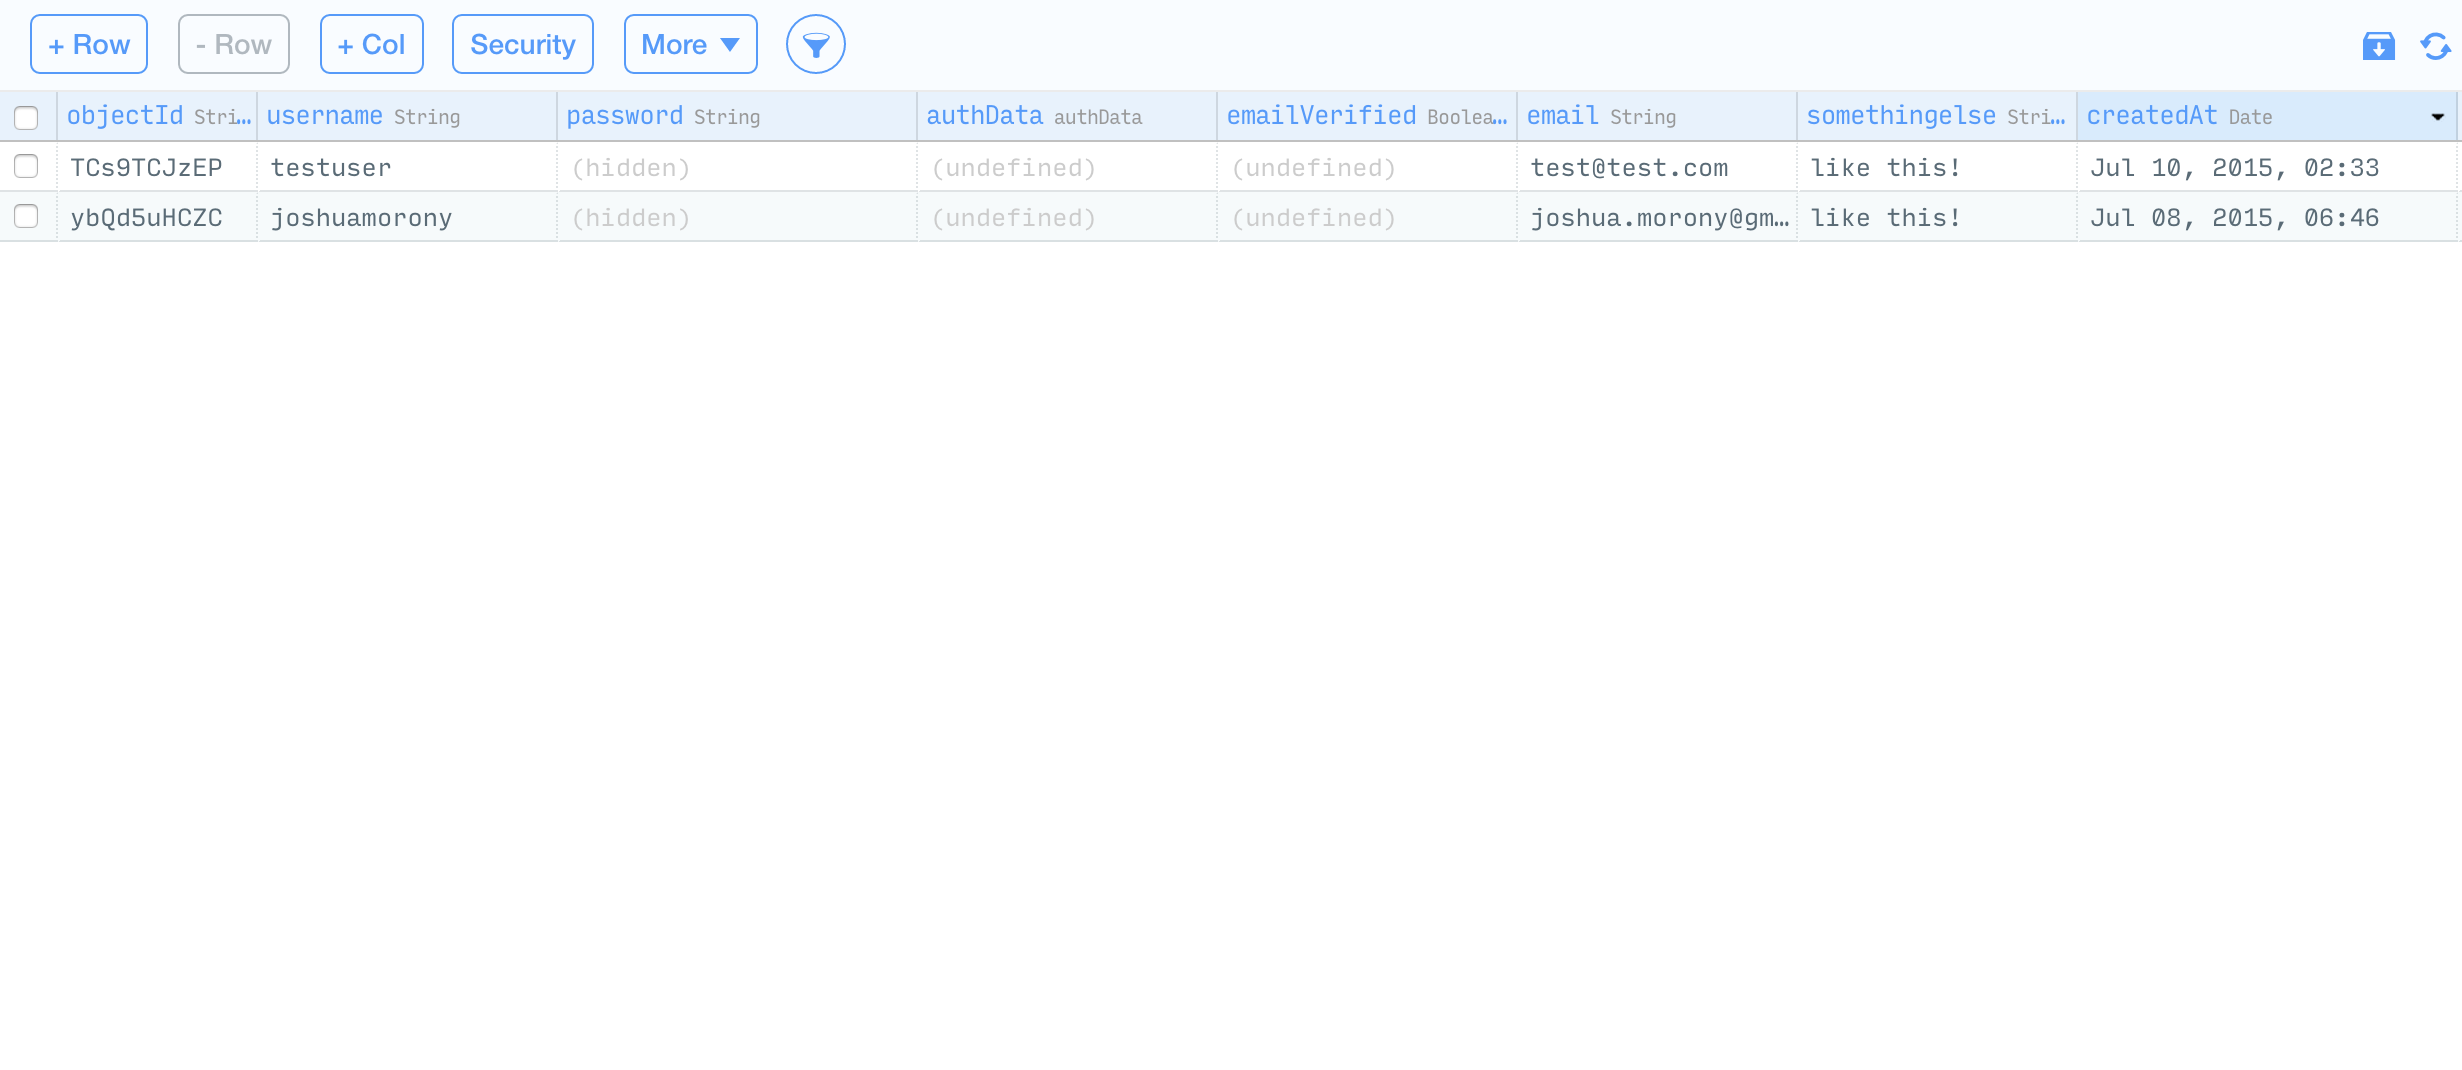
Calling the signUp method will create the User in your Parse backend. After going through the signup form, you should be able to see this entries like this in your Parse dashboard:
Authenticating an Existing User with Parse
The code in the last section allows our users to create a new account and then access the app, but if they are a returning user we want them to be able to sign in instead of signing up. To do that we are going to create another screen like this:
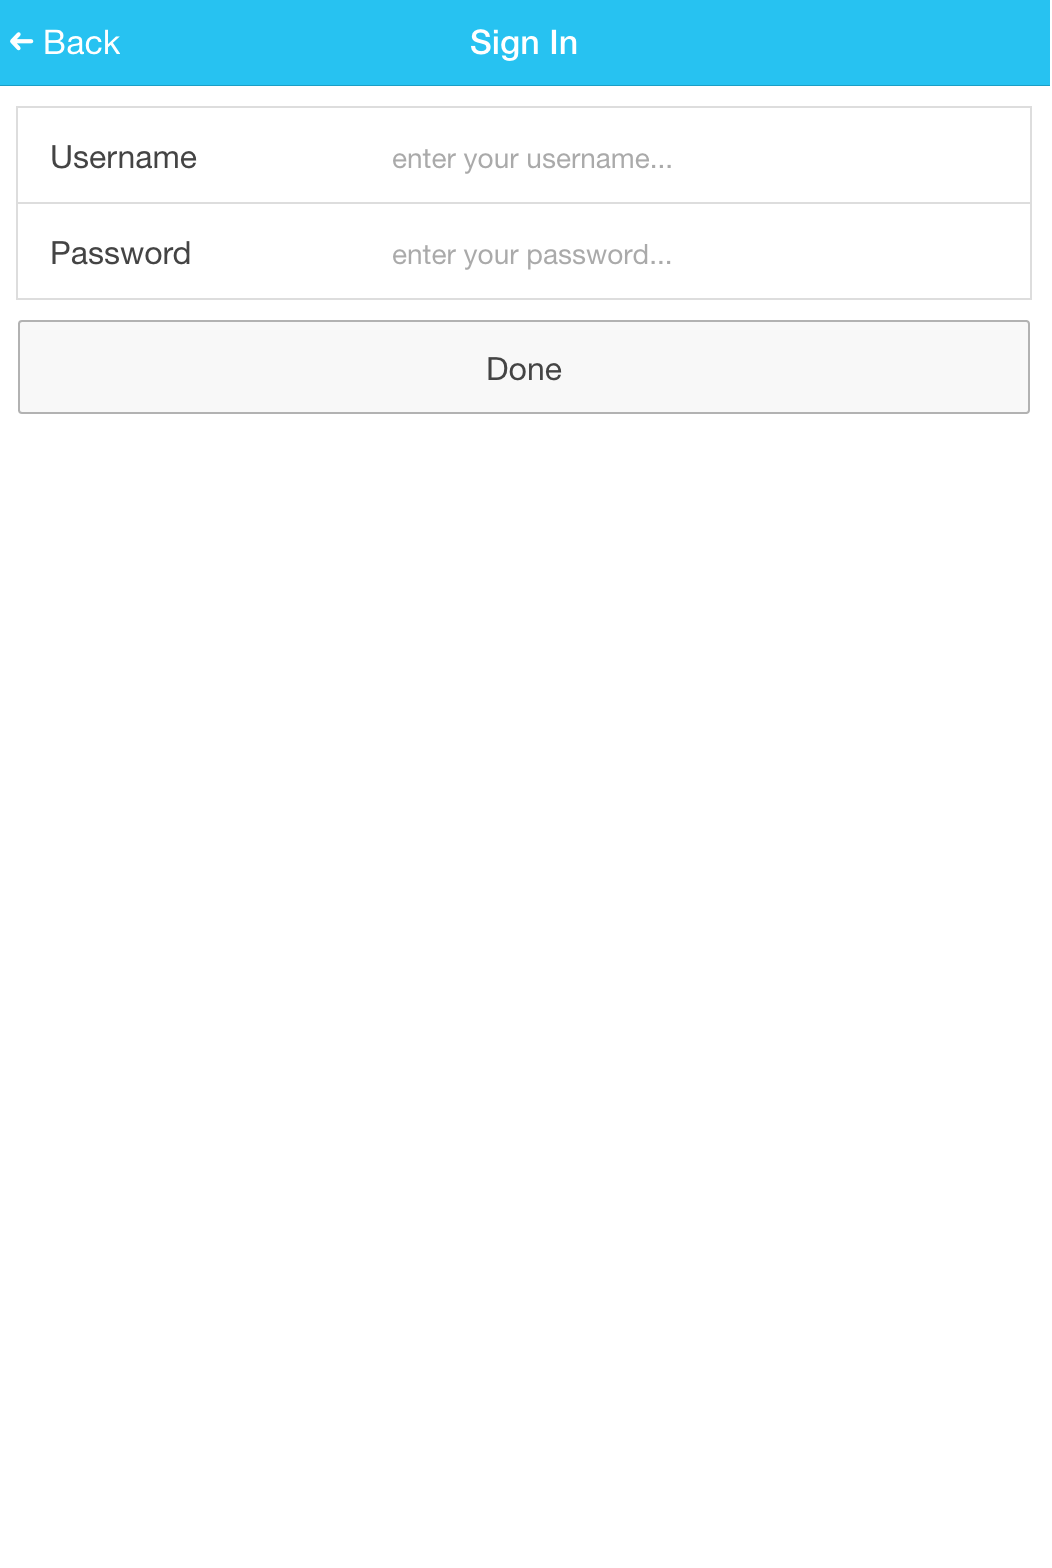
Create a new file called signin.html in the templates folder and add the following code:
<ion-view title="Sign In">
  <ion-content padding="true" class="has-header">
    <form>
      <ion-list>
        <label class="item item-input">
          <span class="input-label">Username</span>
          <input
            type="text"
            placeholder="enter your username..."
            ng-model="data.username"
          />
        </label>
        <label class="item item-input">
          <span class="input-label">Password</span>
          <input
            type="password"
            placeholder="enter your password..."
            ng-model="data.password"
          />
        </label>
      </ion-list>
      <button class="button button-stable button-block" ng-click="loginEmail()">
        Done
      </button>
    </form>
  </ion-content>
</ion-view>
You will notice that this form is triggering loginEmail() instead of signupEmail(). We will get to that in a second, but first we will need to create another route for our new view.
Modify your routes in app.js to reflect the following
.config(function($stateProvider, $urlRouterProvider) {

  $stateProvider
  .state('login', {
    url: '/',
    templateUrl: 'templates/login.html',
    controller: 'LoginCtrl'
  })
  .state('signup', {
    url: '/signup',
    templateUrl: 'templates/signup.html',
    controller: 'LoginCtrl'
  })
  .state('signin', {
    url: '/signin',
    templateUrl: 'templates/signin.html',
    controller: 'LoginCtrl'
  });

  $urlRouterProvider.otherwise("/");

})
Now let’s create the loginEmail function in the controller.
Modify the
loginEmailfunction in app.js to reflect the following:
$scope.loginEmail = function () {
  Parse.User.logIn($scope.data.username, $scope.data.password, {
    success: function (user) {
      // Do stuff after successful login.
      console.log(user);
      alert('success!');
    },
    error: function (user, error) {
      // The login failed. Check error to see why.
      alert('error!');
    },
  });
};
If you try to log in now you should be able to do so with the user you just created:
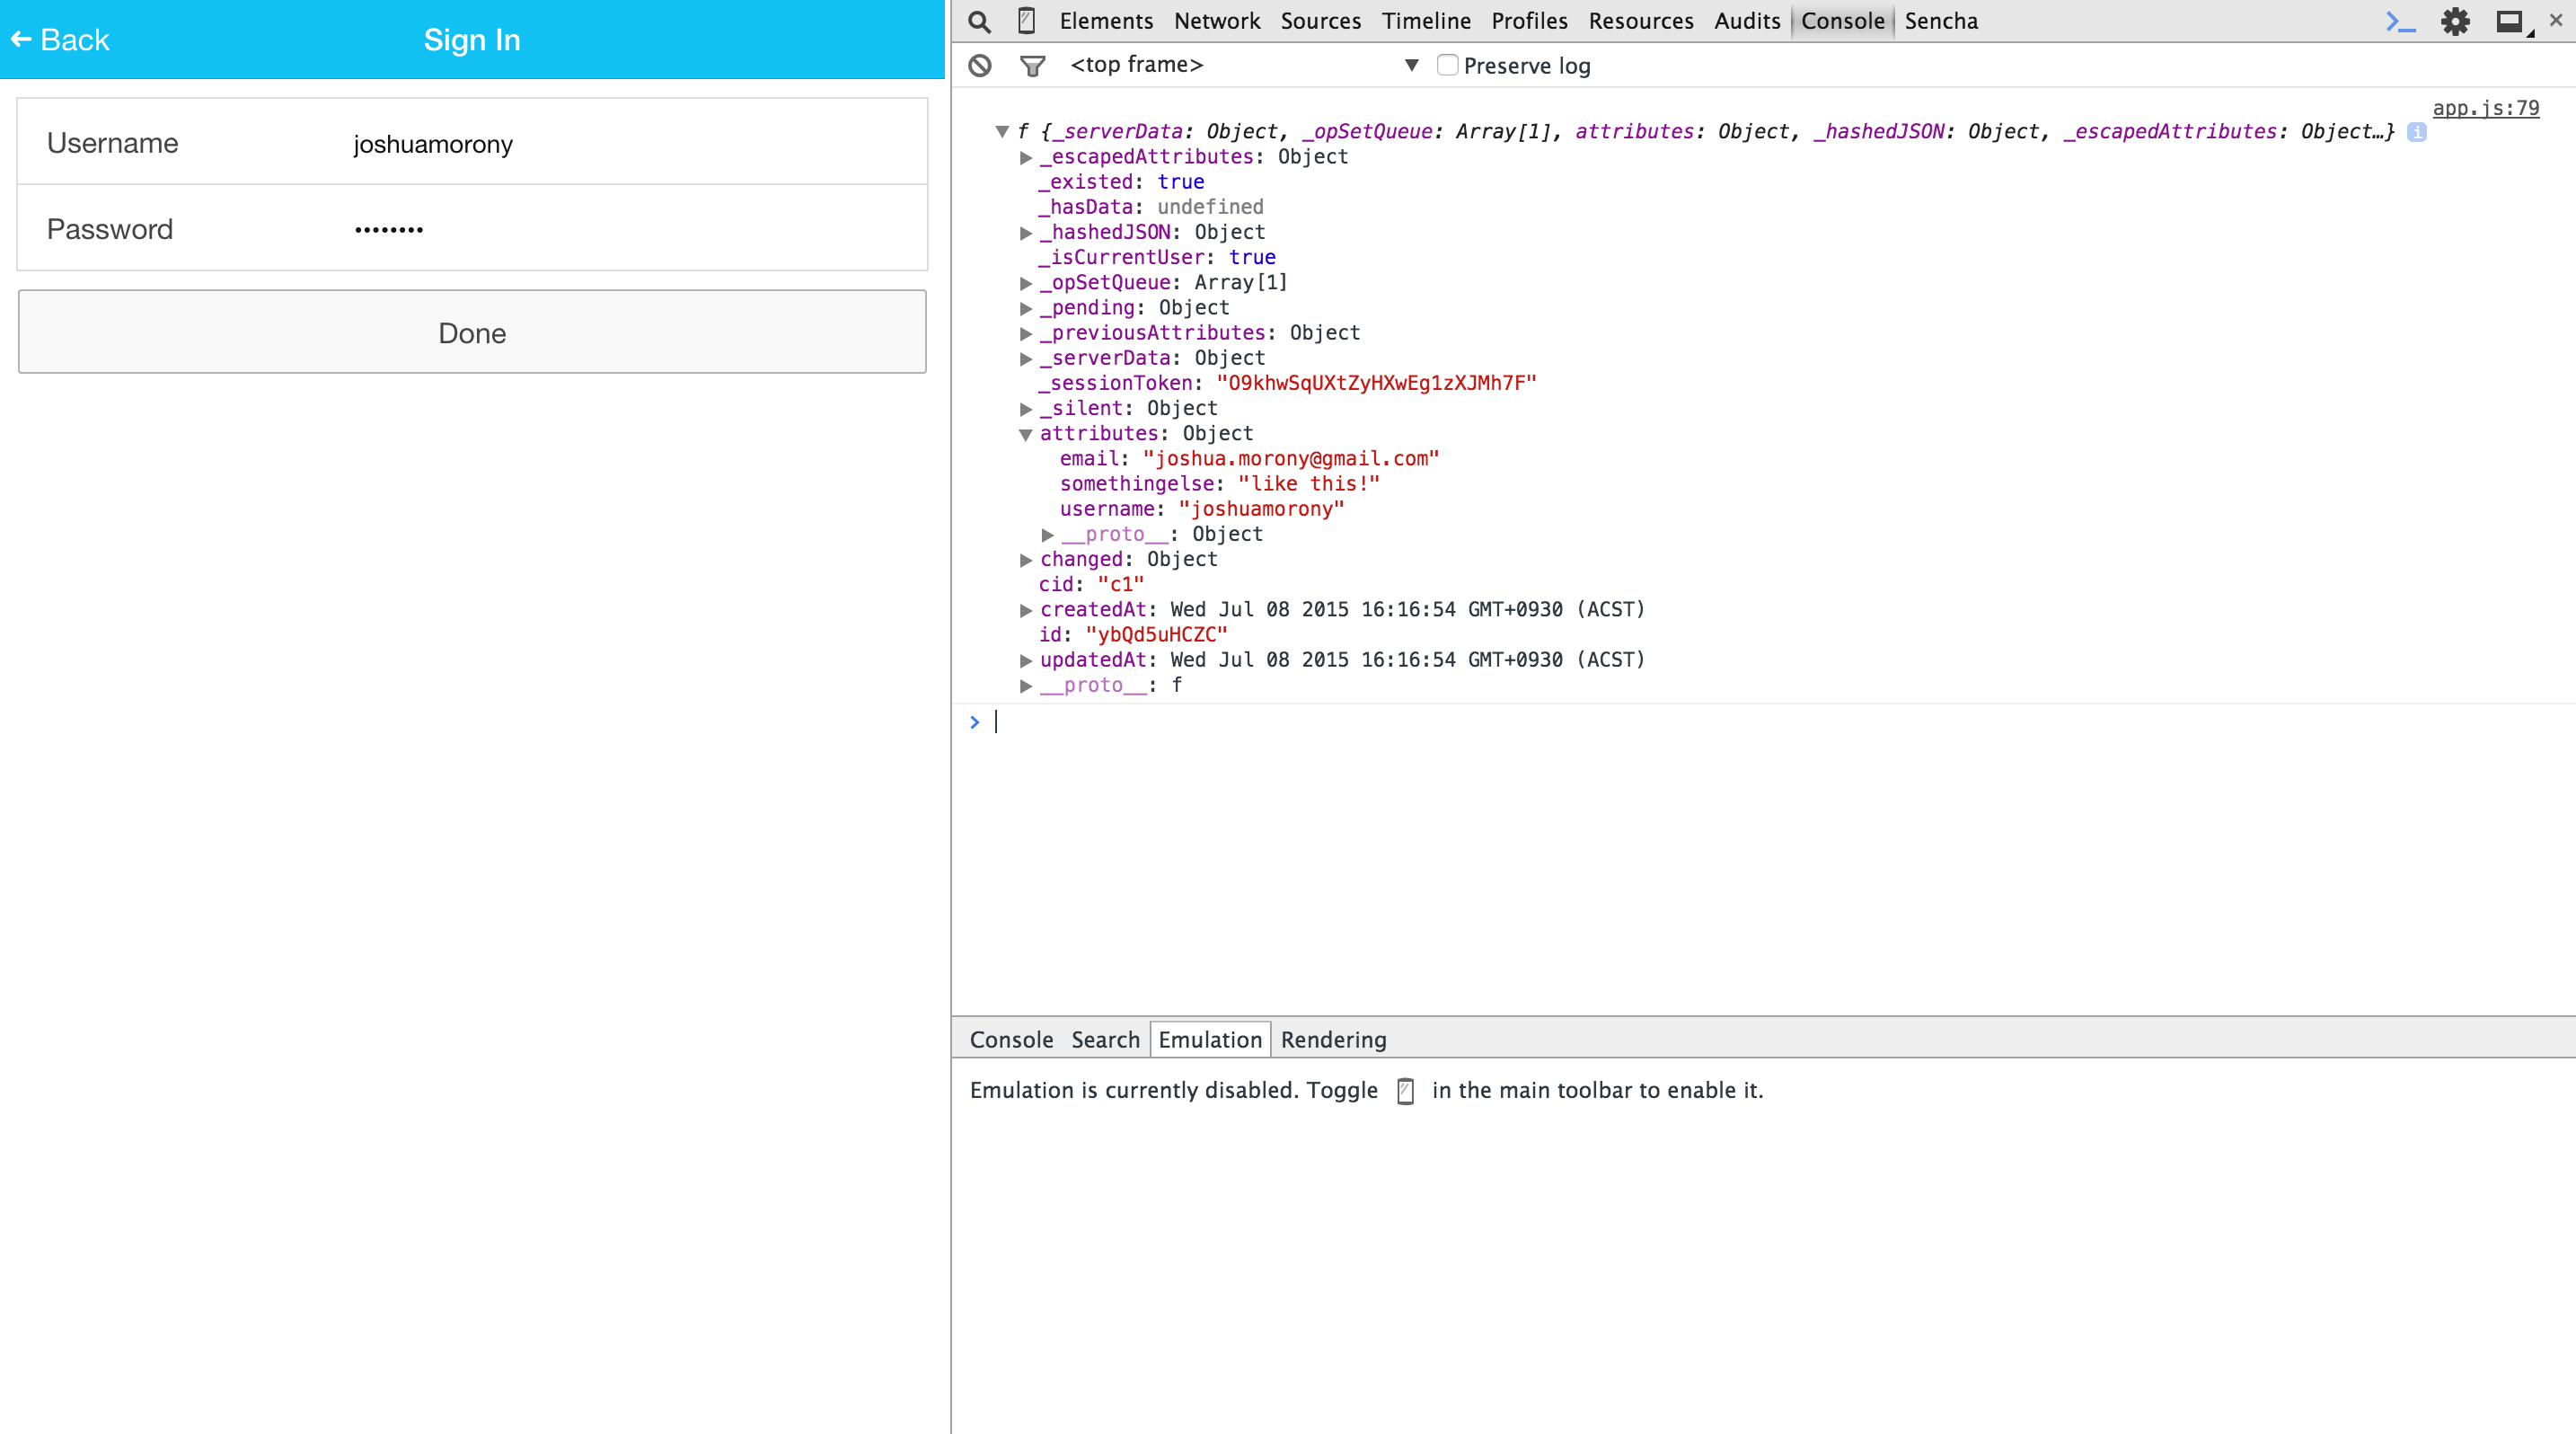
If you take a look in the Console to the right of that image, you will see the user object that is being returned to our application. I’ve expanded the attributes property so that you can see the data we are storing for that user, including the “somethingelse” field.
That’s it! You now have authentication set up with Parse in an Ionic application. Obviously you would want to expand on this a bit for a real application (e.g. trigger some logged in view once the user signs in succesfully, add some error checking on the forms etc.) but this goes to show how much easier services like Parse make these tasks.
There’s a lot more you can do with Parse of course, so I will be doing some more tutorials in future. To start off with, I will be creating a series of posts about authentication with Ionic and Parse so stay tuned for Part 2!
Update: Part 2 is out!