Angular has fantastic support for forms, from the simple ngModel to the more robust reactive forms that make use of FormControl and FormGroup. Using ngModel allows us to bind input fields in the template to class members in our TypeScript files. Reactive forms take a similar approach except that we bind our form in the template to a form group defined in the TypeScript file, and our input fields inside of that form to form controls defined in the TypeScript file.
Generally, with both of these approaches, everything is defined upfront. You would hard code all of the fields that your form requires. This is fine in most circumstances, but what about a scenario where you want a dynamic number of fields? Sometimes, we will want the user to be able to add additional fields if required.
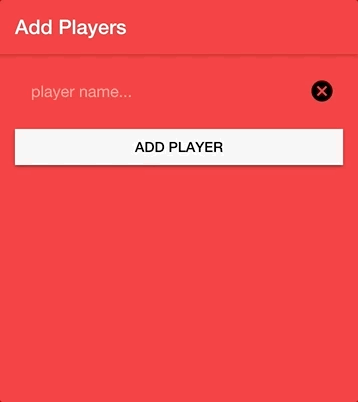
In this tutorial, we will be walking through coding a form that will allow the user to add as many fields as they like. As an example, we will be building an “Add players” screen, where the user can add as many players as they like. To add additional players, the user will be able to click an “Add Player” button that will add an additional text field to the form.
The end result will look like this:
It is worth noting that this is not based on any particular best practice, and I’m not sure if there is a “best practice” for this or not. This is just a simple solution that I came up with that made sense to me, but please do feel free to leave a comment if you feel there is a better way to do this.
Before We Get Started
Last updated for Ionic 4.0.0-beta.7
Before you go through this tutorial, you should have at least a basic understanding of Ionic concepts. You must also already have Ionic set up on your machine, and an Ionic project created.
If you’re not familiar with Ionic already, I’d recommend reading my Ionic Beginners Guide first to get up and running and understand the basic concepts. If you want a much more detailed guide for learning Ionic, then take a look at Building Mobile Apps with Ionic.
The Basic Concept
As I mentioned in the introduction, both methods for creating a form involve binding inputs in our template to values in our TypeScript files. If we want to create a dynamic number of inputs, then we can’t have hard-coded values set up beforehand. However, if we are using Angular’s FormGroup, it is possible to dynamically add new form controls to the group after the fact.
To achieve what we want, we are going to just create a standard FormGroup with a single FormControl – this will be our initial single input. Rather than adding inputs to the template for each input field that we want and assigning a formControlName to each, we will use an *ngFor to loop over all of the controls in the form group to render the inputs dynamically.
The good news is that once we are done, we will just have a standard reactive form with all of the standard features still available to use on each of our inputs – except the user can dynamically add as many fields as they want.
Let’s get the basic concept set up now, and then we will add the ability to add and remove fields to the form.
Modify src/app/home/home.module.ts to reflect the following:
import { NgModule } from '@angular/core';
import { CommonModule } from '@angular/common';
import { IonicModule } from '@ionic/angular';
import { ReactiveFormsModule } from '@angular/forms';
import { RouterModule } from '@angular/router';

import { HomePage } from './home.page';

@NgModule({
  imports: [
    CommonModule,
    ReactiveFormsModule,
    IonicModule,
    RouterModule.forChild([
      {
        path: '',
        component: HomePage,
      },
    ]),
  ],
  declarations: [HomePage],
})
export class HomePageModule {}
We need to make sure that we have the ReactiveFormsModule included in the page we are adding this form to.
Modify src/app/home/home.page.html to reflect the following:
<ion-header>
  <ion-toolbar color="danger">
    <ion-title> Add Players </ion-title>
  </ion-toolbar>
</ion-header>

<ion-content padding>
  <ion-list lines="none">
    <form [formGroup]="myForm">
      <ion-item *ngFor="let control of myForm.controls | keyvalue">
        <ion-input
          required
          type="text"
          [formControlName]="control.key"
          placeHolder="player name..."
        ></ion-input>
      </ion-item>
    </form>
  </ion-list>
</ion-content>
As you can see here we have set up the <form> as we typically would, however for the inputs themselves we are using an *ngFor. This is looping over myForm.controls which will contain all of the controls for the form (which will just be a single control to begin with). Notice the use of keyvalue here. Typically, *ngFor only allows for looping over iterables like an Array – since myForm.controls is an object (which is not an “iterable”) this would not work. However, if we use the keyvalue pipe, it will allow us to loop over an objects keys and values using *ngFor. We use this feature to allow us to bind the formControlName dynamically to the control.key value, which will be the name of that particular control.
Now let’s set up our initial form control in the form.
Modify src/app/home/home.page.ts to reflect the following:
import { Component } from '@angular/core';
import { FormGroup, FormBuilder, FormControl, Validators } from '@angular/forms';

@Component({
  selector: 'app-home',
  templateUrl: 'home.page.html',
  styleUrls: ['home.page.scss'],
})
export class HomePage {

  public myForm: FormGroup;
  private playerCount: number = 1;

  constructor(private formBuilder: FormBuilder){

    this.myForm = formBuilder.group({
      player1: ['', Validators.required]
    });

  }

}
There is nothing different here to how we would usually set up a reactive form. We just use FormBuilder to create a form with a single input of player1. At this point in time, our template would render out a single input inside of the *ngFor loop, assigning it a formControlName of player1. We are also keeping track of a playerCount variable, which we will increment as we add additional controls. This will allow us to add new controls named player2, player3, player4, and so on.
Adding Input Fields
Now we get to the fun part – adding more input fields dynamically. Since we have the set up done already, this is actually quite easy. The FormGroup provides an addControl method that we can use to easily add new form controls to the form.
Modify src/app/home/home.page.ts to include the following function:
addControl(){
    this.playerCount++;
    this.myForm.addControl('player' + this.playerCount, new FormControl('', Validators.required));
  }
All we need to do is supply the addControl method with the new name we want to use for that field, and a new FormControl. Then all we need to do is add a button to trigger this new function.
Modify src/app/home/home.page.html to include the following button:
<ion-button expand="full" color="light" (click)="addControl()"
  >Add Player</ion-button
>
Removing Input Fields
We can add as many input fields as we like now, but we can’t remove them. It would be pretty annoying to accidentally click one or two too many times and be left with more fields than you need. So, let’s add a button to each input field so that it can easily be removed.
Modify the form in src/app/home/home.page.html to reflect the following:
<form [formGroup]="myForm">
  <ion-item *ngFor="let control of myForm.controls | keyvalue">
    <ion-input
      required
      type="text"
      [formControlName]="control.key"
      placeHolder="player name..."
    ></ion-input>
    <ion-icon (click)="removeControl(control)" name="close-circle"></ion-icon>
  </ion-item>
</form>
We have set up a button that calls a removeControl method and passes it the current form control. Now, all we need to do is define that removeControl method.
Modify src/app/home/home.page.ts to include the following function:
removeControl(control){
    this.myForm.removeControl(control.key);
  }
Just like the addControl method of FormBuilder, we can also use a removeControl method that we just need to supply the control name to, and it will be removed from the form.
With that in place, everything should now be finished and working!
Summary
Overall, this is reasonably simple to implement and it allows for a flexible form with potentially an infinite number of inputs, whilst still maintaining the default behaviour and power of reactive forms.
There are still room for improvements. It would probably be better to separate this out into its own component, and its usability could be improved by adding features that automatically scroll to the position of the new input as well as auto-focusing it. If this is something you would like to see in another tutorial, leave a comment and if there is enough interest I’ll create a Part 2 for this where we focus on those improvements.