

You may be familiar with using [(ngModel)] to set up two-way data binding between inputs in your templates, and variables in your class definition. For example you might have an input field like this:
<ion-input type="text" [(ngModel)]="myInput"></ion-input>and then in your class definition you could access that value through:
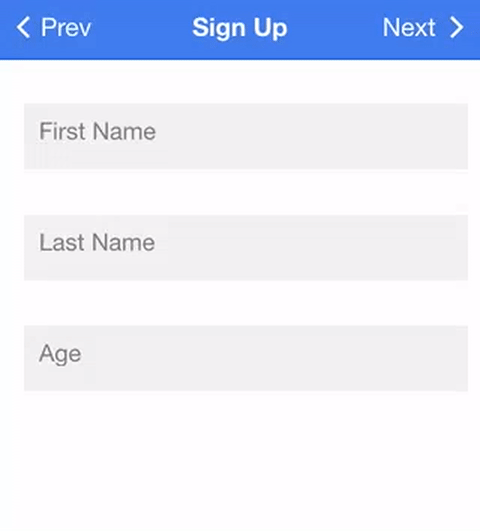
this.myInput;In this tutorial, we are going to look at a more complex, but also more powerful, way to set up forms in an Ionic application. We will be building a multi stage sign up form as an example. Here’s what it will look like:
The method we will use makes it easier to manage forms with many fields, and it also allows us to more easily validate data that is entered, this includes:
- Basic validation using the built in Angular Validators
- Custom validation using our own custom validators
- Multiple validations for a single input field
- Asynchronous validation (e.g. checking if a username is already taken)
We will be using FormBuilder to create our forms and Validators, which are used in conjunction with FormBuilder, to validate the input.
IMPORTANT: Validating input with Javascript is only for user experience. It can easily be circumvented, so if you are sending this data off to a server you must also validate and sanitize the input on the server side.
An Introduction to Forms in Angular and Ionic
When building forms in Angular it is important to understand what a FormControl is and what a FormGroup is.
A FormControl is tied to an input field, it has a value (i.e. the value the user has entered), and a validation state (i.e. whether or not the value is valid based on an optional validation function). A FormGroup is a collection of FormControls.
A single FormControl can be manually created using the following syntax:
this.myControl = new FormControl('value', *validation function goes here*, *asynchronous validation function goes here*);and this is tied to the input in the template by using the ngControl directive:
<ion-input formControlName="myControl" type="text"></ion-input>We can also create and manage multiple FormControls at once in a single FormGroup, like this:
this.myForm = new FormGroup({
  firstName: new FormControl('Josh'),
  lastName: new FormControl('Morony'),
});
We can use another service called FormBuilder to make the process of creating a FormGroup a little easier, and it would look like this:
this.myForm = formBuilder.group({
    firstName: ['value'],
    lastName: ['value', *validation function goes here*],
    age: ['value', *validation function goes here*, *asynchronous validation function goes here*]
});
We use the formBuilder.group function to create our FormGroup by supplying an object containing each of our FormControls. We must also set the formGroup property on the parent <form> to have the same name as our FormBuilder group, which would look like this:
<form [formGroup]="myForm">
  <ion-input formControlName="firstName" type="text"></ion-input>
  <ion-input formControlName="lastName" type="text"></ion-input>
  <ion-input formControlName="age" type="number"></ion-input>
</form>
For each FormControl we create, we also supply an array of values.
The first value is required (although it can just be an empty string) and is the default value of the FormControl. The second value is optional, and is a validation function that is used to check the value of the FormControl. The third value is also optional, and is basically the same as the second except that it is for asynchronous validation. This means if you need to perform a check that is not instant (like checking if a username already exists on a server) then you can use an asynchronous validation function. As you’ll notice in the example above, we have not always included both the validation functions since they are optional.
When supplying Validators we can use ones that are provided by default in Angular from @angular/forms, or we can create our own custom validators. The default Validators include:
- Validators.required
- Validators.minLength(number)
- Validators.maxLength(number)
- Validators.pattern(‘pattern’)
Most of these are pretty obvious. The required validator will ensure that a value is entered, minLength and maxLength ensure that the length of the input is of a certain length, and pattern uses a regex pattern to validate the input.
So an actual FormGroup created by FormBuilder might look like this:
this.slideOneForm = formBuilder.group({
  firstName: [
    '',
    Validators.compose([
      Validators.maxLength(30),
      Validators.pattern('[a-zA-Z ]*'),
      Validators.required,
    ]),
  ],
  lastName: [
    '',
    Validators.compose([
      Validators.maxLength(30),
      Validators.pattern('[a-zA-Z ]*'),
      Validators.required,
    ]),
  ],
  age: ['', AgeValidator.isValid],
});
For the first two controls we are supplying three different validators. We want the input to be shorter than 30 characters, only contain letters and spaces, and it is also a required field. To use multiple Validators we can use the Validators.compose function, and supply it an array of the Validators we want to use.
The last control uses a custom validator to validate the age control (we will be covering how to do that later). This should give you some background, and we are about to go through a practical example in Ionic now, but if you would like some more background information on forms in Angular, I highly recommend these two posts:
Now let’s jump into building a real life example: a multi screen sign up form with validation.
Before we Get Started
Last updated for Ionic 4.1.0
Before you go through this tutorial, you should have at least a basic understanding of Ionic concepts. You must also already have Ionic set up on your machine.
If you’re not familiar with Ionic already, I’d recommend reading my Ionic Beginners Guide first to get up and running and understand the basic concepts. If you want a much more detailed guide for learning Ionic, then take a look at Building Mobile Apps with Ionic & Angular.
Generate a New Ionic Application
We’ll start off by generating a new blank Ionic application.
Generate a new application by running the following command:
ionic start advanced-forms blank --type=angular
Set up Reactive Froms
When using ngModel to handle data we are just using the default FormsModule, but the methods we will be using in this tutorial involve the use of the ReactiveFormsModule. Therefore, we need to make sure that we include the ReactiveFormsModule wherever we want to make use of that functionality.
Modify src/app/home/home.module.ts to reflect the following:
import { NgModule } from '@angular/core';
import { CommonModule } from '@angular/common';
import { IonicModule } from '@ionic/angular';
import { ReactiveFormsModule } from '@angular/forms';
import { RouterModule } from '@angular/router';

import { HomePage } from './home.page';

@NgModule({
  imports: [
    CommonModule,
    ReactiveFormsModule,
    IonicModule,
    RouterModule.forChild([
      {
        path: '',
        component: HomePage,
      },
    ]),
  ],
  declarations: [HomePage],
})
export class HomePageModule {}
Set up the Slides
To set up our multi page form we are going to use the Slides component. We will set up two slides, and add a method to go backwards and forwards between the slides (as well as having the ability to just swipe between the two).
Modify src/app/home/home.page.html to reflect the following:
<ion-header>
  <ion-toolbar color="primary">
    <ion-title> Sign Up </ion-title>
    <ion-buttons slot="start">
      <ion-button (click)="prev()"
        ><ion-icon slot="start" name="arrow-back"></ion-icon> Prev</ion-button
      >
    </ion-buttons>
    <ion-buttons slot="end">
      <ion-button (click)="next()"
        >Next <ion-icon slot="end" name="arrow-forward"></ion-icon
      ></ion-button>
    </ion-buttons>
  </ion-toolbar>
</ion-header>

<ion-content>
  <ion-slides #signupSlider>
    <ion-slide> </ion-slide>

    <ion-slide> </ion-slide>
  </ion-slides>
</ion-content>
We’ve set up out two slides here, and we’ve also created a local variable #signupSlider so that we can grab a reference to the slider and control if from our class definition. Also notice that we’ve set up Next and Prev buttons in the toolbar, we will use those to trigger the next and previous slides.
Modify src/app/home/home.page.ts to reflect the following:
import { Component, ViewChild } from '@angular/core';
import { FormBuilder, FormGroup, Validators } from '@angular/forms';

@Component({
  selector: 'app-home',
  templateUrl: 'home.page.html',
  styleUrls: ['home.page.scss'],
})
export class HomePage {

	@ViewChild('signupSlider') signupSlider;

	public slideOneForm: FormGroup;
	public slideTwoForm: FormGroup;

	public submitAttempt: boolean = false;

    constructor(public formBuilder: FormBuilder) {

    }

    next(){
        this.signupSlider.slideNext();
    }

    prev(){
        this.signupSlider.slidePrev();
    }

    save(){

    }

}
There are quite a few things we’re importing, and some things we’re setting up for later, so let’s talk through that.
We’re importing and using ViewChild to grab a reference to our signupSlider which we then assign to the member variable signupSlider. We are importing FormBuilder, FormGroup, and Validators, all of which we have just been discussing, and we set up member variables for the two forms we will be creating: slideOneForm and slideTwoForm.
We’ve also set up the next() and prev() functions, as well as an empty function save() which we will make use of later.
Set up the Forms
Now that we’ve got the basic structure set up, let’s build our forms.
Modify the first slide in src/app/home/home.page.html to contain the following:
<p *ngIf="submitAttempt" style="color: #ea6153;">
  Please fill out all details accurately.
</p>

<ion-list lines="none">
  <form [formGroup]="slideOneForm">
    <ion-item>
      <ion-label position="floating">First Name</ion-label>
      <ion-input formControlName="firstName" type="text"></ion-input>
    </ion-item>

    <ion-item>
      <ion-label position="floating">Last Name</ion-label>
      <ion-input formControlName="lastName" type="text"></ion-input>
    </ion-item>

    <ion-item>
      <ion-label position="floating">Age</ion-label>
      <ion-input formControlName="age" type="number"></ion-input>
    </ion-item>
  </form>
</ion-list>
Here we’ve set up our form with a formGroup property with a value of slideOneForm which is the name of the member variable we set up in our class, which we will use to create a FormGroup with FormBuilder in just a moment. We’ve then set up all of our inputs and given them each a formControlName which we will also hook into shortly with the FormBuilder.
Now let’s set up our form with FormBuilder in the class definition.
Modify the
constructorin home.page.ts to reflect the following:
	constructor(public formBuilder: FormBuilder) {

	    this.slideOneForm = formBuilder.group({
	        firstName: [''],
	        lastName: [''],
	        age: ['']
	    });

	}
Here we’re setting up our FormGroup with the three Controls we have, firstName, lastName, and age. We’ve just initialised them with an empty default value, and no validators for now. Now let’s do the same for our other form.
Modify the second slide in src/app/home/home.page.html to contain the following:
<ion-list lines="none">
  <form [formGroup]="slideTwoForm">
    <ion-item>
      <ion-label position="floating">Username</ion-label>
      <ion-input formControlName="username" type="text"></ion-input>
    </ion-item>

    <ion-item>
      <ion-label position="floating">Privacy</ion-label>
      <ion-select formControlName="privacy">
        <ion-select-option value="public" checked="true"
          >Public</ion-select-option
        >
        <ion-select-option value="friends">Friends Only</ion-select-option>
        <ion-select-option value="private">Private</ion-select-option>
      </ion-select>
    </ion-item>

    <ion-item>
      <ion-label position="floating">Bio</ion-label>
      <ion-textarea formControlName="bio"></ion-textarea>
    </ion-item>
  </form>
</ion-list>

<ion-button expand="full" color="primary" (click)="save()"
  >Create Account!</ion-button
>
We’ve basically done the exact same thing here. We’re using a <ion-select> input here so the syntax is a little different, and we won’t be setting up any validation on the bio field so we don’t need to call the elementChanged function. We’ve also added a “Create Account!” button that will trigger the save() function. Apart from that, everything else is the same.
Modify the constructor in src/app/home/home.page.ts to reflect the following:
    constructor(public formBuilder: FormBuilder) {

        this.slideOneForm = formBuilder.group({
            firstName: [''],
            lastName: [''],
            age: ['']
        });

        this.slideTwoForm = formBuilder.group({
            username: [''],
            privacy: [''],
            bio: ['']
        });

    }
Now both our forms are set up, but they do not currently have any validation. So let’s move on to that.
Set up Validation
We’re going to have a mixed bag of validations going on here so we can see a bunch of different methods for validation. Here’s a rundown of what we want to do:
- All fields except for
bioshould be required firstNameshould only contain letters and spaces, and be less than 30 charactersfirstNameshould only contain letters and spaces, and be less than 30 charactersagemust be older than 18, and also realistic (i.e. not extremely old, a whole number)usernameshould only contain letters, and it should also check to see if the username is already taken asynchronouslyprivacyis simply requiredbiois optional and has no validation
Some of the validations we want to do are covered by Angular by default, so we will focus on those first.
Modify the constructor in home.page.ts to reflect the following:
    constructor(public formBuilder: FormBuilder) {

        this.slideOneForm = formBuilder.group({
            firstName: ['', Validators.compose([Validators.maxLength(30), Validators.pattern('[a-zA-Z ]*'), Validators.required])],
            lastName: ['', Validators.compose([Validators.maxLength(30), Validators.pattern('[a-zA-Z ]*'), Validators.required])],
            age: ['']
        });

        this.slideTwoForm = formBuilder.group({
            username: ['', Validators.compose([Validators.required, Validators.pattern('[a-zA-Z]*')])],
            privacy: ['', Validators.required],
            bio: ['']
        });

    }
Now we’ve added the appropriate validators, using the default validators provided by Angular, to set up validation for all of the fields except age and username. We will be creating our own custom validators for those now.
Create a new file and folder at src/app/validators/age.ts and add the following:
import { FormControl } from '@angular/forms';

export class AgeValidator {
  static isValid(control: FormControl): any {
    if (isNaN(control.value)) {
      return {
        'not a number': true,
      };
    }

    if (control.value % 1 !== 0) {
      return {
        'not a whole number': true,
      };
    }

    if (control.value < 18) {
      return {
        'too young': true,
      };
    }

    if (control.value > 120) {
      return {
        'not realistic': true,
      };
    }

    return null;
  }
}
This is the simpler of the two validators. We simply pass in the current value through a reference to the FormControl. We then test the value against certain conditions. If any of these conditions are met then we return an object describing the error, returning a value means that the validation has failed. If none of the conditions are met then the validation has succeeded so we simply return null.
Create a new file at app/validators/username.ts and add the following:
import { FormControl } from '@angular/forms';

export class UsernameValidator {
  static checkUsername(control: FormControl): any {
    return new Promise((resolve) => {
      //Fake a slow response from server

      setTimeout(() => {
        if (control.value.toLowerCase() === 'greg') {
          resolve({
            'username taken': true,
          });
        } else {
          resolve(null);
        }
      }, 2000);
    });
  }
}
Rather than actually checking a server to see if a username exists, we use a setTimeout to fake a slow response from a server. It’s the same idea here in that we return null if the validation succeeds, but instead of simply returning the value we return a Promise because this is an asynchronous validator.
Now we need to import those two validators.
Add the following two imports to the top of src/app/home/home.page.ts:
import { AgeValidator } from '../validators/age';
import { UsernameValidator } from '../validators/username';
Now our validators are available to use, we just need to add them to our constructor.
Modify the
constructorin src/app/home/home.page.ts to reflect the following:
    constructor(public formBuilder: FormBuilder) {

        this.slideOneForm = formBuilder.group({
            firstName: ['', Validators.compose([Validators.maxLength(30), Validators.pattern('[a-zA-Z ]*'), Validators.required])],
            lastName: ['', Validators.compose([Validators.maxLength(30), Validators.pattern('[a-zA-Z ]*'), Validators.required])],
            age: ['', AgeValidator.isValid]
        });

        this.slideTwoForm = formBuilder.group({
            username: ['', Validators.compose([Validators.required, Validators.pattern('[a-zA-Z]*')]), UsernameValidator.checkUsername],
            privacy: ['', Validators.required],
            bio: ['']
        });

    }
In the case of age we just add the custom validator as we did the default ones. With username however, take note that we don’t just add the validator to Validators.compose as the second value, we provide it as the third value in the array – this is because it is an asynchronous validator (and a FormControl can have both synchronous and asynchronous validators).
We’re going to make one more change to the class definition, and that’s to finish off the save() function.
Modify the
save()function in src/app/home/home.page.ts to reflect the following:
    save(){

        this.submitAttempt = true;

        if(!this.slideOneForm.valid){
            this.signupSlider.slideTo(0);
        }
        else if(!this.slideTwoForm.valid){
            this.signupSlider.slideTo(1);
        }
        else {
            console.log("success!")
            console.log(this.slideOneForm.value);
            console.log(this.slideTwoForm.value);
        }

    }
First we set submitAttempt to true to indicate that the user has attempted to submit the form (remember, we will be using this to decide whether or not to style fields with the invalid styling). Then we check if both of the forms are valid, if they aren’t then we swap to the slide with the errors.
If both of the forms are valid then we hit our success condition, and simply log out the form values (for you to do with as you please now).
Styling the Form
Our validators are completely functional now, but what’s the use of this fancy validation if we can’t indicate what’s going on to the user? We will be modifying our template now to make use of these validators. First we will create some styles to use.
Modify src/app/home/home.page.scss to reflect the following:
p {
  font-size: 0.8em;
  color: #d2d2d2;
}

ion-slides {
  height: 100%;
}

ion-slide {
  display: block;
}

ion-label,
.select-text {
  margin-left: 10px;
}

.invalid {
  border: 1px solid #ea6153;
}
We’ve added a few styles here, but most notably we’ve created an invalid class, which will give the input a red border.
Modify the slides in src/app/home/home.page.html to reflect the following:
<ion-slides #signupSlider pager>
  <ion-slide>
    <p *ngIf="submitAttempt" style="color: #ea6153;">
      Please fill out all details accurately.
    </p>

    <ion-list lines="none">
      <form [formGroup]="slideOneForm">
        <ion-item>
          <ion-label position="floating">First Name</ion-label>
          <ion-input
            formControlName="firstName"
            type="text"
            [class.invalid]="!slideOneForm.controls.firstName.valid && (slideOneForm.controls.firstName.dirty || submitAttempt)"
          ></ion-input>
        </ion-item>

        <ion-item
          *ngIf="!slideOneForm.controls.firstName.valid  && (slideOneForm.controls.firstName.dirty || submitAttempt)"
        >
          <p>Please enter a valid name.</p>
        </ion-item>

        <ion-item>
          <ion-label position="floating">Last Name</ion-label>
          <ion-input
            formControlName="lastName"
            type="text"
            [class.invalid]="!slideOneForm.controls.lastName.valid && (slideOneForm.controls.age.dirty || submitAttempt)"
          ></ion-input>
        </ion-item>

        <ion-item
          *ngIf="!slideOneForm.controls.lastName.valid  && (slideOneForm.controls.lastName.dirty || submitAttempt)"
        >
          <p>Please enter a valid name.</p>
        </ion-item>

        <ion-item>
          <ion-label position="floating">Age</ion-label>
          <ion-input
            formControlName="age"
            type="number"
            [class.invalid]="!slideOneForm.controls.age.valid && (slideOneForm.controls.age.dirty || submitAttempt)"
          ></ion-input>
        </ion-item>

        <ion-item
          *ngIf="!slideOneForm.controls.age.valid  && (slideOneForm.controls.age.dirty || submitAttempt)"
        >
          <p>Please enter a valid age.</p>
        </ion-item>
      </form>
    </ion-list>
  </ion-slide>

  <ion-slide>
    <ion-list lines="none">
      <form [formGroup]="slideTwoForm">
        <ion-item>
          <ion-label position="floating">Username</ion-label>
          <ion-input
            [class.invalid]="!slideTwoForm.controls.username.valid && (slideTwoForm.controls.username.dirty || submitAttempt)"
            formControlName="username"
            type="text"
          ></ion-input>
        </ion-item>

        <ion-item *ngIf="slideTwoForm.controls.username.pending">
          <p>Checking username...</p>
        </ion-item>

        <ion-item
          *ngIf="!slideTwoForm.controls.username.valid && !slideTwoForm.controls.username.pending && (slideTwoForm.controls.username.dirty || submitAttempt)"
        >
          <p>Sorry, that username can not be used!</p>
        </ion-item>

        <ion-item>
          <ion-label position="floating">Privacy</ion-label>
          <ion-select
            [class.invalid]="!slideTwoForm.controls.privacy.valid && (slideTwoForm.controls.privacy.dirty || submitAttempt)"
            formControlName="privacy"
          >
            <ion-select-option value="public" checked="true"
              >Public</ion-select-option
            >
            <ion-select-option value="friends">Friends Only</ion-select-option>
            <ion-select-option value="private">Private</ion-select-option>
          </ion-select>
        </ion-item>

        <ion-item>
          <ion-label position="floating">Bio</ion-label>
          <ion-textarea formControlName="bio"></ion-textarea>
        </ion-item>
      </form>
    </ion-list>

    <ion-button expand="full" color="primary" (click)="save()"
      >Create Account!</ion-button
    >
  </ion-slide>
</ion-slides>
Excuse the giant block of code, but I figured it’d be easier to explain this way. First of all, we’ve added the invalid class conditionally to most elements using something like this:
[class.invalid]="!slideTwoForm.controls.privacy.valid &&
(slideTwoForm.controls.privacy.dirty|| submitAttempt)"
This will give the element the invalid styling only if the input is invalid (which we can do by checking the valid property on the FormControl) and the user has made an attempt to input a value, or they have attempted to submit the form. If the dirty property is true it means the value has been changed by the user – we don’t want to display errors for every input right away.
We have also added a few items that will display only when an invalid value is supplied to explain to the user what is wrong:
<ion-item
  *ngIf="!slideOneForm.controls.firstName.valid  && (slideTwoForm.controls.firstName.dirty || submitAttempt)"
>
  <p>Please enter a valid name.</p>
</ion-item>
Our username field is a bit of a special case, since it asynchronously checks to see if the value is valid (which in our case will always take two seconds) we display a message whilst the value is being checked by checking the pending property on the Control:
<ion-item *ngIf="slideTwoForm.controls.username.pending">
  <p>Checking username...</p>
</ion-item>
Our multi-page signup form should now be fully functional!
Summary
Forms can be quite complex and, although I wouldn’t really call what we’ve done in this tutorial “simple”, I think the FormBuilder, FormControls and Validators available in Angular are an elegant way to handle forms. This really only covers the basics as well, you should be able to do most of what you need with the techniques we discussed in this tutorial, but Controls still offer other functionality we haven’t discussed (for example, it also provides a valueChanges observable that we can subscribe to for changes to an input field).
That’s enough for now though, perhaps we’ll go into even more depth in a future tutorial!