

Last week, we created a custom Google Maps component for an Ionic/Angular application. Since I have also been creating a lot of Stencil content recently, I think it is fun to see how we could build the same components that we build for Ionic/Angular, except as a generic web component with Stencil.
To that end, in this tutorial, we will be recreating the same Google Maps component in Stencil. The main benefit to building a component as a web component with Stencil is that it doesn’t depend on a particular framework (Angular in this case), but that can also be a downside because you miss out on the features of that framework.
This tutorial isn’t going to focus too much on a comparison between the two approaches, I just want to point out that it isn’t a case of one approach inherently being better than the other. The main point of this tutorial is to cover how you would convert one particular custom Angular component to a Stencil component. As you will see, the bulk of the code actually remains the same (since most of it is just normal TypeScript), we just need to change a few Angular specific things.
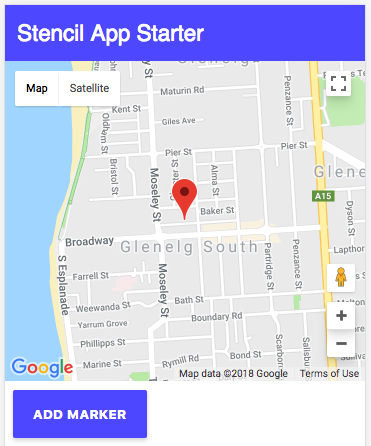
I won’t be covering how this component works in detail in this tutorial, as I have already covered that in the previous tutorial. If you would like to know more about why we are doing certain things, I would recommend reading that tutorial. At the end of the tutorial, we will have something that looks like this:
Before We Get Started
This tutorial assumes a basic level of knowledge about Stencil. You should already be reasonably comfortable with what the purpose of Stencil is and the basic syntax. If you are not yet familiar with Stencil, this is a good place to start.
1. Generate a New Stencil Project
We are going to be using the Stencil starter project provided by the Ionic team to set up our application. To do that, you just need to run the following command:
git clone https://github.com/ionic-team/stencil-starter.git stencil-google-mapsOnce it has finished downloading, you should make it your working directory:
cd stencil-google-mapsand then install the dependencies:
npm installOnce that has finished, you can serve your application using the following command throughout development:
npm run dev2. Add Capacitor
Just like in the previous tutorial, we will be using Capacitor so that we can make use of the Geolocation and Network APIs.
Keep in mind that, at the time of writing this, Capacitor is still in alpha and should not be used in a production environment. At the moment, in order to set up Capacitor in your project you just need to run the following command:
npm install --save @capacitor/core @capacitor/cliand then initialise your project for Capacitor with the following command:
npx cap init YourAppName com.example.yourappnameIn order to make Capacitor work with Stencil, you will also need to install the following dependency:
npm install tslib --saveOtherwise, you will receive the following error when attempting to build your application:
'tslib' is imported by node_modules/@capacitor/core/dist/esm/web/browser.js, but could not be resolved – treating it as an external dependency3. Set up the Google Maps Component
In order to set up a new Stencil component, we just need to create a new folder and the appropriate files inside of the components folder. To do that, just run the following command:
cd src/componentsto make the components folder your working directory. Then you can create a new folder for the component with the following command:
mkdir my-google-mapsand finally, you can create the necessary files with the following commands:
touch my-google-maps/my-google-maps.tsx
touch my-google-maps/my-google-maps.css
4. Create the Google Maps Component
With the set up out of the way, let’s get into creating the component. Like last time, I will just paste all of the code at once and then we will talk through the changes.
Modify src/components/my-google-maps/my-google-maps.tsx to reflect the following:
import { Component, Prop, Method } from '@stencil/core';
import { Plugins } from '@capacitor/core';

const { Geolocation, Network } = Plugins;

@Component({
  tag: 'my-google-maps',
  styleUrl: 'my-google-maps.css'
})
export class MyGoogleMaps {

  @Prop() apiKey: string;

  public map: any;
  public markers: any[] = [];
  private mapsLoaded: boolean = false;
  private networkHandler = null;

  render() {
    return <div id='google-map-container'></div>
  }

  componentDidLoad() {

    this.init().then(() => {
      console.log("Google Maps ready.")
    }, (err) => {
      console.log(err);
    });

  }

  init(): Promise<any> {

    return new Promise((resolve, reject) => {

      this.loadSDK().then(() => {

        this.initMap().then(() => {
          resolve(true);
        }, (err) => {
          reject(err);
        });

      }, (err) => {

        reject(err);

      });

    });

  }

  loadSDK(): Promise<any> {

    console.log("Loading Google Maps SDK");

    return new Promise((resolve, reject) => {

      if(!this.mapsLoaded){

        Network.getStatus().then((status) => {

          if(status.connected){

            this.injectSDK().then(() => {
              resolve(true);
            }, (err) => {
              reject(err);
            });

          } else {

            if(this.networkHandler == null){

              this.networkHandler = Network.addListener('networkStatusChange', (status) => {

                if(status.connected){

                  this.networkHandler.remove();

                  this.init().then(() => {
                    console.log("Google Maps ready.")
                  }, (err) => {
                    console.log(err);
                  });

                }

              });

            }

            reject('Not online');
          }

        }, (err) => {

          console.log(err);

          // NOTE: navigator.onLine temporarily required until Network plugin has web implementation
          if(navigator.onLine){

            this.injectSDK().then(() => {
              resolve(true);
            }, (err) => {
              reject(err);
            });

          } else {
            reject('Not online');
          }

        });

      } else {
        reject('SDK already loaded');
      }

    });


  }

  injectSDK(): Promise<any> {

    return new Promise((resolve) => {

      window['mapInit'] = () => {
        this.mapsLoaded = true;
        resolve(true);
      }

      let script = document.createElement('script');
      script.id = 'googleMaps';

      if(this.apiKey){
        script.src = 'https://maps.googleapis.com/maps/api/js?key=' + this.apiKey + '&callback=mapInit';
      } else {
        script.src = 'https://maps.googleapis.com/maps/api/js?callback=mapInit';
      }

      document.body.appendChild(script);

    });

  }

  initMap(): Promise<any> {

    return new Promise((resolve, reject) => {

      Geolocation.getCurrentPosition().then((position) => {

        console.log(position);

        let latLng = new google.maps.LatLng(position.coords.latitude, position.coords.longitude);

        let mapOptions = {
          center: latLng,
          zoom: 15
        };

        this.map = new google.maps.Map(document.getElementById('google-map-container'), mapOptions);
        resolve(true);

      }, () => {

        reject('Could not initialise map');

      });

    });

  }

  @Method()
  addMarker(lat: number, lng: number): void {

    let latLng = new google.maps.LatLng(lat, lng);

    let marker = new google.maps.Marker({
      map: this.map,
      animation: google.maps.Animation.DROP,
      position: latLng
    });

    this.markers.push(marker);

  }

  @Method()
  getCenter(){
    return this.map.getCenter();
  }

}
If you’ve read the previous tutorial, then you will likely notice that the structure of this component is very similar to the Angular version, almost identical infact. However, there are some key differences (aside from the general syntax changes).
First of all, it is important that we create a <div> in the template to hold the Google Maps component:
render() { return
<div id="google-map-container"></div>
}
Previously, we just attached the Google Map to the host element of the component, but if we attempt to instantiate a new Google Map on the host element of this web component we will get some undesired behaviour. Instead, we set up this child element to attach the map to instead.
We were relying on Angular’s Renderer previously, as well as injecting a reference to the document object, but now we just use standard Javascript to create the script element and append it to the document:
injectSDK(): Promise<any> {

    return new Promise((resolve) => {

      window['mapInit'] = () => {
        this.mapsLoaded = true;
        resolve(true);
      }

      let script = document.createElement('script');
      script.id = 'googleMaps';

      if(this.apiKey){
        script.src = 'https://maps.googleapis.com/maps/api/js?key=' + this.apiKey + '&callback=mapInit';
      } else {
        script.src = 'https://maps.googleapis.com/maps/api/js?callback=mapInit';
      }

      document.body.appendChild(script);

    });

  }
and we also do the same for when we are creating the Google Map.The settings for the TypeScript compiler are more strict in this project, so we have also had to remove some unused parameters.
In the Angular component, we just had publicly exposed class members and functions that we could call to interact with the map, but now we need to define those more specifically:
@Method()
  addMarker(lat: number, lng: number): void {

    let latLng = new google.maps.LatLng(lat, lng);

    let marker = new google.maps.Marker({
      map: this.map,
      animation: google.maps.Animation.DROP,
      position: latLng
    });

    this.markers.push(marker);

  }

  @Method()
  getCenter(){
    return this.map.getCenter();
  }
This allows us to expose two public API methods on the web component. This will allow us to call the addMarker method to add a marker to the map, and we can also grab the current center position of the map with getCenter.
We are also going to need to add a couple of styles to the component to make sure that it expands to fill the size of its container.
Modify src/components/my-google-maps/my-google-maps.css to reflect the following:
my-google-maps {
  width: 100%;
  height: 100%;
}

#google-map-container {
  width: 100%;
  height: 100%;
}
5. Use the Google Maps Component
Now that we have our component created, we just need to use it. We are just going to add it to the app-home component that comes with the starter project.
Modify src/components/app-home/app-home.tsx to reflect the following:
import { Component } from '@stencil/core';

@Component({
  tag: 'app-home',
  styleUrl: 'app-home.css'
})
export class AppHome {

  private mapComponent;

  componentDidLoad(){
    this.mapComponent = document.querySelector('my-google-maps');
  }

  testMarker(){

    let center = this.mapComponent.getCenter();
    this.mapComponent.addMarker(center.lat(), center.lng());

  }

  render() {
    return (
      <div class='app-home'>
        <div class='map-container'>
          <my-google-maps apiKey="YOUR_API_KEY"></my-google-maps>
        </div>

        <button onClick={() => this.testMarker()}>
          Add Marker
        </button>

      </div>
    );
  }

}
All we need to do is drop this line:
<my-google-maps apiKey="YOUR_API_KEY"></my-google-maps>Wherever we want to include the map – making sure to use your own API key. In order to use the public methods of the component, we also create a reference to the component on mapComponent. We then have a button set up that will trigger adding a test marker to the map:
testMarker(){
    let center = this.mapComponent.getCenter();
    this.mapComponent.addMarker(center.lat(), center.lng());
  }
In order for the map to display properly, we are also going to have to make a couple of style changes to the home component.
Modify src/components/app-home/app-home.css to reflect the following:
.app-home {
}

.map-container {
  width: 100%;
  height: 50vh;
}

button {
  background: #5851ff;
  color: white;
  margin: 8px;
  border: none;
  font-size: 13px;
  font-weight: 700;
  text-transform: uppercase;
  padding: 16px 20px;
  border-radius: 2px;
  box-shadow: 0 8px 16px rgba(0, 0, 0, 0.1), 0 3px 6px rgba(0, 0, 0, 0.08);
  outline: 0;
  letter-spacing: 0.04em;
  transition: all 0.15s ease;
  cursor: pointer;
}

button:hover {
  box-shadow: 0 3px 6px rgba(0, 0, 0, 0.1), 0 1px 3px rgba(0, 0, 0, 0.1);
  transform: translateY(1px);
}
If you were to run the application now, you should see something like this:
Summary
The number of changes required to convert this Angular component into a web component built with Stencil was very small. Although there are obvious syntax differences between Angular and Stencil, both are predominantly just TypeScript, and most of the Angular specific stuff can be reasonably easily converted. So, in most cases, you will likely find it similarly straightforward to convert Angular components to Stencil components or vice versa.