

In this tutorial, we are going to create an Ionic 2 application that integrates with the Dropbox API. We are going to create an application that will return a list of all the files and folders in your Dropbox, and allow you to traverse through the folders. We will be using the v2 version of the API, which allows you to do everything you need purely with HTTP requests.
Obviously, we will be learning how to use the Dropbox API, but we are also going to be learning a few things about Ionic 2 in general, which will include:
- Creating a provider to handle the integration with Dropbox
- Sending POST requests with the Http service
- Setting headers on POST requests
- Using conditionals in templates
Here’s a look at what we’ll be building in this part of the tutorial:
For now, we will be using an access token to retrieve data only from your Dropbox, so make sure you don’t go publishing the application just yet. In the next part of this tutorial, we will set up an authentication flow to pull in the access token for the person who is using the application.
Before we Get Started
Last updated for Ionic 3.2.1
Before you go through this tutorial, you should have at least a basic understanding of Ionic 2 concepts. You must also already have Ionic 2 set up on your machine.
If you’re not familiar with Ionic 2 already, I’d recommend reading my Ionic 2 Beginners Guide first to get up and running and understand the basic concepts. If you want a much more detailed guide for learning Ionic 2, then take a look at Building Mobile Apps with Ionic 2.
Setting up a Dropbox App
Before we can start using the Dropbox API, we need to set up an application and generate an access token. You can do that by signing into the app console and then clicking the Create app button:

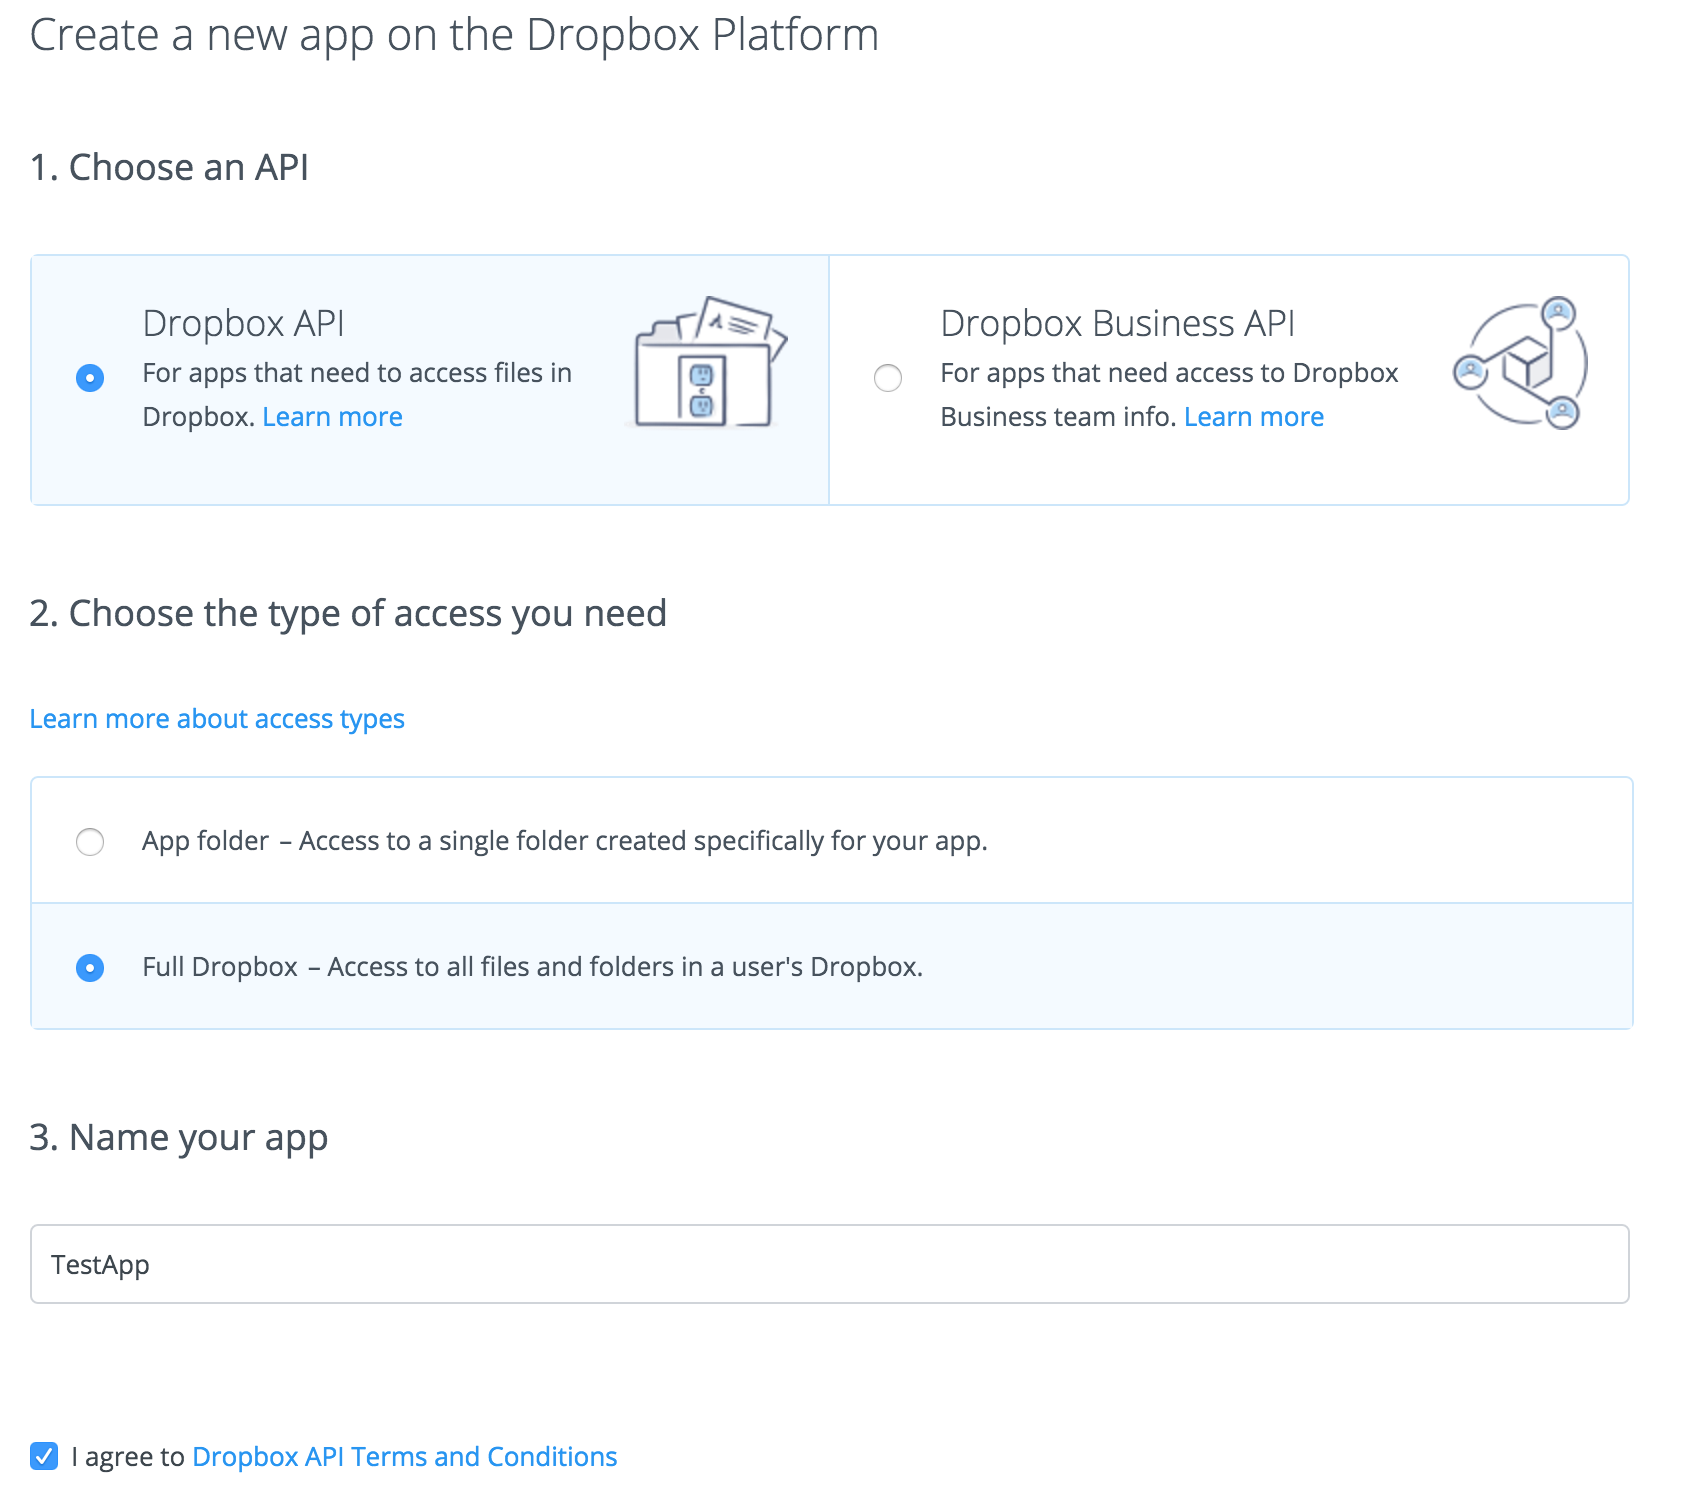
Once you have done that you will need to fill out some settings. This will depend on what exactly it is you want to do with the Dropbox API but for the sake of this tutorial you can just choose Dropbox API and Full Dropbox as shown below:
Now you will want to find the following button to generate an access token:
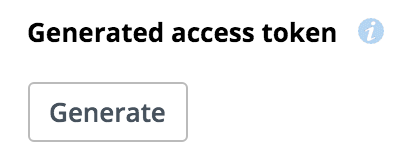
Once you click this it will give you an access token. Make a copy of that and do not share it. Remember, this token is specific to your dropbox, is you give it to anybody or release your application with this token then others will be able to gain access to your Dropbox files.
With that token in hand, we have everything we need to start building our Ionic 2 + Dropbox application.
1. Generate a New Ionic 2 Application
First, we are going to generate a new Ionic 2 application using the blank template.
Run the following command to generate a new Ionic 2 application:
ionic start ionic2-dropbox blank
Once that has finished generating, make sure to make it your current directory.
Run the following command to switch to your new project:
cd ionic2-dropbox
We’re going to be using the auto-generated HomePage to display our Dropbox files and folders, so we don’t need to create any new pages, but we will be creating a custom provider.
Run the following command to generate a Dropbox provider:
ionic g provider Dropbox
We will also need to make sure this provider is added to our app.module.ts file so that it is available throughout the application.
Modify src/app/app.module.ts to reflect the following:
import { BrowserModule } from '@angular/platform-browser';
import { NgModule, ErrorHandler } from '@angular/core';
import { HttpModule } from '@angular/http';
import { IonicApp, IonicErrorHandler, IonicModule } from 'ionic-angular';
import { SplashScreen } from '@ionic-native/splash-screen';
import { StatusBar } from '@ionic-native/status-bar';
import { InAppBrowser } from '@ionic-native/in-app-browser';

import { MyApp } from './app.component';
import { HomePage } from '../pages/home/home';
import { Dropbox } from '../providers/dropbox/dropbox';

@NgModule({
  declarations: [MyApp, HomePage],
  imports: [BrowserModule, HttpModule, IonicModule.forRoot(MyApp)],
  bootstrap: [IonicApp],
  entryComponents: [MyApp, HomePage],
  providers: [
    Dropbox,
    StatusBar,
    SplashScreen,
    InAppBrowser,
    { provide: ErrorHandler, useClass: IonicErrorHandler },
  ],
})
export class AppModule {}
2. Create the Dropbox Provider
Providers are great for making our applications more modular. Rather than building all of the functionality directly into our home page (which we could do), we are going to separate it out into a generic “Dropbox Service”. This keeps our code much more clean and organised, and most importantly it will allow you to easily use this Dropbox provider again in other Ionic 2 applications.
Our provider will perform three main functions for now. It will allow us to:
- Get the users profile information, which will include things like their name and email address
- Get a list of the user files and folders
- Allow users to traverse through different folders
Before we get into building this, let’s quickly cover exactly how the Dropbox API works. All requests to the API are done through HTTP, and they will look something like this:
curl -X POST https://api.dropboxapi.com/2-beta-2/files/list_folder --header "Authorization: Bearer <access-token>" --header "Content-Type: application/json" --data "{"path": ""}"This is just a curl request, which you could just run directly through the command line (where curl is available). This isn’t how we will be retrieving the data in Ionic 2, but it doesn’t matter what framework or language you are using, you simply need to be able to make a HTTP request to use this API.
The example above is the request we will be using to grab a list of the user’s files and folders. Notice that it is hitting the files/list_folder endpoint, and we can supply the access token in the header. We also need to set the content type to JSON using a header as well. The final piece of the puzzle here is the data that we can send along. In this case, this is how we tell the Dropbox API what folder we want to retrieve, but it can also be left blank, or it could be used to send other data (like a file to upload).
Let’s get into building the provider now.
Modify dropbox.ts to reflect the following:
import { Injectable } from '@angular/core';
import { Http, Headers } from '@angular/http';
import 'rxjs/add/operator/map';

@Injectable()
export class Dropbox {

  accessToken: any;
  folderHistory: any = [];

  constructor(public http: Http) {

  }

  setAccessToken(token) {
    this.accessToken = token;
  }

  getUserInfo(){

  }

  getFolders(path?){

  }

  goBackFolder(){

  }

}
This is the basic layout for our provider, we will define the rest of the functions later. Notice that we are injecting the Http service and we are also importing Headers. This is what will allow us to add some headers to send along with our POST request that we can trigger with the Http service.
NOTE: This tutorial relies heavily on using the Http service and the observables that it returns. I won’t be explaining this in much detail in this tutorial, so if you are unfamiliar with the Http service I would recommend reading Using Http to Fetch Remote Data from a Server in Ionic 2 first.
So far all we’ve done is add the method to set the access token. This is important because we need to supply the access token to make requests to the Dropbox API, but we don’t want to hard code this value. Later on, we want to be able to set the access token to whatever the authenticated users access token is, not your own token.
We’ve also created a folderHistory member variable here, this is an array that will keep track of what folder the user is in. If the user goes inside of one folder, and then another, we need to know how to navigate back through those folders.
Now let’s start defining these functions one by one, starting with the getUserInfo function.
Modify the getUserInfo function in dropbox.ts to reflect the following:
getUserInfo(){

    let headers = new Headers();

    headers.append('Authorization', 'Bearer ' + this.accessToken);
    headers.append('Content-Type', 'application/json');

    return this.http.post('https://api.dropboxapi.com/2-beta-2/users/get_current_account', "null", {headers: headers})
      .map(res => res.json());

  }
First, we are generating the headers that are required for this request by first creating a new Headers object, and then appending both the Authorization (which will contain our access token) and Content-Type headers to it.
Then all we do is trigger a POST using the post method of the Http service. The first parameter is the URL we are POSTing too, which is the /users/get_current_account endpoint.
The second parameter is the body or data that we are sending, but since we are just requesting the users info we don’t need to send any data so it is just set to “null”. It is important to note that this second parameter needs to be valid JSON, since our content type is set too JSON. If you were to set this to just null instead of "null" you would get an error like this:
Error in call to API function “users/get_current_account”: request body: could not decode input as JSON
because "null" is valid JSON and null is not.
The last parameter is where we can add the headers we created. Then we map the response to be a JSON-decoded version of that response and we are returning the whole thing. Remember, that Http requests return an observable which we can subscribe to, to grab the data it returns. Rather than returning the data with this function, we instead return the observable so that we are able to subscribe to it from outside of the provider (the reason for this should become apparent when we build the Home page).
Modify the getFolders function to reflect the following:
getFolders(path?){

    let headers = new Headers();

    headers.append('Authorization', 'Bearer ' + this.accessToken);
    headers.append('Content-Type', 'application/json');

    let folderPath;

    if(typeof(path) == "undefined" || !path){

      folderPath = {
        path: ""
      };

    } else {

      folderPath = {
        path: path
      };

      if(this.folderHistory[this.folderHistory.length - 1] != path){
        this.folderHistory.push(path);
      }

    }

    return this.http.post('https://api.dropboxapi.com/2-beta-2/files/list_folder', JSON.stringify(folderPath), {headers: headers})
      .map(res => res.json());

  }
This function looks a little different, but at its core, it is the same. This function will return a list of all files and folders in a directory. By default, it will get the root directory, but we can also supply a path to the function to retrieve a specific directory, this is how we enable the user to traverse their folders in the app. Since the path paramater is optional, we add a ? to it so that TypeScript does not complain about the supplied parameters not matching the signature call of the target.
So, if a path is supplied to this function then we send that path off in the data portion of the POST, which will then return the files and folders for that specific folder. If we don’t supply a path, then an empty path object is sent and the root files and folders will be returned instead. Also note that we are hitting a different endpoint now: files/list_folder.
The other tricky thing here is that we are pushing the path name to the folderHistory array. Here’s why, basically what we do is this:
- Display a list of all the files and folders returned from the getFolders function
- If the user taps a folder, return all the folders and files from that specific folder by calling getFolders with the path for that folder
- Repeat this process for as many folders deep as the user wants to go
- When the users hits the back button, go back to the last folder
Each time we navigate to a specific folder, we add it to this folderHistory array so that we know how to go back through the folder structure. The problem is though that when we are navigating back through the folders, we are also grabbing the files and folders using the getFolders function again. So we first check to see if we are navigating back by comparing the last entry in the folderHistory with the current path. If that matches, it means we are navigating back and shouldn’t add it to the folder history.
Modify the goBackFolder function to reflect the following:
goBackFolder(){

    if(this.folderHistory.length > 0){

      this.folderHistory.pop();
      let path = this.folderHistory[this.folderHistory.length - 1];

      return this.getFolders(path);
    }
    else {
      return this.getFolders();
    }
  }
This function plays into what we were just talking about, it will take the user one folder up from where they current are. First, we check if there are any paths in the folderHistory, if there’s not then we can just call getFolders with no path since we are back to the root folder. If there are paths in the folderHistory then we want to pop off the last entry (which is where the user currently is) to remove it, and then navigate to the previous path in the history stack. If you’re familiar with push and pop navigation in Ionic 2 then this is essentially our own little version of that.
The functions we just created for that provider are reasonably complex, so hopefully it all made sense. Now that we have that built, though, it is going to be super easy for us to make use of it in our home page.
List the Files & Folders
We’ve got the hard part out of the way, now we just need to finish up our Home page. Let’s get right into it.
Modify home.ts to reflect the following:
import { Component } from '@angular/core';
import { NavController, LoadingController } from 'ionic-angular';
import { Dropbox } from '../../providers/dropbox/dropbox';

@Component({
  selector: 'page-home',
  templateUrl: 'home.html'
})
export class HomePage {

  depth: number = 0;
  folders: any;

  constructor(public navCtrl: NavController, public dropbox: Dropbox, public loadingCtrl: LoadingController) {

  }

  ionViewDidLoad(){

      this.dropbox.setAccessToken("YOUR-ACCESS-TOKEN");
      this.folders = [];

      let loading = this.loadingCtrl.create({
        content: 'Syncing from Dropbox...'
      });

      loading.present();

      this.dropbox.getFolders().subscribe(data => {
        this.folders = data.entries;
        loading.dismiss();
      }, (err) => {
        console.log(err);
      });

  }

  openFolder(path){

  }

  goBack(){

  }

}
First of all, notice that we have imported, injected and added the provider declaration to the decorator for the Dropbox provider we just created. This will allow us to make use of it in this class. We’re also importing the LoadingController service which will allow us to display a loading message to the user as we are retrieving the files and folders from the Dropbox API.
Inside of the ionViewDidLoad hook (which will trigger as soon as the page has loaded) we are setting the access token in the Dropbox provider by calling the setAccessToken function. You should change this to be the access token that you generated earlier, but once again I stress that this token is specific to your account and you should not share it.
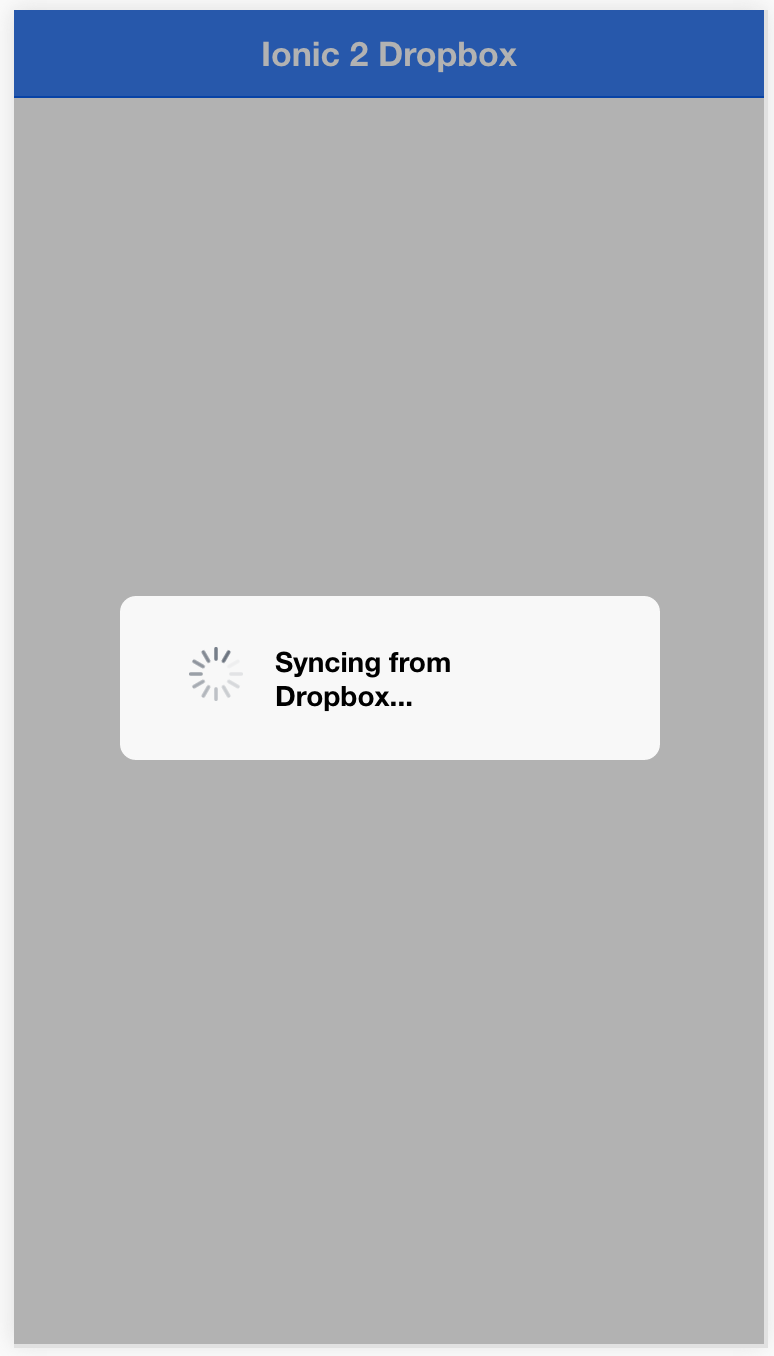
Then we do the fun bit. We subscribe to the observable returned from the getFolders function to grab our initial list of files and folders and set it on the this.folders members variable (which we will use in our template shortly). Notice that we also present the loading message before we trigger this request, and then we dismiss the loading message once the data has returned. When the data is loading in from Dropbox, the user will see a message like this:
Now let’s define the final two functions.
Modify the openFolder function to reflect the following:
openFolder(path){

    let loading = Loading.create({
      content: 'Syncing from Dropbox...'
    });

    this.nav.present(loading);

    this.dropbox.getFolders(path).subscribe(data => {
      this.folders = data.entries;
      this.depth++;
      loading.dismiss();
    }, err => {
      console.log(err);
    });

  }
This function will be triggered from our template, and it will allow users to select a specific folder to look at. This function basically just repeats what we just did, but instead, it takes in a specific path so that the getFolders function will instead return that specific folder, rather than the root folder.
Modify the goBack function to reflect the following:
goBack(){

    let loading = Loading.create({
      content: 'Syncing from Dropbox...'
    });

    this.nav.present(loading);

    this.dropbox.goBackFolder().subscribe(data => {
      this.folders = data.entries;
      this.depth--;
      loading.dismiss();
    }, err => {
      console.log(err);
    });

  }
This function will be triggered by the “Back” button in our template. Again, it’s pretty similar to the other functions but instead, we are calling the goBackFolder function that we created before to take the user back to the previous folder. Also notice that we decrement the depth variable here (and we incremented it in the previous function), this keeps track of how many levels deep we are in the folder hierarchy so that we know when to display the back button (if the depth is 0, then we don’t want to display it).
Finally, we just need to create our template to display the data and to trigger these functions.
Modify home.html to reflect the following:
<ion-header>
  <ion-navbar color="primary">
    <ion-title> Ionic 2 Dropbox </ion-title>
    <ion-buttons start>
      <button ion-button *ngIf="depth" (click)="goBack()">
        <ion-icon name="arrow-back"></ion-icon> Back
      </button>
    </ion-buttons>
  </ion-navbar>
</ion-header>

<ion-content>
  <ion-list>
    <div *ngFor="let folder of folders">
      <ion-item
        *ngIf="folder['.tag'] == 'folder'"
        detail-push
        (click)="openFolder(folder.path_lower)"
      >
        {{folder.name}}
      </ion-item>
      <ion-item *ngIf="folder['.tag'] == 'file'"> {{folder.name}} </ion-item>
    </div>
  </ion-list>
</ion-content>
The first conditional here we are using is on the back button. Since a value of `is akin tofalse, when the depth is 0 our *ngIf` directive on the button will fail and it will not be displayed.
The next thing of importance here is the *ngFor loop we have created. Rather than adding this to <ion-item> directly, we are surrounding it with a <div> and then conditionally displaying one of two difference sets of <ion-item>. This is because not everything will be a folder, some will just be a file and in that case we don’t want to add detail-push (which will add an arrow to the list) or trigger the openFolder function.
Also note the weird syntax here:
*ngIf="folder['.tag'] == 'folder'
usually we would do something like this:
*ngIf="folder.tag == 'folder'
but for some reason the tag property returned in the data actually starts with a dot like this .tag (if anyone knows why, please feel free to explain in the comments) making it impossible for us to grab with the standard syntax. Fortunately, any property from an object can also be grabbed using this syntax:
object['property']
so we can grab it without too much trouble. The final thing you should note is that we are passing through folder.path_lower to the openFolder function, which will supply the path for whatever folder the user clicked.
With that all done, your application should now look something like this:
Of course with your own files and folders though, not my ugly mess of a Dropbox.
Summary
We have a working integration between Ionic 2 and Dropbox now which is pretty cool, but we’ve got even further to go. In the next tutorial in this series, we will look at how to set up an authentication flow so that we can allow anybody to use the app, not just you. After that, who knows – maybe even uploading and downloading?
UPDATE: Part 2 is out now.