

This is the second part of a tutorial series where we will be building a drawing application using the HTML5 canvas element in Sencha Touch. Click here for the first part.
Last time we created our own ’CanvasDraw’ component. Right now we can use that component in our application and we will be able to draw on the canvas. We’ve added a lot of functionality into the component though which can not be utilised yet, specifically:
- Changing colours
- Changing brush size
- Resetting the canvas
So now we’re going to build an interface within our application to interact with these features. We’ll add some colours to choose from, a few brush sizes and a reset button. What we’re building will look something like this:
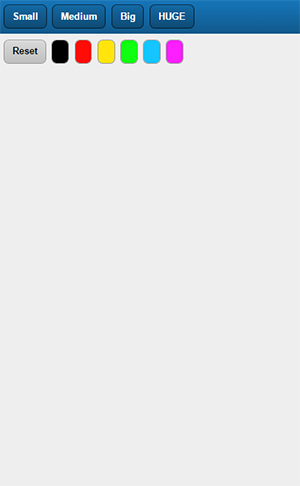
I’ve chosen some colours and sizes specifically, but the component is flexible so you can set these to be whatever you want. You could even create an interface where the brush size could be controlled by a slider, and perhaps even offer a colour picker. We’ll be keeping it simple for now though and just be using the buttons.
1. Set up the toolbars and canvas component
By default the auto generated Main.js view uses a tabbed layout. We’re going to change this to a simple Container with a vbox layout, and add in a couple of toolbars and our canvasdraw component:
Ext.define('SenchaDraw.view.Main', {
  extend: 'Ext.Container',
  xtype: 'main',
  requires: ['Ext.ux.CanvasDraw'],
  config: {
    items: [
      {
        xtype: 'container',
        layout: {
          type: 'vbox',
        },
        items: [
          {
            xtype: 'toolbar',
          },
          {
            xtype: 'toolbar',
          },
          {
            xtype: 'canvasdraw',
          },
        ],
      },
    ],
  },
});
We’ll be using the top toolbar to store our brushes and the second toolbar to store the colours. Obviously this isn’t the best looking layout in the world, perhaps later we will make it look prettier but for now we will just focus on functionality.
2. Set up brush size buttons
Add some buttons to your first toolbar and add the handler functions shown below:
{
    xtype: 'toolbar',
    items: [
        {
            xtype: 'button',
            text: 'Small',
            handler: function(){
                this.up('main').setBrushSize(1);
            }
        },
        {
            xtype: 'button',
            text: 'Medium',
            handler: function(){
                this.up('main').setBrushSize(5);
            }
        },
        {
            xtype: 'button',
            text: 'Big',
            handler: function(){
                this.up('main').setBrushSize(10);
            }
        },
        {
            xtype: 'button',
            text: 'HUGE',
            handler: function(){
                this.up('main').setBrushSize(30);
            }
        }
    ]
},
The handler function will fire whenever the button is tapped. When a button is tapped we will trigger the following code:
this.up('main').setBrushSize(value);This will call the setBrushSize function within the Main view, this does not exist yet so let’s create that function now. Add the following function outside of the config in the Main.js file:
setBrushSize: function(size){
    var me = this;
    me.down('canvasdraw').setBrushSize(size);
},
Now when one of the brush buttons are click, this function will be triggered with the desired brush size value. This function will then call the automatically generated setter function for the brushSize config on the canvas component we created.
3. Set up colour buttons
Setting up the colour buttons will involve basically the same process, except instead of passing an integer for the size we will pass a hex value for the colour.
{
    xtype: 'toolbar',
    ui: 'plain',
    items: [
        {
            xtype: 'button',
            text: 'Reset',
            handler: function(){
                this.up('main').resetCanvas();
            }
        },
        {
            xtype: 'button',
            style: 'background-color: #000; background-image: none;',
            handler: function(){
                this.up('main').setBrushColor('#000');
            }
        },
        {
            xtype: 'button',
            style: 'background-color: #ff0c06; background-image: none;',
            handler: function(){
                this.up('main').setBrushColor('#ff0c06');
            }
        },
        {
            xtype: 'button',
            style: 'background-color: #ffe50c; background-image: none;',
            handler: function(){
                this.up('main').setBrushColor('#ffe50c');
            }
        },
        {
            xtype: 'button',
            style: 'background-color: #10ff10; background-image: none;',
            handler: function(){
                this.up('main').setBrushColor('#10ff10');
            }
        },
        {
            xtype: 'button',
            style: 'background-color: #15c5ff; background-image: none;',
            handler: function(){
                this.up('main').setBrushColor('#15c5ff');
            }
        },
        {
            xtype: 'button',
            style: 'background-color: #fc1fff; background-image: none;',
            handler: function(){
                this.up('main').setBrushColor('#fc1fff');
            }
        }
    ]
},
We also add a bit of styling to the button so the user can see what the colour is, rather than writing ‘Red’ or ‘Pink’ in text. You must also create another function to handle this inside the Main view (again, outside of the config):
setBrushColor: function(color){
    var me = this;
    me.down('canvasdraw').setBrushColor(color);
}
4. Add in a reset button
Finally we will create our reset button, which will be added to the colours toolbar:
{
    xtype: 'button',
    text: 'Reset',
    handler: function(){
        this.up('main').resetCanvas();
    }
},
and once again create the corresponding function in the Main view:
resetCanvas: function(){
    var me = this;
    me.down('canvasdraw').resetCanvas();
},
Now load up the application in your browser and you should be able to use all the functions we created. We have a pretty functional application by this point, in the next part though we’ll look at adding in functionality to save the photos as well!