

Ionic provides a lot of useful components right out of the box, but sometimes they might not do exactly what you want them to do. In situations like this, you mostly have two options: build a new component that does what you want, or create a directive to modify the behaviour of the existing component.
The difference between a component and a directive can be a little hard to understand, but the basic idea is that you would create a custom component to create some new element in your application and you would create a directive to change the behaviour of some existing component. A directive is basically a component without a template.
If you were creating your own entirely new custom component, you would use it like this:
<my-cool-component></my-cool-component>but if you were creating a directive, you would attach it to an existing component like this:
<some-existing-component myDirective></some-existing-component>In this tutorial, we are going to walk through how to modify the behaviour of the sliding item component in Ionic by creating our own directive. We will add the ability to continue sliding the sliding item past the default threshold, and when that sliding reaches a certain point we will trigger an event to delete that item (and animate the item away with a cool effect).
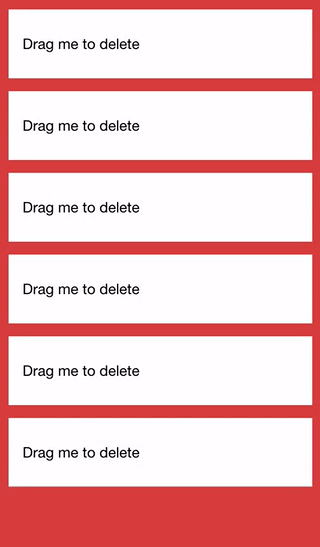
If you’ve used the latest version of the GMail application, the end result will be somewhat similar to the way you archive an email. Here’s what it will look like:
Before We Get Started
Last updated for Ionic 3.9.2
Before you go through this tutorial, you should have at least a basic understanding of Ionic concepts. You must also already have Ionic set up on your machine.
If you’re not familiar with Ionic already, I’d recommend reading my Ionic Beginners Guide or watching my beginners series first to get up and running and understand the basic concepts. If you want a much more detailed guide for learning Ionic, then take a look at Building Mobile Apps with Ionic.
1. Generate a New Ionic Application
First, we are going to generate a simple blank application. If you already have an existing application you would like to add this to you don’t need to generate a new project, but we will just be running through implementing it in an application with a simple example.
Run the following command to generate a new Ionic application:
ionic start ionic-overslide blankOnce that has finished generating, make it your working directory:
cd ionic-overslideWe will also need to generate a new directive that we will use to implement the “overslide” functionality.
Run the following command to generate an Overslide directive
ionic g directive OverslideNow we are just going to modify the app.module.ts file to include the new directive that we just created.
Modify src/app/app.module.ts to reflect the following:
import { BrowserModule } from '@angular/platform-browser';
import { ErrorHandler, NgModule } from '@angular/core';
import { IonicApp, IonicErrorHandler, IonicModule } from 'ionic-angular';
import { SplashScreen } from '@ionic-native/splash-screen';
import { StatusBar } from '@ionic-native/status-bar';

import { MyApp } from './app.component';
import { HomePage } from '../pages/home/home';

import { Overslide } from '../components/overslide/overslide';

@NgModule({
  declarations: [MyApp, HomePage, Overslide],
  imports: [BrowserModule, IonicModule.forRoot(MyApp)],
  bootstrap: [IonicApp],
  entryComponents: [MyApp, HomePage],
  providers: [
    StatusBar,
    SplashScreen,
    { provide: ErrorHandler, useClass: IonicErrorHandler },
  ],
})
export class AppModule {}
2. Implement the Overslide Directive
Now that we have everything set up, let’s walk through implementing the directive. As you saw in the introduction section, we will eventually attach this directive to an existing component. The file we are about to implement essentially allows us to add some additional functionality through another TypeScript file to that component.
Modify src/components/overslide/overslide.ts to reflect the following:
import { Directive, Output, ElementRef, Renderer, EventEmitter } from '@angular/core';

@Directive({
    selector: '[overslide]',
    host: {
        '(ionDrag)': 'handleDrag($event)'
    }
})
export class Overslide {

    @Output() overslide: any = new EventEmitter();

    triggered: boolean = false;

    constructor(public element: ElementRef, public renderer: Renderer) {
        console.log('Hello Overslide Directive');
    }

    handleDrag(ev){

        if(Math.abs(ev.getSlidingPercent()) > 1.7 && !this.triggered){

            this.triggered = true;

            this.renderer.setElementStyle(this.element.nativeElement, 'transition', '0.3s linear');
            this.renderer.setElementStyle(this.element.nativeElement, 'opacity', '0');

            setTimeout(() => {
                this.renderer.setElementStyle(this.element.nativeElement, 'display', 'none');
                this.overslide.emit(true);
            }, 300);

        }

    }

}
Since this directive has a selector of [overslide] we will be able to add overslide to any component to attach the functionality of this directive to it. However, this directive is going to be designed specifically to interact with the <ion-item-sliding> component, so adding it to anything else would just cause errors.
In the @Directive decorator, we also add the host property and set up a listener for the ionDrag event. This is an event that <ion-item-sliding> outputs by default. We want to add some extra logic into this, so we trigger our own handleDrag event when we detect the ionDrag event. We basically want to perform some logic on this event, and then emit our own new event, which is why we set up an @Output of overslide that uses the EventEmitter – this will allow us to trigger our own custom event on the component.
In the handleDrag event we just check the value returned by getSlidingPercent. When the sliding item is fully open this value will either be -1 or 1 depending on whether the right or left side of the sliding item is being exposed (which is why we use the absolute value). If this value goes higher than 1, it means that the item is being dragged past being fully opened. So, we add a threshold of 1.7 (i.e. 170% open) at which point we will trigger our custom behaviour. This means that it won’t trigger immediately when the item is dragged past being fully open, but if the user continues to drag it will eventually trigger. You can modify this value if you like.
When it is triggered we add a few styles. We set the opacity of the element to `and add a transition property so that it fades out over 0.3 seconds rather than instantly disappearing. We give the animation time to finish using thesetTimeoutfunction, and then we trigger our custom event by callingemitonoverslide. If we were listening to the (overslide)` event on the component that this is attached to, we would then be able to react to this event. This directive doesn’t actually delete the item, it just hides it, so we would need to handle deleting that item in response to the event.
To prevent the function from triggering multiple times, we also keep track of a triggered flag.
3. Use the Overslide Directive
In order to use the directive, we now just need to attach it to an <ion-item-sliding>. Here’s an example:
Modify src/pages/home/home.ts to reflect the following:
import { Component } from '@angular/core';
import { NavController } from 'ionic-angular';

@Component({
  selector: 'page-home',
  templateUrl: 'home.html'
})
export class HomePage {

    items: any = new Array(10);

    constructor(public navCtrl: NavController) {

    }

    handleOverslide(item){
        console.log(item);
    }

}
Modify src/pages/home/home.html to reflect the following:
<ion-content>
  <ion-list no-lines>
    <ion-item-sliding
      (overslide)="handleOverslide(item)"
      *ngFor="let item of items"
      #item
      overslide
    >
      <ion-item> Drag me to delete </ion-item>
      <ion-item-options side="left">
        <button ion-button (click)="favorite(item)">Favorite</button>
        <button ion-button color="danger" (click)="share(item)">Share</button>
      </ion-item-options>

      <ion-item-options side="right">
        <button ion-button (click)="unread(item)">Unread</button>
      </ion-item-options>
    </ion-item-sliding>
  </ion-list>
</ion-content>
As you can see, we have added an (overslide) event binding to <ion-item-sliding> which will call the handleOverslide function in home.ts when it is triggered.
Summary
The functionality we created in this tutorial is a perfect use case for a directive. It may be tempting to just hack away at your application by implementing this functionality directly in home.ts or maybe even modifying the Ionic source code itself, but this approach makes your code a lot cleaner and a lot more reusable.