When it comes to accessing native functionality in Capacitor, we are generally able to use any of the thousands of existing plugins for Cordova. However, whilst most Cordova plugins will work fine without modification in Capacitor, not all of them will.
One particularly popular Cordova plugin is Phonegap Plugin Push which allows you to register for and receive push notifications in your application. Unfortunately, this is one particular case of a plugin that will not work out of the box with Capacitor. We will likely see a Capacitor specific plugin for push notifications in the future, but in the meantime, it is still possible to get the existing Cordova plugin working in Capacitor with a few tweaks.
In this tutorial, we will be covering how to use the push notifications plugin in Capacitor for both iOS and Android. We will need to make some tweaks to the plugin to get it working with iOS, but it does actually still work by default for Android projects (just the standard configuration is required). The steps we will be walking through for sending push notification on iOS will require macOS and XCode.
I will provide an example of how to implement the client side for push notifications in an Ionic/Angular application, but keep in mind this will work for any application built with Capacitor. The client-side code we will be using is quite small/simple, so it should be reasonably easy to adapt it to whatever you are using.
A big thank you to Julio Cesar (a big Cordova contributor who is now also working on Capacitor) who provided a lot of technical guidance in creating this tutorial.
Setting up the Project
In order to complete this tutorial, you will need to have a project with Capacitor installed:
npm install --save @capacitor/core @capacitor/cliand you will also need to initialise your Capacitor project:
npx cap initTake note of the bundle identifier you use when initialising the project (i.e. com.example.myapp) as you will need to use this to configure push notifications. You will need to make sure that you have added each platform that you are targetting:
npx cap add ios
npx cap add android
The push notifications plugin should then be installed with the following command:
npm install phonegap-plugin-push --saveOnce the plugin has been installed, you should copy it over to your Capacitor project by running the sync command:
npx cap syncThis will require your application code to be built, so if you are using Ionic you would need to make sure to run ionic build before running the sync command so that there is code to be copied over from the www folder.
Configuring the Plugin for iOS
As I mentioned, there are some changes required for this plugin in order to get it working with Capacitor – we are going to walk through implementing those changes now. First, you should open up the Capacitor project in XCode by running the following command:
npx cap open iosWith the project open, you should see App and Pods in the file explorer:
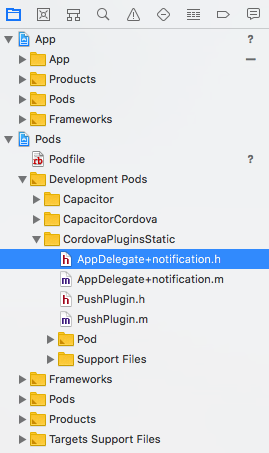
You will need to navigate to Pods > Development Pods > CordovaPluginsStatic > AppDelegate+Notification.h and replace:
#import "AppDelegate.h"with
#import <Cordova/AppDelegate.h>IMPORTANT: Since Capacitor copies the Cordova plugin files over every time you sync the project, you will need to make this change each time you run npx cap sync or npx cap update. Alternatively, you can make this change directly to node_modules/phonegap-plugin-push (but this would also be overwritten if you do an npm install).
Next, you will need to make a change to LocalNotifications plugin. Navigate to Pods > Development Pods > Capacitor > Plugins > LocalNotifications.swift and change:
public override func load() {
    let center = UNUserNotificationCenter.current()
    center.delegate = self
  }
to
public override func load() {
    let center = UNUserNotificationCenter.current()
    //center.delegate = self
  }
IMPORTANT: This change prevents push notifications and local notifications from working together.
Finally, we will need to make some changes to App > App > AppDelegate.swift. You should add the following to imports to the top of the file:
import Cordova
import CordovaPluginsStatic
You will also need to add the following functions somewhere in the same file:
func application(_ application: UIApplication, didRegisterForRemoteNotificationsWithDeviceToken deviceToken: Data) {

  let pushHandler = self.getCommandInstance(pluginName: "PushNotification") as! PushPlugin

  pushHandler.didRegisterForRemoteNotifications(withDeviceToken: deviceToken);

}

func application(

  _ application: UIApplication,

  didReceiveRemoteNotification userInfo: [AnyHashable : Any],

  fetchCompletionHandler completionHandler: @escaping (UIBackgroundFetchResult) -> Void) {

  let pushHandler = self.getCommandInstance(pluginName: "PushNotification") as! PushPlugin

  pushHandler.notificationMessage = userInfo

  pushHandler.notificationReceived()

}

func getCommandInstance(pluginName: String) -> CDVPlugin? {

  if let viewController = UIApplication.shared.keyWindow?.rootViewController as? CAPBridgeViewController {

    return (viewController.bridge?.cordovaPluginManager?.getCommandInstance(pluginName))!

  }

  return nil

}
With those changes in place, we should now be able to use the push plugin on iOS with Capacitor. Remember that you need to modify Pods > Development Pods > CordovaPluginsStatic > AppDelegate+Notification.h every time you run npx cap sync or npx cap update.
Push Notifications on iOS
With the plugin modifications our of the way, now we just need to complete the standard configuration steps for push notifications on iOS. First, we will add support for push notifications to our iOS project. You will need to open up your project in XCode:
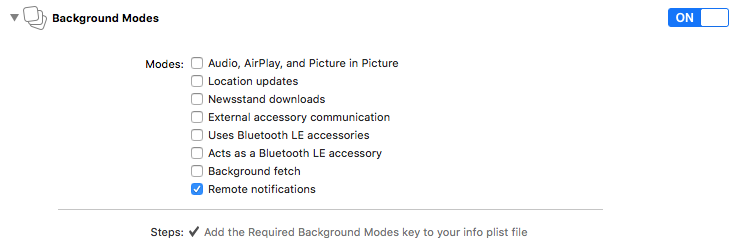
npx cap open iosOnce the project is open you should click on App in the file explorer, and then go to the Capabilities tab. You will need to switch push notifications on:

and you will also need to enable background modes and check the ‘Remote notifications’ option:
In order to be able to use push notifications on iOS, you will also need to generate an APNS (Apple Push Notification Service) certificate at developer.apple.com. Once you have logged in, you should make your way to the Certificates, IDs & Profiles section. Click the + button to create a new certificate, and you can either create an Apple Push Notification service SSL (Sandbox) development certificate or an Apple Push Notification service SSL (Sandbox & Production) production certificate.
You will be guided through the process of creating the certificate (make sure that you use an App ID that matches the bundle ID you used to initialise Capacitor, e.g. com.example.myapp). Once you are done, you should download the resulting certificate and double-click it to add it to the keychain on your computer. We will need to export this certificate as a .p12 file in order to use it with the tool we will be using to send push notifications later.
To export the certificate, first open up Keychain Access on your computer. A lot of certificates may show up here, so you might want to search push in the top-right:
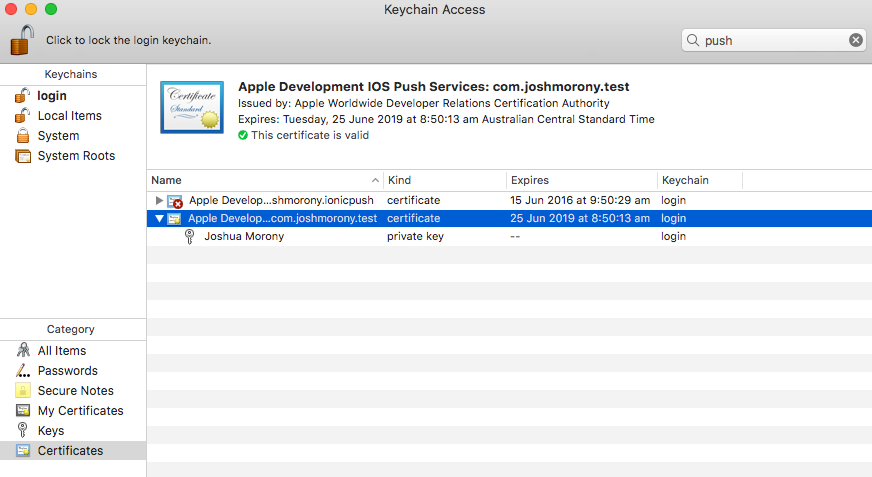
Once you have found the certificate, just right-click it and choose the Export option (right-click and export the certificate, not the private key). Make sure to save the resulting .p12 file somewhere safe (don’t save it inside of your client-side code).
Now let’s discuss the client-side code. We will need to use the push plugin to register for notifications, and we will also need a way to handle notifications that are sent to the application. There is more that the push plugin can do, but we are just going to focus on a simple implementation. Here is an example service I created for an Ionic/Angular application:
import { Injectable } from '@angular/core';
import { BehaviorSubject } from 'rxjs';

@Injectable({
  providedIn: 'root'
})
export class PushNotificationService {

  public notifications: BehaviorSubject<Object> = new BehaviorSubject(false);

  constructor() {

  }

  init(): void {

    let push = (<any> window).PushNotification.init({
      ios: {
        alert: 'true',
        badge: true,
        sound: 'false'
      }
    });

    push.on('registration', (data) => {
      console.log(data.registrationId);
      console.log(data.registrationType);
    });

    push.on('notification', (data) => {

      console.log(data.alert);
      console.log(data.message);
      console.log(data.title);
      console.log(data.count);
      console.log(data.sound);
      console.log(data.image);
      console.log(data.additionalData);

      this.notifications.next(data);

    });

    push.on('error', (err) => {
      console.log(err);
    });

  }

}
All that would be required for this to work is to call the init method of the service from somewhere during your app startup process. In the notification handler, it is passing along the data to the notifications behavior subject that is set up, so you could easily subscribe to this from anywhere in your application to respond to incoming push notifications.
This is obviously an Angular specific implementation, but a similar approach would be used in any situation. Just make sure that you call PushNotification.init() at some point, and that you set up handlers for both the registration and the notification events.
If you run this code on an iOS device now (remember to build your application and copy it over to your native project with npx cap copy first) you should see in the console logs that the application has successfully registered for push notifications, and you will also see a long string of numbers and letters that make up that device’s token. We will need this token to send a push notification.
Although there are other ways to send push notifications, an easy way to send out some test push notifications is to use NWPusher. You can install this application on your computer and just send push notifications from your desktop.
All you need to do is supply NWPusher with the .p12 file you exported before, the device token for the device you want to send the push notification to, and then hit the Push button:

With any luck, you should almost instantly see the push notification appear on your device. If you have the application closed the push notification will be displayed by the system, but if you have the application open then it will be your push.on('notification') handler that handles displaying the notification (so if you haven’t done anything with that, nothing will appear).
Push Notifications on Android
Now let’s discuss how to set up push notifications with the same plugin on Android. Fortunately, Android does not require any changes to the plugin itself, and it is also just generally a little bit easier to set up than it is with iOS (this usually seems to be the case with most things).
We will be using Firebase Cloud Messaging in order to send push notifications to applications on Android devices. First, make your way over to console.firebase.google.com and create a new project if you haven’t already.
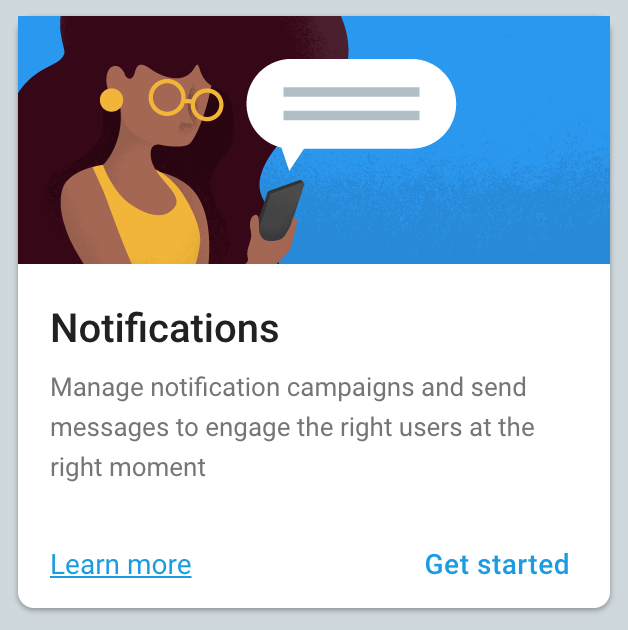
Once the project has been created, make your way down to Notifications and click Get started:
Choose the Android option to add an Android app. You will need to supply the bundle ID of your application (e.g. com.example.myapp). On the next step, you should download the google-services.json file and place it into the yourproject/android/app folder. You do not need to complete the Add Firebase SDK step.
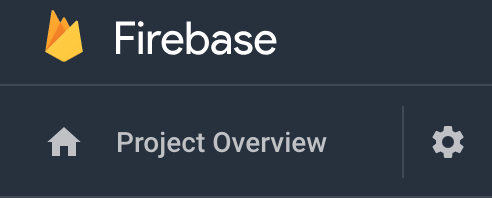
Next, we will need to modify the client side code to enable push notifications on Android. This will require supplying a Sender ID. You can find the Sender ID by going back to the main Firebase dashboard, and clicking on the settings buttons next to Project Overview and choosing Project settings:
You should then go to the Cloud Messaging tab, and you will be able to find your Sender ID on this screen. You should then use that Sender ID to modify the push notification configuration to look like this:
import { Injectable } from '@angular/core';
import { BehaviorSubject } from 'rxjs';

@Injectable({
  providedIn: 'root'
})
export class PushNotificationService {

  public notifications: BehaviorSubject<Object> = new BehaviorSubject(false);

  constructor() {

  }

  init(): void {

    let push = (<any> window).PushNotification.init({
      android: {
        senderID: '1234567890'
      },
      ios: {
        alert: 'true',
        badge: true,
        sound: 'false'
      }
    });

    push.on('registration', (data) => {
      console.log(data.registrationId);
      console.log(data.registrationType);
    });

    push.on('notification', (data) => {

      console.log(data.alert);
      console.log(data.message);
      console.log(data.title);
      console.log(data.count);
      console.log(data.sound);
      console.log(data.image);
      console.log(data.additionalData);

      this.notifications.next(data);

    });

    push.on('error', (err) => {
      console.log(err);
    });

  }

}
We are obviously still including the iOS configuration here, but you can remove that if you are only interested in Android. You will now be able to launch the application on an Android device – make sure to copy over your code changes first with npx cap copy and then you can launch Android Studio with npx cap open android.
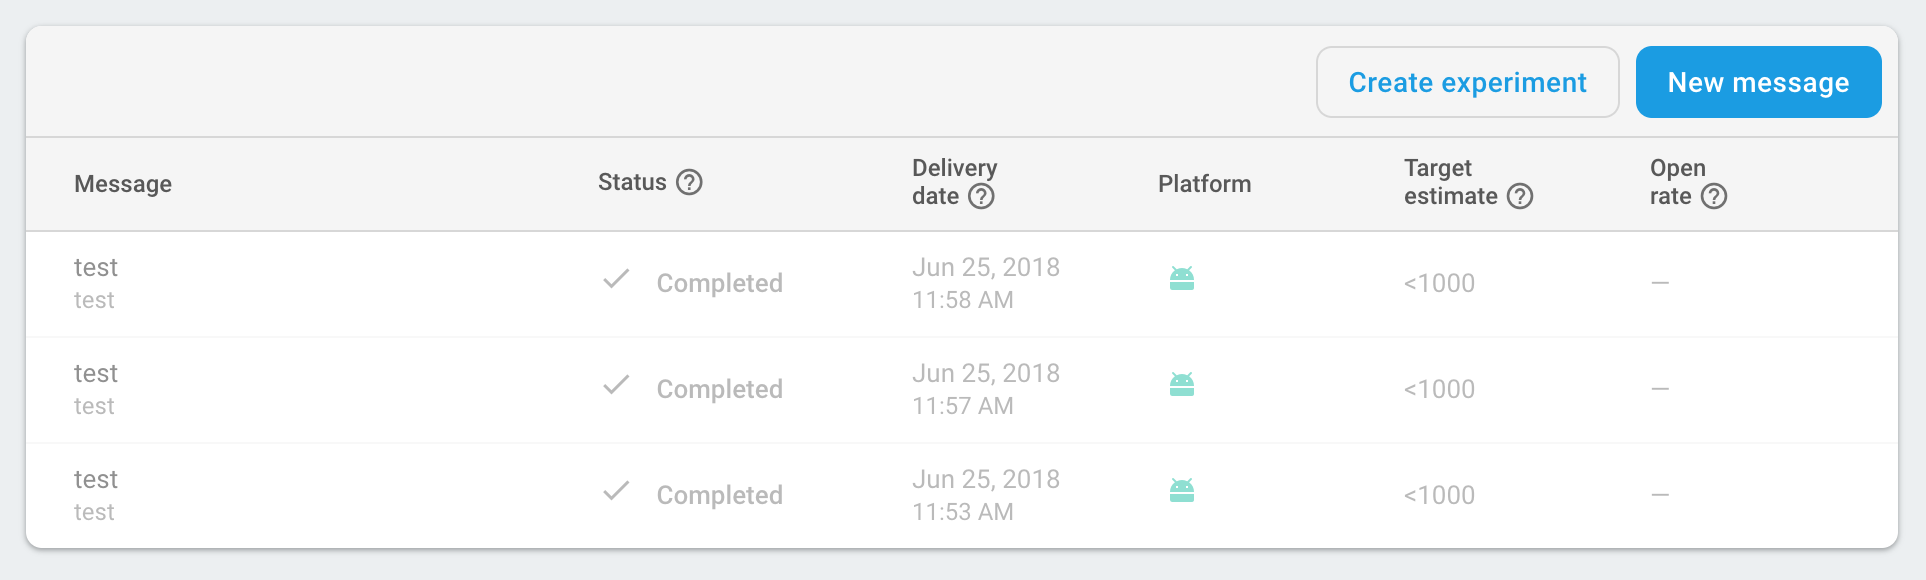
In order to send a test push notification, you can use the Notifications composer in the Firebase console. Just select your application and choose New Message:
Summary
Push Notifications are a complex area and there are a lot of different ways you can go about implementing them. The main goal of this article was to demonstrate how you can take the existing Phonegap Push Plugin and make use of that same plugin in Capacitor with just a few tweaks.
As I mentioned, we will likely see a specific Capacitor plugin for push notifications in the future, so this will simplify things a little more.