

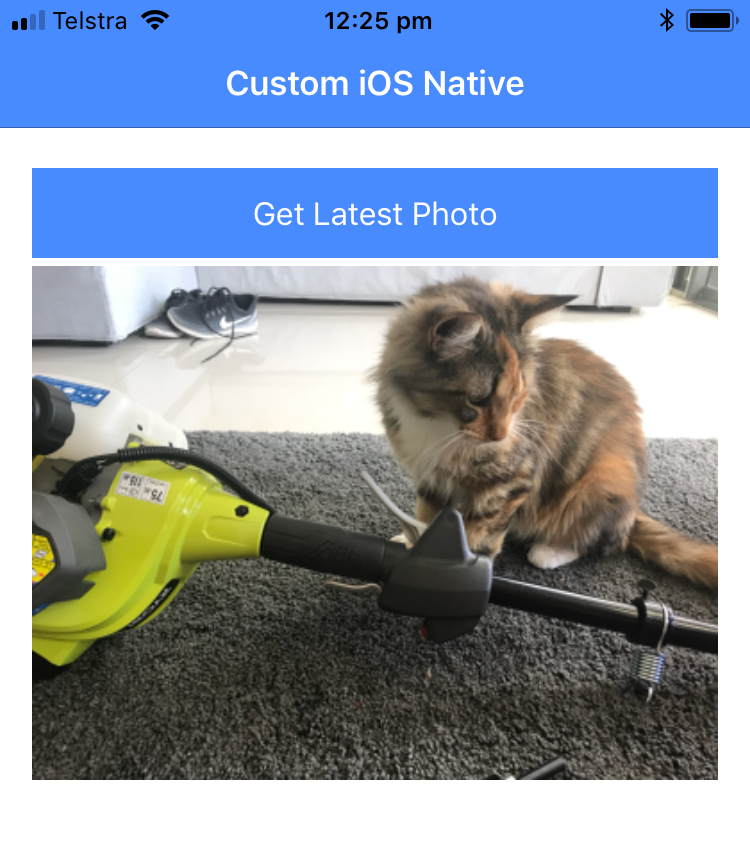
Earlier this week, I published a tutorial that described how to use Capacitor to run custom iOS native code in Ionic. We built a Capacitor plugin that allowed us to automatically retrieve the latest photo on the user’s camera roll, resulting in an application that looked like this:
In order to achieve this, we just made modifications to the local Capacitor project. This is fine, but we may also want to make the plugin a little more modular/portable so that we can reuse it in other projects easily, or allow the broader community to benefit from the plugin we have created.
In this tutorial, we are going to take the same plugin code but we are going to build it as a standalone Capacitor plugin using the Capacitor CLI. This will allow us to easily publish the plugin to NPM and install it in our Ionic project using:
npm install my-plugin --saveBefore We Get Started
I will be jumping right into creating the plugin in this tutorial, but it will help to have some context. I would recommend that you read the previous tutorial to get an understanding of how Capacitor plugins works in more detail, and if you need help in setting up Capacitor in a new Ionic project.
As with the last tutorial, this will require macOS and XCode to complete.
1. Generate a New Capacitor Plugin Project
The Capacitor CLI already ships with a convenient tool for generating Capacitor plugins. It can generate a template for you with some placeholder code and everything set up so that it can be easily built and published to NPM.
Generate a new Capacitor plugin project by running the following command:
npx @capacitor/cli plugin:generateIMPORTANT: This should be generated as its own standalone project. Do not create this inside of an existing Ionic/Capacitor project.
Once you run this command, you will receive a series of prompts asking you to name your plugin, specify a license type, and so on. You do not have to answer all of these right away and can leave them blank if you like.
Once you have created your project you should make it your working directory and then run the following command:
npm install2. Define the TypeScript Interface
If you open your new project you will find a few files and folders, including a src folder. This folder contains the TypeScript interfaces for your project, and they need to be set up correctly to reflect the API of your plugin.
By default, an example interface is included in the definitions.ts file:
declare global {
  interface PluginRegistry {
    EchoPlugin?: EchoPlugin;
  }
}

export interface EchoPlugin {
  echo(options: { value: string }): Promise<{value: string}>;
}
The basic idea is that we want to define an interface for our plugin, and then add that to the global PluginRegistry so that we can access it just like we access the default Capacitor plugins. Our plugin does not provide an echo method, it provides a method called getLastPhotoTaken that takes no arguments, so let’s modify that.
Modify src/definitions.ts to reflect the following:
declare global  {
    interface PluginRegistry {
        GetLatestPhoto?: GetLatestPhoto;
    }
}

export interface GetLatestPhoto {
    getLastPhotoTaken(): Promise<any>;
}
You can also define a web interface for the plugin if you like, but we are just going to delete that for now.
Delete the src/web.ts file
Modify src/index.ts to reflect the following:
export * from './definitions';3. Build the Plugin in XCode
We are now going to use XCode to build our iOS plugin for Capacitor. Before working with XCode, we should make sure to install all the dependencies. Capacitor uses CocoaPods to manage dependencies, which is basically like npm for XCode.
If you haven’t already, make sure that you have CocoaPods installed as described in the Capacitor documentation. Once you have done that you should change into the directory of your project that contains the Podfile:
cd ios/Pluginand then you should run:
pod installOnce that has completed, we are going to open up the project in XCode using the Plugin.xcworkspace file.
Open ios > Plugin > Plugin.xcworkspace in XCode
Once you open this, you should see some Plugin files:
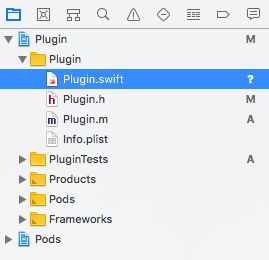
Just like in the previous tutorial, we have a Plugin.swift file and a Plugin.m file. If you have read the previous tutorial, then you can probably see where we are going with this. By default, the CLI generates us a nice template to work with based on the name of our project:
import Foundation
import Capacitor

/**
 * Please read the Capacitor iOS Plugin Development Guide
 * here: https://capacitor.ionicframework.com/docs/plugins/ios
 */
@objc(GetLatestPhoto)
public class GetLatestPhoto: CAPPlugin {

    @objc func echo(_ call: CAPPluginCall) {
        let value = call.getString("value") ?? ""
        call.success([
            "value": value
        ])
    }
}
But we will need to modify that to include the functionality of our plugin.
Modify Plugin/Plugin.swift to reflect the following:
import Foundation
import Capacitor
import Photos

@objc(GetLatestPhoto)
public class GetLatestPhoto: CAPPlugin {

    @objc func getLastPhotoTaken(_ call: CAPPluginCall) {

        let fetchOptions = PHFetchOptions()
        fetchOptions.sortDescriptors = [NSSortDescriptor(key: "creationDate", ascending: false)]
        fetchOptions.fetchLimit = 1

        let fetchResult = PHAsset.fetchAssets(with: .image, options: fetchOptions)

        if(fetchResult.count > 0){

            let image = getAssetThumbnail(asset: fetchResult.object(at: 0))
            let imageData:Data =  UIImagePNGRepresentation(image)!
            let base64String = imageData.base64EncodedString()

            call.success([
                "image": base64String
                ])

        } else {

            call.error("Could not get photo")

        }

    }

    func getAssetThumbnail(asset: PHAsset) -> UIImage {

        let manager = PHImageManager.default()
        let option = PHImageRequestOptions()

        var thumbnail = UIImage()
        option.isSynchronous = true

        manager.requestImage(for: asset, targetSize: CGSize(width: 500, height: 500), contentMode: .aspectFit, options: option, resultHandler: {(result, info)->Void in
            thumbnail = result!
        })

        return thumbnail
    }

}
This is exactly the same as the previous tutorial, except we have renamed it to GetLatestPhoto instead of PluginTest. We will also need to modify the .m file to register the plugin.
Modify Plugin/Plugin.m to reflect the following:
#import <Foundation/Foundation.h>
#import <Capacitor/Capacitor.h>

// Define the plugin using the CAP_PLUGIN Macro, and
// each method the plugin supports using the CAP_PLUGIN_METHOD macro.
CAP_PLUGIN(GetLatestPhoto, "GetLatestPhoto",
           CAP_PLUGIN_METHOD(getLastPhotoTaken, CAPPluginReturnPromise);
)
Whilst making these changes, if you get any errors like:
Cannot load underlying module for 'Capacitor'Just clean/build the XCode project by doing to Product > Clean, Product > Build and it should go away. If you are still having issues, make sure to run the pod update command:
pod updateinside of the ios/Plugin folder.
4. Publish to NPM
Now, all we need to do is publish the plugin to NPM! The project is already set up with the necessary configuration, so all you need to do is run:
npm publishand the package will be published to NPM. If you do not already have an NPM account set up, you will need to run the:
npm adduser5. Install & Use the Plugin in Ionic
Now that we have published the plugin, we can install it into an Ionic project (or any project using Capacitor) using the following command:
npm install capacitor-get-latest-photo --saveThis is my package – you should instead use the name of the package that you published (you can also feel free to install this one and test it out if you like!). Once the package is installed, you can use it in your project just like any other Capacitor plugin like this:
src/pages/home/home.ts
import { Component } from '@angular/core';
import { NavController } from 'ionic-angular';
import { Plugins } from '@capacitor/core';
import { GetLatestPhoto } from 'capacitor-get-latest-photo';

@Component({
  selector: 'page-home',
  templateUrl: 'home.html'
})
export class HomePage {

    constructor(public navCtrl: NavController) {

    }

    testPlugin(){

        const { GetLatestPhoto } = Plugins;

        GetLatestPhoto.getLastPhotoTaken().then((result) => {
            console.log(result);
        });

    }

}
You should now run:
npx cap updateand Capacitor should find your new plugin:
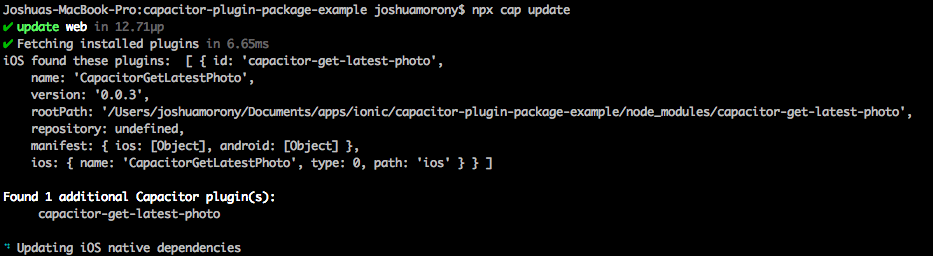
Then just build your project:
npm run buildCopy the web directory over to the native Capacitor project:
npx cap copyOpen up your project in XCode:
npx cap open iosand then run it! If you open up the Safari debugger you should be able to see the base64 data for the latest photo logged out to the console:

Summary
With relatively little effort, we have been able to create our own native plugin that can easily be added to any Ionic/Capacitor project. Building the plugin as its own NPM package will make it much easier to maintain and update across multiple projects, and the more people that publicly publish their Capacitor plugins the richer the Capacitor ecosystem will become.