One of the core concepts in Phaser is States. States split your game code up into logical chunks, and you progress through these states one at a time. Typically, you would have individual states for a level in your game, a title screen, a game over screen, a bonus round game, and so on. You can switch between states and go back to states that have already been used, but there is only ever one active state at a time.
In this tutorial, I am going to talk through how to create and use states in Phaser, as well as covering some general theory around how they work.
Before we Get Started
This post assumes that you are already at least somewhat familiar with Phaser. If you have never set up a Phaser game before, I would recommend reading Level up Your Phaser Games with ES6 first. This will set you up with a nice structure to start building HTML5 mobile games with Phaser.
For more Phaser tutorials, you can also check out the games category on the blog.
What is a State in Phaser?
When building HTML5 games with Phaser, we use the concept of States. A state is implemented using a JavaScript object, and allows us to modularise the different concerns of our game into separate chunks of code.
You might have the following states in a Phaser game, for example:
- Boot
- Preload
- GameTitle
- Main
- GameOver
and these are in fact states which I use in most of the games I create with Phaser. The Boot state handles any set up that is required (like setting the dimensions for the game) and calls the next state. Preload handles loading in any assets that are required and then launches the GameTitle state. GameTitle displays the title screen for the application, where a player can typically start the game, see instructions, or access the settings. Main is the main state for the application which will handle the logic for the game itself. GameOver displays the game over screen and will handle displaying the player’s score, allow them to reset the game, and so on.
Here’s what these states look like in one of the games I’ve created:
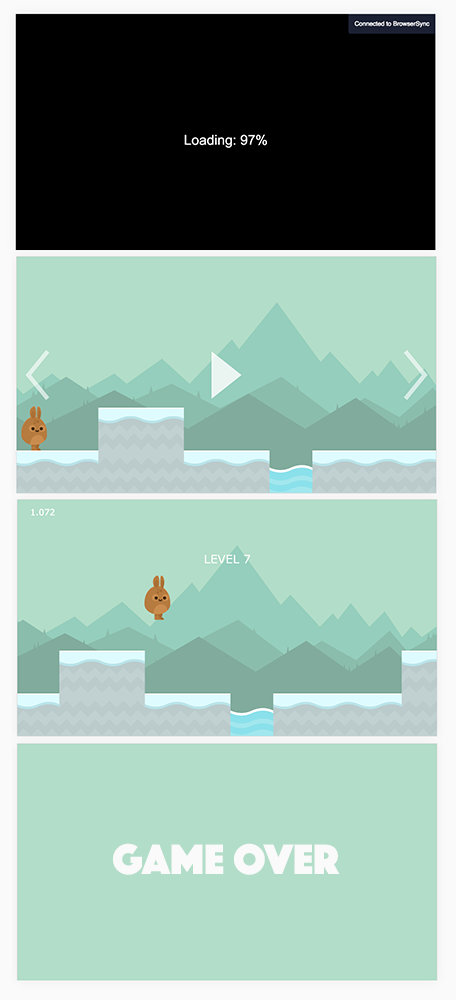
The only state missing in the screenshots above is the Boot state – we never actually see that on screen so I haven’t included it.
You can see how each of these states are separated logically. These aren’t the only states that can be created, they are just typical for a common mobile application. You can create as many states as you like. If you had a game with three different levels you might (or you might not) decide to create three separate states for those levels, e.g: LevelOne, LevelTwo, and LevelThree.
Using states has two main benefits:
- It allows us to organise our code, making it easier to build and maintain
- It allows us to manage each state individually, meaning we don’t have to keep everything for the entire game in memory all at once
Using States in Phaser
Now that we know what a state is, let’s walk through how to actually create them and use them.
1. Defining the State
Before we can bring a state to life, we must first create the blueprint for that state. In Object Oriented Programming (OOP), we have classes and objects. If this is a new concept to you, I would highly recommend that you learn a little about OOP in JavaScript before continuing.
In short, a class defines a blueprint for an object, and an object is an instance of the class. We can create multiple objects from a single class definition.
This is the concept we use to create our states in Phaser. We will first create a class to define our state object, and then we will use that object to do stuff.
The class for our states in Phaser will look something like this:
StateName.js
class StateName extends Phaser.State {
  preload() {}

  create() {}

  update() {}
}
All we need to do is create a new class that extends Phaser.State. As you can see, we have some methods defined in the class above, and these relate to the work a state does, but we will be discussing that a little later.
Where this JavaScript file for this state lives in your project will depend on how your project is structured. I would recommend following this structure if you do not have a preference.
2. Bringing a State to Life
Once we have a state, we need to add it into the game. To do this, we must first load the class wherever it is required – either through adding a <script> tag to your index.html file, or through importing into your index.js file if you are using an ES6 structure.
Then we need to call the state.add() method on the Phaser game instance, and supply it with the name of the state we created. In an ES6 style project, that would look like this:
import Boot from 'states/Boot';
import Preload from 'states/Preload';
import GameTitle from 'states/GameTitle';
import Main from 'states/Main';
import GameOver from 'states/GameOver';

class Game extends Phaser.Game {
  constructor() {
    super('100%', '100%', Phaser.AUTO, 'gameArea');

    this.state.add('Boot', Boot, false);
    this.state.add('Preload', Preload, false);
    this.state.add('GameTitle', GameTitle, false);
    this.state.add('Main', Main, false);
    this.state.add('GameOver', GameOver, false);

    this.state.start('Boot');
  }
}

new Game();
This will set up all of the five states. Once we have added the states, they will be available to use throughout the game. You may notice that the last line in the constructor method above looks like this:
this.state.start('Boot');this is how we start a state once it has been added to the game. This will kick off the entire process for the game, because the Boot state will handle starting the Preload state, the Preload state will handle starting the GameTitle state, and so on.
You can also restart a state by calling the restart method:
this.state.restart();Outside of the Game class, like in the states themselves, we need to make sure we are referencing the game object when working with states. So, inside of your states, the code to interact with states will look more like this:
this.game.state.start('SomeState');
this.game.state.restart();
Since, from within a state, the this keyword will reference the state, not the game object.
3. The Life of a State
We’ve created a state, we’ve added it to the game, and we’ve switched to it – it’s got center stage , so now what? What does a state do throughout its lifetime?
Let’s take a look at some code I showed earlier:
class StateName extends Phaser.State {
  preload() {}

  create() {}

  update() {}
}
I mentioned before that these methods related to the work that a state does. These methods are triggered automatically by Phaser, and perform different tasks.
The preload method is triggered first and is typically used to load any assets that are required (like sprites and sound effects).
The create method is called after preload has finished, it runs once and is used to do the initial set up for the game.
The update method starts after create has finished, and then it is continuously called as part of the “game loop”. This method is where most of the fun happens, as it can be used to make decisions based on the current state of the game – is the player touching an enemy, is there less than 10 seconds remaining, are there multiple enemies on screen?
These are not all of the available methods, but they are the ones you will use most commonly. The other methods available are:
initloadRenderloadUpdatepausedpauseUpdatepreRenderrenderresizeresumedshutdown
For more information on what these do, you can take a look at the documentation.
4. The Death of a State
Is there life after death for a state in Phaser? Depending on how we go about ending a state, it may have lasting effects even after it’s gone.
When we switch to a new state, the previous state’s shutDown method is called first, and everything that was added to the world (like sprites and any other objects you may have added) is cleared completely by default. Anything that is added to the Stage instead of the World is not cleared during a state change.
Getting into the difference between the concept of the Stage and World is a bit beyond the scope of this tutorial, but let’s briefly cover what they are so the concept isn’t completely foreign. The Stage sits at the root of everything, and the World is a container that sits on that stage. The World is where most of your game objects will live, and we can use the Camera in Phaser to view part, or all, of the World. Typically you would add everything to the World, but you may also want to add something “above” the world (i.e. on the stage), like any UI elements that you want to persist throughout the game.
When switching to a new state, we can also supply some optional parameters:
this.state.start('Main', true, false);The first optional parameter is clearWorld and the second is clearCache. If we wanted to, we could set clearWorld to false, in which case objects that were added to the world would not be cleared. So, anything added by the state will remain even after the state is shut down. The clearCache option will also clear all loaded assets (i.e. the assets you would load in the preload method). Anything that has been added to the Stage, not the World, will also remain after a state is shut down.
Summary
Once you are familiar with them, states are quite easy to work with in Phaser and are a great way to organise the code for your games.