

I’ve been building out some software recently that involves uploading a bunch of files at once to a server, so I figured it would be worthwhile to share the solution I ended up with in this blog post.
The solution is based around using the ng2-file-upload package, but we will be building that into a custom component so that we can easily drop all of the bits-and-bobs we need into the application in a single line of code. The end result will look like this:
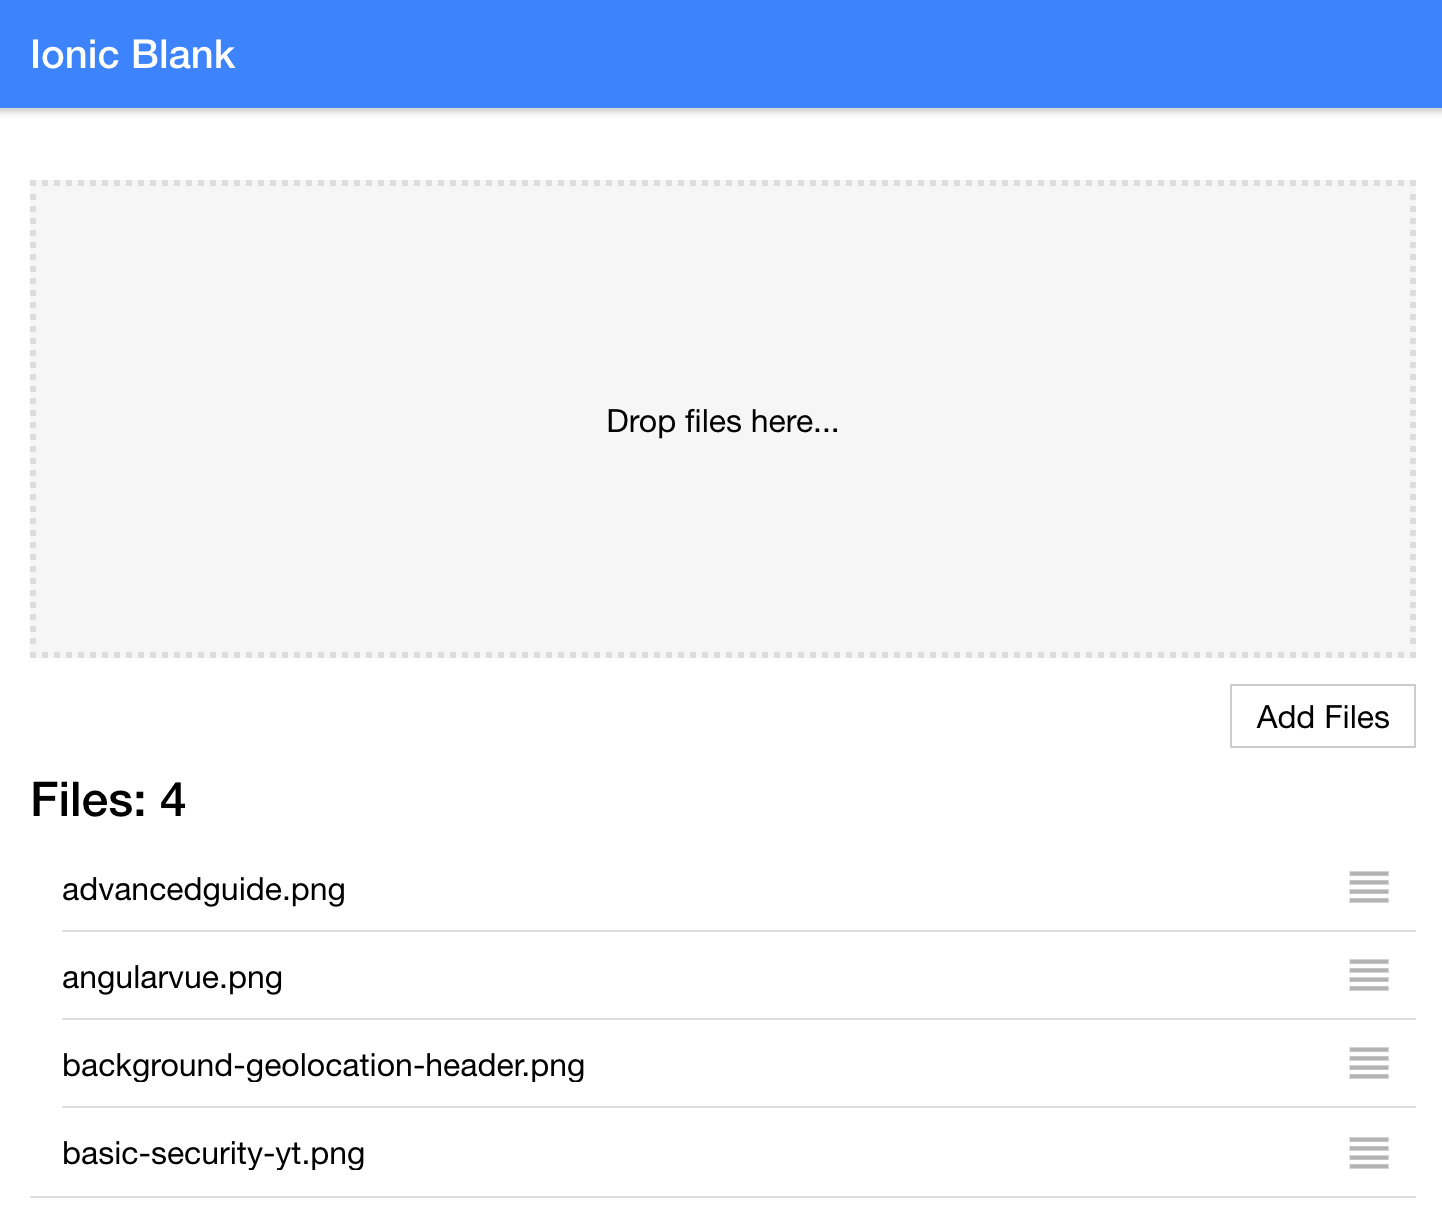
The custom component will also include a list that previews all of the files that have currently been added, as well as the ability to reorder those files.
We will be covering just what is required on the client side to send the files to a server, we won’t be implementing the server-side where you would want to actually do something with those files (I likely will write another tutorial on doing that with NestJS soon). It is also worth noting that this functionality ties into a standard file input component, i.e:
<input type="file" />We won’t be covering cases where perhaps you might want to upload a picture taken with the device’s camera, or perhaps through using the Filesystem on an iOS/Android device.
Before We Get Started
Last updated for Ionic 4, beta.13
Before you go through this tutorial, you should have at least a basic understanding of Ionic concepts. You must also already have Ionic set up on your machine, and an Ionic project created.
If you’re not familiar with Ionic already, I’d recommend reading my Ionic Beginners Guide first to get up and running and understand the basic concepts. If you want a much more detailed guide for learning Ionic, then take a look at Building Mobile Apps with Ionic.
1. Install ng2-file-upload
As I mentioned, we will be using the ng2-file-upload package to provide the functionality we will be making use of. In order to install that, you will need to run the following command in your project:
npm install --save ng2-file-uploadThis package will provide us with two directives. The ng2FileDrop directive will allow us to create an area where a user can drag and drop multiple files, and the ng2FileSelect directive will allow us to create a standard input button that allows for selecting multiple files.
2. Create the Multi-File Upload Component
It is not entirely necessary to create a custom component. You could just use these directives directly in your templates. However, we will be building out a few more features around this functionality, so we are going to bundle that into its own component.
Run the following command to create the component:
ionic g component components/MultiFileUploadWith the component generated, we can start to work through implementing the functionality. Before we do that, I think it is important to have a basic understanding of the different ways in which we can encode and send data through forms. Specifically, we will want to understand the difference multipart/form-data (which we will be using) and the more generic application/x-www-form-urlencoded which is used by default with forms.
3. Understanding Multipart Form Data
Generally, when data is submitted through forms, that data is sent using the default application/x-www-form-urlencoded encoding type. However, when we use <input type="file"> in a form, we need to use the multipart/form-data encoding type. When data is sent with the default encoding it is basically treated like a long query string that you would be able to send through a URL.
Using multipart/form-data allows us to send more complex data which is required for transmitting files. It allows for sending key/value pairs where we can associate a different value with each key. This method for sending data is more robust, but it does have more overhead than the simpler URL encoded approach.
It is not really important to understand the particulars of how this all works behind the scenes, but it is useful to understand that there is a reason for the existence of these different encoding types.
As you will see in the following section, we don’t actually set up the multipart/form-data encoding type on our form (in fact, we don’t use a form at all). Instead, we are manually creating a FormData object and assigning values to it.
Creating this FormData object manually basically just mimics the way data would be submitted through a standard <form> if its encoding type was set to multipart/form-data. This allows us to assemble all of the data we want to send programmatically in a set of key/value pairs.
4. Implementing the Component
Now let’s work on implementing the upload component itself. We will add the code for the various files and then talk through what is happening.
Modify src/app/components/multi-file-upload/multi-file-upload.ts to reflect the following:
import { Component } from '@angular/core';
import { FileUploader, FileLikeObject } from 'ng2-file-upload';

@Component({
  selector: 'app-multi-file-upload',
  templateUrl: './multi-file-upload.component.html',
  styleUrls: ['./multi-file-upload.component.scss']
})
export class MultiFileUploadComponent {

  public uploader: FileUploader = new FileUploader({});
  public hasBaseDropZoneOver: boolean = false;

  constructor() {

  }

  getFiles(): FileLikeObject[] {
    return this.uploader.queue.map((fileItem) => {
      return fileItem.file;
    });
  }

  fileOverBase(ev): void {
    this.hasBaseDropZoneOver = ev;
  }

  reorderFiles(reorderEvent: CustomEvent): void {
    let element = this.uploader.queue.splice(reorderEvent.detail.from, 1)[0];
    this.uploader.queue.splice(reorderEvent.detail.to, 0, element);
  }

}
In this file, we are setting up some variables and methods that we will be making use of in the template. The uploader is the object that will handle keeping track of all of the files that are being uploaded, and the hasBaseDropZoneOver will be used to modify some styles in the template when the “drop zone” is being hovered over with files (which we are also using the fileOverBase method for).
We have implemented a getFiles() method which will just allow us to easily grab an array of all of the files that have been uploaded (which we will then send off in a POST request from somewhere else).
The reorderFiles method is just used to rearrange the list that displays the files that have been uploaded. We make sure to move the files around in the uploader queue itself so that the reordering changes are reflected in the actual files that will be uploaded.
If you would like more information on how list reordering works in Ionic 4, you can take a look at my Reordering List Items tutorial.
Modify src/app/components/multi-file-upload/multi-file-upload.ts to reflect the following:
<div
  ng2FileDrop
  [ngClass]="{'nv-file-over': hasBaseDropZoneOver}"
  (fileOver)="fileOverBase($event)"
  [uploader]="uploader"
  class="drop-zone"
>
  Drop files here...
</div>

<div class="file-input-container">
  <label>
    <input type="file" ng2FileSelect [uploader]="uploader" multiple />
    Add Files
  </label>
</div>

<h2>Files: {{ uploader?.queue?.length }}</h2>

<ion-list>
  <ion-reorder-group (ionItemReorder)="reorderFiles($event)" disabled="false">
    <ion-item *ngFor="let item of uploader.queue">
      <ion-label> {{ item?.file?.name }} </ion-label>
      <ion-reorder></ion-reorder>
    </ion-item>
  </ion-reorder-group>
</ion-list>
The <div> at the top is what is being used as our “drop zone” where the user can drag and drop files. We hook into that hasBaseDropZoneOver variable so that we can conditionally apply the nv-file-over class to change its style. Notice that we also attach the ng2FileDrop directive to this <div>.
We also set up a button for manually adding files, and we attach the ng2FileSelect directive to that (as well as associating it with the same uploader).
Then we just have our list that will list all of the files currently in the uploader queue. Again, if you would like to know more about reordering list items then take a look at this tutorial.
Finally, we are just going to add a few styles to this component.
Modify src/app/components/multi-file-upload/multi-file-upload.scss to reflect the following:
.drop-zone {
  background-color: #f6f6f6;
  border: dotted 3px #dedddd;
  height: 30vh;
  display: flex;
  align-items: center;
  justify-content: center;
  margin: 20px 0;
}

.file-input-container {
  text-align: right;

  input[type='file'] {
    display: none;
  }

  label {
    border: 1px solid #ccc;
    padding: 6px 12px;
    cursor: pointer;
  }
}

.nv-file-over {
  border: dotted 3px red;
}
A lot of this is just simple styling that you can modify to suit your needs, however, it is worth noting this rule:
input[type='file'] {
  display: none;
}
We need to use the file input button, but we created our own button rather than using the default. Since we have done this, we need to make sure that we hide the default button using the rule above.
5. Add the Component to a Page
Before we can use the component, we need to set up a few things. Specifically, we need to add both the component we created and the FileUploadModule from the ng2-file-upload package to the module file for the page we want to use it on. We will walk through an example of adding it to the home page.
Modify src/app/home/home.module.ts to reflect the following:
import { NgModule } from '@angular/core';
import { CommonModule } from '@angular/common';
import { IonicModule } from '@ionic/angular';
import { FormsModule } from '@angular/forms';
import { RouterModule } from '@angular/router';

import { HomePage } from './home.page';
import { MultiFileUploadComponent } from '../components/multi-file-upload/multi-file-upload.component';
import { FileUploadModule } from 'ng2-file-upload';

@NgModule({
  imports: [
    CommonModule,
    FormsModule,
    IonicModule,
    FileUploadModule,
    RouterModule.forChild([
      {
        path: '',
        component: HomePage,
      },
    ]),
  ],
  declarations: [HomePage, MultiFileUploadComponent],
})
export class HomePageModule {}
As you can see, we’ve added the MultiFileUploadComponent to the declarations and we have also added the FileUploadModule to the imports.
Now we just need to add it to the template.
Modify src/app/home/home.page.html to reflect the following:
<ion-header>
  <ion-toolbar color="primary">
    <ion-title> Ionic Blank </ion-title>
  </ion-toolbar>
</ion-header>

<ion-content padding>
  <app-multi-file-upload></app-multi-file-upload>
</ion-content>
The user will now be able to upload files in the application, but we still need to be able to grab those files and send them off to the server. Let’s take a look at a quick example.
Modify src/app/home/home.page.ts to reflect the following:
import { Component, ViewChild } from '@angular/core';
import { MultiFileUploadComponent } from '../components/multi-file-upload/multi-file-upload.component';

@Component({
  selector: 'app-home',
  templateUrl: 'home.page.html',
  styleUrls: ['home.page.scss'],
})
export class HomePage {
  @ViewChild(MultiFileUploadComponent) fileField: MultiFileUploadComponent;

  constructor() {}

  upload() {
    let files = this.fileField.getFiles();
    console.log(files);

    let formData = new FormData();
    formData.append('somekey', 'some value'); // Add any other data you want to send

    files.forEach((file) => {
      formData.append('files[]', file.rawFile, file.name);
    });

    // POST formData to Server
  }
}
Now to send the files off to a server somewhere, we could call this upload function from the template. As you can see, we retrieve an array of all of the files form our MultiFileUploadComponent by first getting a reference to it using @ViewChild and then calling the getFiles method we created.
We then create a FormData object that we talked about before. To assign key/value pairs to this FormData object we can call the append method. You can add additional kinds of data to send along here if you like, but the important part is that we loop over each file that was uploaded and append it to the files[] key. We include both the file itself (the “raw” file) and the name of the file.
Finally, you would just need to launch a POST request to send that formData somewhere. If you would like to see an example of sending/receiving data through a POST request you might want to read: Sending Data with POST Requests to a NestJS Backend.
If you were to run this application in the browser now, you should see something like this:
Summary
We now have a component that we can easily drop anywhere in our application to accept multiple file uploads from the user.
Of course, we have just covered half of the battle in this post. There is still the matter of doing something with the data that is received on the server side. Exactly how that looks is going to depend on what exactly it is you are using on the server-side, but I do plan on creating an example specifically for NestJS soon.