

Learning Vue for Ionic/Angular Developers – Part 2: Navigation (this tutorial)
Learning Vue for Ionic/Angular Developers – Part 3: Services/Providers and HTTP Requests
Learning Vue for Ionic/Angular Developers – Part 4: Storing Data with Local Storage, IndexedDB, WebSQL, and SQLite
Learning Vue for Ionic/Angular Developers – Part 5: Building with Cordova and the Vue CLI
In this tutorial, we are going to start by covering the absolute basics of routing/navigation in Vue, and then we are going to look at how to navigate through an Ionic application using Vue.
It’s simple enough to include Ionic’s web components in a Vue application (or anything else) just by dumping them into the template as you would with Angular, but things get a little more complicated when we want to navigate between pages. In Angular, we would just use the NavController that the ionic-angular package provides, but with Vue we will be relying on Vue’s own routing.
NOTE: Ionic 4 (which allows us to use Ionic outside of Angular) is still in early alpha – please keep in mind that this is somewhat experimental and certainly not production ready.
Navigation in Vue
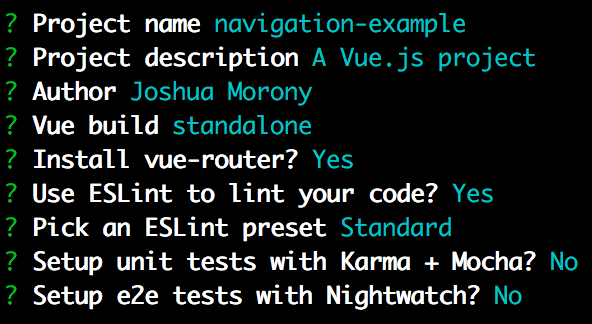
As I mentioned in the last part, Vue is more lightweight and less opinionated than Angular. Angular provides just about everything out of the box, but Vue leaves you to fill in some of the blanks. Navigation is one of these blanks that you will need to fill in, but although you can use whatever routing you like with Vue, Vue does have a default router that you can set up during project creation:
If you choose to use the Vue router, it will generate your project such that support for routing is set up automatically. If you were to take a look at the src/App.vue you would find that a <router-view/> tag is added:
<template>
  <div id="app">
    <img src="./assets/logo.png" />
    <router-view />
  </div>
</template>
This is similar in concept to Ionic’s <ion-nav> component that serves as a container for navigating between various pages. Whatever view is active will displayed wherever this <router-view/> tag is.
You will now also find a router folder inside of your project, and if you were to take a look at the router/index.js file you would see the following:
import Vue from 'vue';
import Router from 'vue-router';
import HelloWorld from '@/components/HelloWorld';

Vue.use(Router);

export default new Router({
  routes: [
    {
      path: '/',
      component: HelloWorld,
    },
  ],
});
This defines all of the “routes” for the application. If you are used to using Ionic (opposed to vanilla Angular) then you may not be familiar with defining explicit routes like this, but the concept is pretty straightforward. We need to supply a path which will be the URL associated with the page, and a component that specifies which component should be used for that page. We can add as many routes as we like here by adding additional objects to the routes array.
If you want to switch to any particular route, you just need to link to it using the <router-link> tag like this:
<router-link to="/detail">Go to the Detail Page</router-link>or if you wanted to create a method that handles switching to another page you could define the following method:
methods: {
    goToDetail () {
      this.$router.push('detail')
    }
  }
and trigger that method in your template:
<button @click="goToDetail">Go to the Detail Page</button>Also, if you take a look in your src/main.js file, you will find that the router is also being set up here:
import Vue from 'vue';
import App from './App';
import router from './router';

Vue.config.productionTip = false;

/* eslint-disable no-new */
new Vue({
  el: '#app',
  router,
  template: '<App/>',
  components: { App },
});
This is set up by default when using the CLI so it’s not something you need to particularly worry about, but it is important that it is included when instantiating a new Vue application.
Navigating in an Ionic/Vue Application
Now that we’ve covered the basics let’s see how navigation would apply to an Ionic application that is built using Vue. In order to make Ionic web components available in our Vue application, we will need to add the following line to the index.html file:
<script src="https://unpkg.com/@ionic/core@0.0.2-20/dist/ionic.js"></script>Remember, this is an early alpha version of Ionic 4 that is being included. This alone is almost enough to get us up and running with Ionic, but there are a couple more steps.
If you attempt to view the application on a mobile device, it will not scale properly. In order for the application to display properly on mobile, we need to set up the viewport correctly using a <meta> tag. We can get the tags we need just by copying them from a normal Ionic/Angular application.
Add the following meta tags to index.html:
<meta
  name="viewport"
  content="width=device-width, initial-scale=1.0, minimum-scale=1.0, maximum-scale=1.0, user-scalable=no"
/>
<meta name="format-detection" content="telephone=no" />
<meta name="msapplication-tap-highlight" content="no" />
Since we are using web components, we are attempting to add tags into our Vue application that don’t exist in normal HTML, and that aren’t defined as components in Vue. If we attempt to use the Ionic components in our Vue application, we will run into errors like this:
[Vue warn]: Unknown custom element: <ion-app>So that Vue doesn’t complain about these “unknown” custom elements, we need to set up the following configuration in src/main.js:
// The Vue build version to load with the `import` command
// (runtime-only or standalone) has been set in webpack.base.conf with an alias.
import Vue from 'vue';
import App from './App';
import router from './router';

Vue.config.productionTip = false;

Vue.config.ignoredElements = [
  'ion-app',
  'ion-header',
  'ion-navbar',
  'ion-title',
  'ion-content',
  'ion-button',
];

/* eslint-disable no-new */
new Vue({
  el: '#app',
  router,
  template: '<App/>',
  components: { App },
});
You should add any Ionic components that you want to use to the ignoredElements array – you don’t need to include Ionic components that you are not using.
Now that we can use Ionic components in our Vue application, let’s “Ionic-ify” our existing HelloWorld component.
Modify src/components/HelloWorld.vue to reflect the following:
<template>
  <ion-app>
    <ion-header>
      <ion-navbar>
        <ion-title>Ionic</ion-title>
      </ion-navbar>
    </ion-header>

    <ion-content>
      <ion-button @click="goToDetail">Hello</ion-button>
    </ion-content>
  </ion-app>
</template>

<script>
  export default {
    name: 'HelloWorld',
    data() {
      return {
        msg: 'Welcome to Your Vue.js App',
      };
    },
    methods: {
      goToDetail() {
        this.$router.push('detail');
      },
    },
  };
</script>

<style scoped></style>
Now we are just using Ionic components as we usually would to create the template. We have also set up a @click handler that triggers the goToDetail method. This will push the detail page, but we haven’t created that yet. As you can see, this isn’t all that dissimilar to Ionic/Angular. Instead of triggering our method with (click) we use @click, and instead of pushing with the NavController we are pushing through the $router. It looks a little different, but the same basic concept is there.
Creating a New Ionic Page in Vue
We are attempting to push this “Detail” page but we haven’t actually created that component yet, and we haven’t set up a route for it. We are going to do that now.
Create a file at src/components/Detail.vue and add the following:
<template>
  <ion-app>
    <ion-header>

        <ion-navbar>
            <ion-title>Ionic</ion-title>
        </ion-navbar>

    </ion-header>

    <ion-content padding>

        <p><router-link to="/">Go home</router-link></p>

    </ion-content>
  </ion-app>
</template>

<script>
export default {
  name: 'Detail',
  data () {
    return {
      msg: 'Welcome to Your Vue.js App'
    }
  }
}
</script>

<style scoped>

</style>
This component is quite similar to our HelloWorld component, just a little simpler. This time, we are using the <router-link> tag to link back to the home page. In an Ionic applicaiton, you wouldn’t typically use a text link for navigation like this, but I wanted to demonstrate this method of navigation.
With the component defined, let’s create the route for it.
Modify router/index.js to reflect the following:
import Vue from 'vue';
import Router from 'vue-router';
import HelloWorld from '@/components/HelloWorld';
import Detail from '@/components/Detail';

Vue.use(Router);

export default new Router({
  routes: [
    {
      path: '/',
      component: HelloWorld,
    },
    {
      path: '/detail',
      component: Detail,
    },
  ],
});
We are importing the Detail component that we just created, and then we set up its route. Now we can navigate freely between our two Ionic pages in Vue.
Animating Page Transitions
We can now navigate between two Ionic pages in Vue, but if you run this code you will probably notice that the transition occurs instantly. This can be a bit jarring, as there is typically some kind of page transition animation when transitioning between two pages.
This is something that Ionic handles for us automatically in Angular with the NavController, but we’re not using that here, so what can we do?
Fortunately, Vue has pretty good support for performing transition animations like this. In order to set up a global transition animation, we will be using one of the examples from the Vue documentation.
Modify src/App.vue to reflect the following:
<template>
  <div id="app">
    <transition name="slide-fade">
      <router-view/>
    </transition>
  </div>
</template>

<script>
export default {
  name: 'app'
}
</script>

<style>
#app {
  font-family: 'Avenir', Helvetica, Arial, sans-serif;
  -webkit-font-smoothing: antialiased;
  -moz-osx-font-smoothing: grayscale;
  text-align: center;
  color: #2c3e50;
  margin-top: 60px;
}

/* Enter and leave animations can use different */
/* durations and timing functions.              */
.slide-fade-enter-active {
  transition: all .3s ease;
}
.slide-fade-leave-active {
  transition: all .8s cubic-bezier(1.0, 0.5, 0.8, 1.0);
}
.slide-fade-enter, .slide-fade-leave-to
/* .slide-fade-leave-active below version 2.1.8 */ {
  transform: translateX(10px);
  opacity: 0;
}
</style>
We have wrapped the <router-view> in a <transition> tag, which can animate components as they enter/leave. We attach an animation called “slide-fade” to that, which is defined in the style tag for the component. After making this modification, if you were to switch between the pages in the application you should notice that the transition is now animated.
This isn’t quite as nice as the default transitions that Ionic provides in Angular, but you can use more complex transitions if you like – it’s just a matter of defining the animation appropriately. If you prefer, you can also set up specific animations for specific pages, rather than having a single global animation. For more information, I’d recommend taking a look at this guide.
Summary
The key differences between navigation in Ionic/Angular and Ionic/Vue is that we need to define our own routes in Vue, and we also need to handle the page transition animations since we aren’t relying on the NavController. Aside from a few minor differences, though, the basic concept is more or less the same as navigating through an Ionic application in Angular.