

Advertisements, although not always the best way to monetise a venture, are one of the easiest ways to potentially earn some money from an application or website. Google’s advertisement platform allows you to easily implement advertisements without having to secure deals with advertisers yourself – you display Google’s ads and you get a percentage of the cost for those ads.
Google has a service specifically for mobile applications called AdMob. In this tutorial, we will be covering how to add Google AdMob to an Ionic application. We will cover both banner ads (which display a horizontal banner at the bottom of your application) and interstitial ads (which pop up and cover the entire screen).
Before We Get Started
Last updated for Ionic 3.1.0
Before you go through this tutorial, you should have at least a basic understanding of Ionic concepts. You must also already have Ionic set up on your machine.
If you’re not familiar with Ionic already, I’d recommend reading my Ionic Beginners Guide or watching my beginners series first to get up and running and understand the basic concepts. If you want a much more detailed guide for learning Ionic, then take a look at Building Mobile Apps with Ionic.
1. Generate a New Ionic Application
We’re going to start by generating a new blank Ionic application, to do that just run the following command:
ionic start ionic-admob blankOnce that has finished generating, you should make it your working directory:
cd ionic-admob2. Integrate the AdMob Plugin
In order to use Google AdMob, we will need to use a Cordova plugin. There are a few plugins available that we can use, but we will be using one called AdMob Free. As you can likely tell from the name, this is a free to use community maintained plugin.
Run the following commands to install the AdMob Free plugin
cordova plugin add cordova-plugin-admob-free --save
npm install @ionic-native/admob-free --save
This will install the Cordova plugin and the Ionic Native package that we will be using to help use the plugin. We will also need to set this plugin up in the application.
Modify src/app/app.module.ts to reflect the following:
import { BrowserModule } from '@angular/platform-browser';
import { ErrorHandler, NgModule } from '@angular/core';
import { IonicApp, IonicErrorHandler, IonicModule } from 'ionic-angular';
import { SplashScreen } from '@ionic-native/splash-screen';
import { StatusBar } from '@ionic-native/status-bar';
import { AdMobFree } from '@ionic-native/admob-free';

import { MyApp } from './app.component';
import { HomePage } from '../pages/home/home';

@NgModule({
  declarations: [MyApp, HomePage],
  imports: [BrowserModule, IonicModule.forRoot(MyApp)],
  bootstrap: [IonicApp],
  entryComponents: [MyApp, HomePage],
  providers: [
    StatusBar,
    SplashScreen,
    AdMobFree,
    { provide: ErrorHandler, useClass: IonicErrorHandler },
  ],
})
export class AppModule {}
We have added AdMobFree as a provider, so now we will be able to inject it anywhere that we need in our application.
3. Create a Google AdMob Account
In order to display real advertisements in your application, you will need to set up your Google AdMob account (although, you can skip this for now and just use test advertisements if you like).
To create an account you should go here and sign up. Once you have logged in, you will need to click this button:

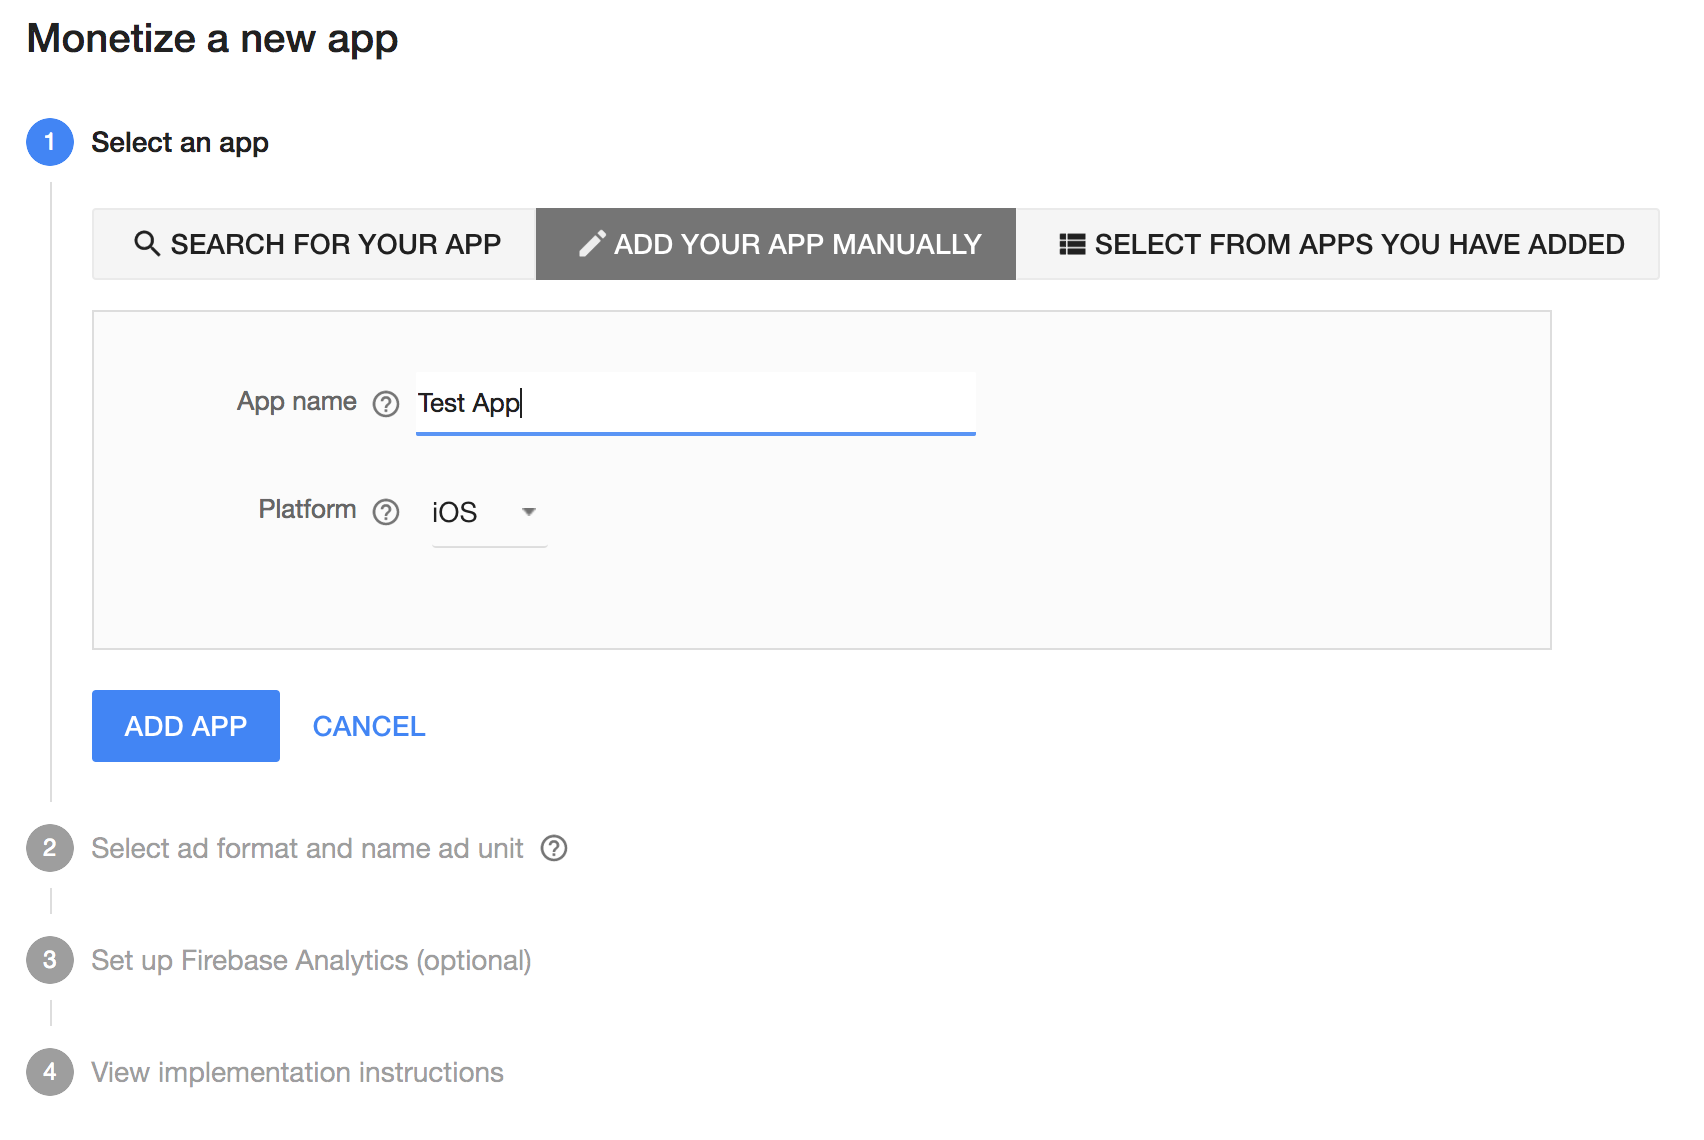
From there, you will be able to create a new ad unit. First, you will need to add your application:
and then create the advertisements that you want to use:
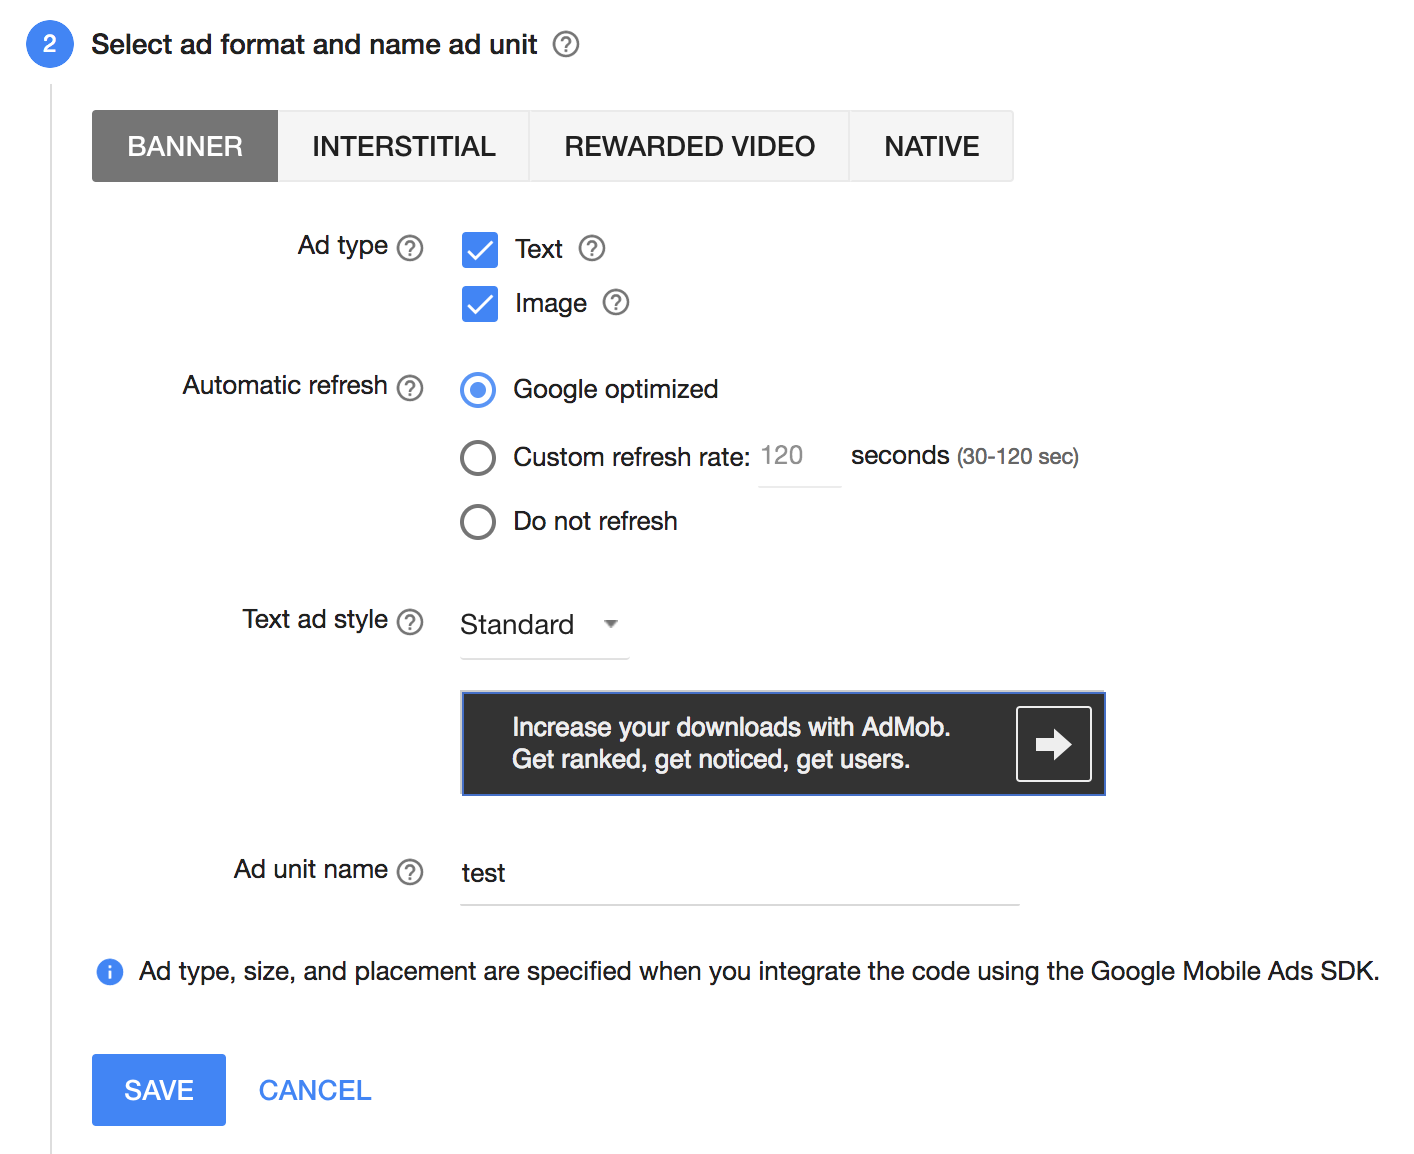
and then you will be able to grab the Ad Unit ID, which you will be able to use to display your ad (you will supply this to the plugin later).
4. Create a Banner Advertisement
First, let’s try creating a banner advertisement. Using this plugin is actually really simple, we just need to provide a little configuration and then make a call to the prepare() function.
Modify src/pages/home/home.ts to reflect the following:
import { Component } from '@angular/core';
import { NavController } from 'ionic-angular';
import { AdMobFree, AdMobFreeBannerConfig, AdMobFreeInterstitialConfig } from '@ionic-native/admob-free';

@Component({
  selector: 'page-home',
  templateUrl: 'home.html'
})
export class HomePage {

    constructor(public navCtrl: NavController, public admob: AdMobFree) {

    }

    showBanner() {

        let bannerConfig: AdMobFreeBannerConfig = {
            isTesting: true, // Remove in production
            autoShow: true
            //id: Your Ad Unit ID goes here
        };

        this.admob.banner.config(bannerConfig);

        this.admob.banner.prepare().then(() => {
            // success
        }).catch(e => console.log(e));

    }

}
We create a configuration object for the banner ad, which we use to set isTesting to true (which will allow us to just use test ads for now) and autoShow to true (which will cause the ad to display as soon as it is ready). When you are using real advertisements, you should get rid of the isTesting flag and make sure to supply your Ad Unit ID using the id property.
We enable this configuration by calling the config function, and then we just call the prepare() function to create the advertisement. Once this banner is ready, it will automatically display at the bottom of your application.
For testing purposes, we will just trigger this code with a button click.
Modify src/pages/home/home.html to reflect the following:
<ion-header>
<ion-navbar>
<ion-title> Ionic Blank </ion-title>
</ion-navbar>
</ion-header>
<ion-content padding>
<button ion-button (click)="showBanner()">Show Banner</button>
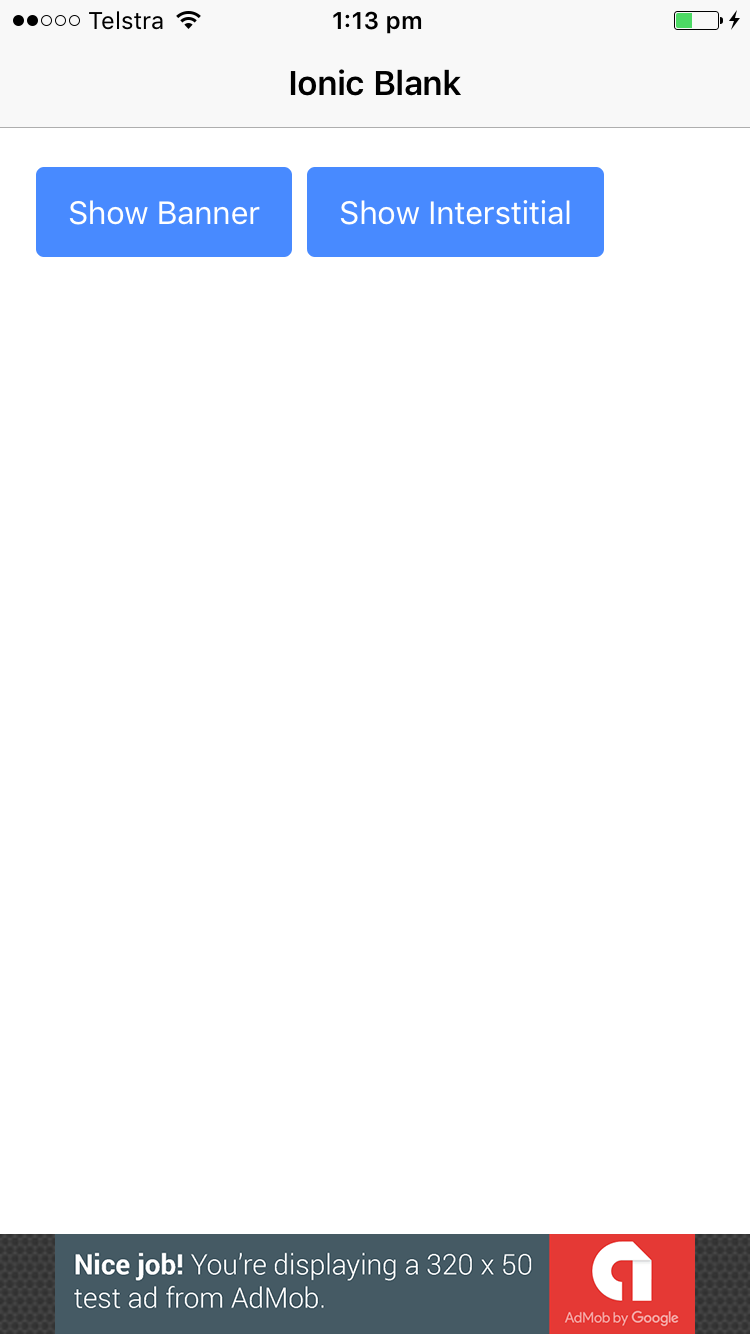
</ion-content>Here’s what it should look like:
5. Create an Interstitial Advertisement
Creating an interstitial advertisement is basically exactly the same. Let’s take a look.
Modify src/pages/home/home.ts to reflect the following:
import { Component } from '@angular/core';
import { NavController } from 'ionic-angular';
import { AdMobFree, AdMobFreeBannerConfig, AdMobFreeInterstitialConfig } from '@ionic-native/admob-free';

@Component({
  selector: 'page-home',
  templateUrl: 'home.html'
})
export class HomePage {

    constructor(public navCtrl: NavController, public admob: AdMobFree) {

    }

    showBanner() {

        let bannerConfig: AdMobFreeBannerConfig = {
            isTesting: true, // Remove in production
            autoShow: true
            //id: Your Ad Unit ID goes here
        };

        this.admob.banner.config(bannerConfig);

        this.admob.banner.prepare().then(() => {
            // success
        }).catch(e => console.log(e));

    }

    launchInterstitial() {

        let interstitialConfig: AdMobFreeInterstitialConfig = {
            isTesting: true, // Remove in production
            autoShow: true
            //id: Your Ad Unit ID goes here
        };

        this.admob.interstitial.config(interstitialConfig);

        this.admob.interstitial.prepare().then(() => {
            // success
        });

    }

}
The only difference here is that we make a call to interstitial instead of banner. We will of course also need to add a button to trigger the interstitial ad.
Modify src/pages/home/home.html to reflect the following:
<ion-header>
  <ion-navbar>
    <ion-title> Ionic Blank </ion-title>
  </ion-navbar>
</ion-header>

<ion-content padding>
  <button ion-button (click)="showBanner()">Show Banner</button>
  <button ion-button (click)="launchInterstitial()">Show Interstitial</button>
</ion-content>
Here’s what it will look like:

Summary
It can be quite difficult to make any significant amount of money from advertisements in mobile applications, and they can be quite annoying for users. But there is room to do it correctly, and in the right circumstances, the Google AdMob platform can be a great way to monetise an application.