

One of the most common ways to monetise a mobile application is to offer In App Purchases. An In App Purchase is something the user buys within your application after already having downloaded it. Typically an app that utilises In App Purchases will be free to download, and the user will be charged for premium content like the removal of mobile advertisements, unlocking more features or extra game items.
Apple has users credit cards on file, so when a user wants to make a purchase there is very little barriers to them doing so – this has a positive affect on the conversion from free users to paying users.
In App Purchases may be the best thing since ice cream, but they can be an awful pain to set up. So let’s walk through exactly how to set them up for your PhoneGap Build (or PhoneGap) application.
1. Create a new app in iTunes Connect
In order to add In App Purchases to your application you will need to be registered for the iOS Developer Program. You will also need to go through the process of creating provisioning profiles, certificates, adding devices ids and so on. So, before continuing, use this tutorial to:
- Create a new app ID
- Add devices
- Create a provisioning profile and .p12 file
Once you have done that, you will have everything necessary to install the application on your iOS device. With an App ID created, we can also create an entry for our application in iTunes Connect (which is also necessary for setting up In App Purchases).
iTunes Connect is where you submit your application, upload the store listing description, set the price and so on. It is also used to define other things like Game Center achivements and leaderboards as well as what we’re interested in, In App Purchases.
- Create a new app in iTunes Connect by going to My Apps and clicking the + icon
Once you’ve created your app in iTunes Connect you can define our In App Purchases.
- Click on your newly created app to manage it
- Go to the In-App Purchases section
- Click Create New
Before you can create In App Purchases you need to make sure you have agreed to the most recent Paid Applications agreements. If you have not already done this you will receive instructions on this screen about how to proceed.
Once your iOS Paid Applications agreement is in place you will be given a few different options:
Consumables are in app purchases that are ‘consumed’. This means that they are used and then they are gone. Typically this will be things like coins that are spent in game, or power ups that are used.
Non-consumables are in app purchases that are not consumed and only ever need to be purchased once by the user. These would include things like level, character or feature unlocks. It is important to note that you must provide a way for the user to restore these purchases if they are to switch to a different device for example (more on that later)
There are also Auto-Renewable Subscriptions, Free Subscriptions and Non-Renewing Subscriptions which, clearly, allow you to create subscriptions, but we won’t be discussing that in this tutorial.
- Choose whichever is necessary for your item, but in this tutorial we will be creating a Remove Ads In App Purchase. This would fall under Non-consumables so select that.
- Add a reference name to identify the in app purchase
- Add an id
- Enter the pricing and availability information
- Add at least one language. This will display the name of the purchase and description in the language appropriate to the user.
- You will be asked to upload a screenshot for review, but you can skip this for now since we are just testing the functionality and not submitting our application just yet.
Now let’s look at how to set up the In App Purchases plugin in our PhoneGap Build application.
2. Install the in app purchases plugin
We will be using the InAppPurchase plugin by Matt Kane and Jean-Christophe Hoelt to achieve this functionality.
- Add the following line to your config.xml file:
<gap:plugin name="cc.fovea.plugins.inapppurchase" version="3.4.0" />Easy. Now on to the hard bit…
3. Add the code to your application
So far we’ve set up our In App Purchases in iTunes Connect and made the plugin available to our application. Now we need to add code to our application that will allow us to load the products available, purchase them, and perform some action in the application based on what was purchased.
First we will create a list of all the In App Purchases that were created in iTunes Connect.
- Add the following code to your project to create an IAP object and add an array called list to it
IAP = {
  list: ['adfree'],
};
If you created more than one In App Purchase make sure to also add them to the array. Next we will create a load method for our IAP object.
- Add the following code to create the load method
IAP.load = function () {
  // Check availability of the storekit plugin
  if (!window.storekit) {
    console.log('In-App Purchases not available');
    return;
  }

  // Initialize
  storekit.init({
    debug: true, // Enable IAP messages on the console
    ready: IAP.onReady,
    purchase: IAP.onPurchase,
    restore: IAP.onRestore,
    error: IAP.onError,
  });
};
Here we are making use of the storekit object that the plugin has made available to our PhoneGap project. Storekit is used to interface between our application and the In App Purchases available in iTunes Connect. We call the init method which is supplied 4 callback functions: onReady, onPurchase, onRestore and onError. We will create those now.
- Create the onReady method
IAP.onReady = function () {
  storekit.load(IAP.list, function (products, invalidIds) {
    IAP.products = products;
    IAP.loaded = true;
    for (var i = 0; i < invalidIds.length; ++i) {
      console.log('Error: could not load ' + invalidIds[i]);
    }
  });
};
This method will load all of the In App Purchases available – you can use these returned products to display the appropriate information inside of your application. This is useful as Apple uses a tiered approach to pricing, which means that your In App Purchase will cost different amounts in different regions. So you can’t just create a static button that says your Super Duper Coin Pack costs $1.99.
- Create the onPurchase method
IAP.onPurchase = function (transactionId, productId, receipt) {
  if (productId === 'adfree') {
    alert('Ads Removed!');
    //Code to remove ads for the user
  }
};
This code will be triggered once a successful purchase has occurred. This is where you would place your code that removes the advertisements from the application. If you have multiple products, then you would place multiple if statements inside of this function testing for the different productId’s.
- Create the onRestore method
IAP.onRestore = function (transactionId, productId, transactionReceipt) {
  if (productId == 'adfree') {
    //Code to remove ads for the user
  }
};
As I mentioned before, if someone deletes your application, changes devices or something else that would cause them to lose their purchase then they must be able to restore it. You must provide the ability to trigger this restore process from somewhere in your application otherwise you will not make it past Apple’s review process. All you need to do is provide the same code here that you would have for the onPurchase method – it’s just like they are buying it again.
- Create the onError method
IAP.onError = function (errorCode, errorMessage) {
  console.log(errorCode);
  console.log(errorMessage);
};
If something went wrong, let’s find out about it!
- Create a buy method
IAP.buy = function (productId) {
  storekit.purchase(productId);
};
When we want to trigger a purchase, we will use this method to pass along the productId.
- Create a restore method
IAP.restore = function () {
  storekit.restore();
};
This will be used to trigger the restore process mentioned above.
Ok, we’re getting there! Our IAP object now has all the bells and whistles it needs. Now we just need to call the load method (make sure you trigger this after the deviceready event has fired)
- Call the load method once the device is ready
document.addEventListener(
  'deviceready',
  function () {
    IAP.load();
  },
  false
);
Now all that is left to do is trigger a purchase.
- Add the following code to trigger a purchase after the In App Purchases have been loaded
IAP.buy('adfree');You might think this would be the end of the tutorial, but we’ve got a way to go yet unfortunately! At this point if you try to trigger a purchase you will receive a login prompt for logging into your iTunes account, as you might expect. What you may not expect is to be greeted with the following error message:
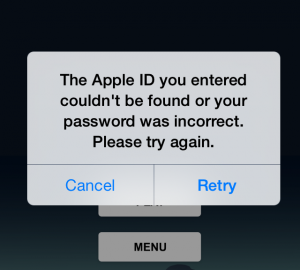
The Apple ID you entered couldn’t be found or your password was incorrect. Please try again.
You didn’t enter in your password incorrectly, it’s just that in order to test In App Purchases you will need to create a Sandbox Tester. You can do this by following these steps:
- Log into iTunes Connect
- Go to Users and Roles
- Click on Sandbox Testers
- Click the + icon to add a new tester
- Fill in the details of the tester account and hit Save
Assuming you filled out the form correctly, you should now receive a message saying that the Sandbox tester has been created. You will now need to sign into your test account:
- Go to Settings > iTunes & App Store on your device
- Click your Apple ID and then choose Sign out
- Replace your Apple ID and password with the Sandbox Tester Apple ID and password
You might think once again that we’d be done now but unfortunately not, you will now receive the following message:
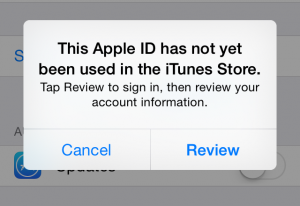
This Apple ID has not yet been used in the iTunes Store.
- Choose Review and make your way through the prompts (you will also need to enter in a credit card to associate with the account)
- Click the link in the verification email sent to your email address
Try triggering your In App Purchase again, this time logging in with your new Sandbox Tester account and:

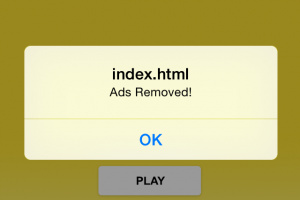
tada! You can now proceed with the purchase. Note that is says [Environment: Sandbox] so you won’t be charged for purchases (…at least I don’t think it does… don’t hold me to that!).
You can see from the image below that the “Ads Removed!” alert is being successfully triggered, which means the purchase has been successful. Now you would just need to replace that alert with some code that actually removes the advertisements from the application.
In App Purchases are a little tricky to set up and there’s certainly a few hoops you need to jump through, especially with PhoneGap Build. It’s one of the best ways to monetise your application though, so it’s certainly worth the effort.