

In this tutorial, we are going to walk through how to use Capacitor to deploy iOS applications. We will be covering how to get a Capacitor application running on an iOS device for development, all the way through to creating a build for distribution on the App Store.
We are going to do this starting from a completely blank slate to demonstrate how to set up the appropriate environment from scratch. For this tutorial, I created a separate profile on a new computer so that absolutely nothing was installed or configured beforehand.
I will be using an Ionic application as an example for this, but keep in mind that you don’t need to use Ionic in order to use Capacitor. Capacitor performs two main roles:
- Wrapping a web-based application in a native shell
- Facilitating communication between the web application and the Native APIs of the device the application is running on.
All you need to build your application with Capacitor is some web-based code to point it at, and so that doesn’t need to be an Ionic application (Ionic is certainly a great choice for developing a mobile app, though).
It is also worth noting that Capacitor is not just for iOS builds either, you can also use Capacitor to create builds for Android and Electron (for Desktop Apps). However, we will just be focusing on iOS in this tutorial.
Do I Need a Mac to Deploy to iOS?
Short answer: Yes. To follow the steps in this tutorial you will need a Mac. XCode is required as it provides the necessary SDKs for building iOS applications, and XCode will only run on macOS. If you do not have a Mac, some options available to you are:
- Using Ionic Package to handle creating the iOS build for you. NOTE: I do not believe this is available for Capacitor apps just yet
- Using a service like macincloud to access a Mac machine remotely
- Borrow a friends machine – if you are using something like Ionic, you can do most of your development in the browser. Although it helps to have access to native builds, you may be able to get away with just borrowing somebody else’s computer to perform the build step.
If you are able to get your hands on a computer with macOS that you can use on a frequent basis, it does help a great deal.
1. Sign up for the Apple Developer Program
In order to create iOS applications, you will need to enroll in the Apple Developer Program which has an annual fee of $99 for individuals and $299 for enterprises.
2. Install XCode
In order to run applications on your iOS device, and submit them to the App Store, you will need XCode. You can download this from the Apple App Store. In this example, we are using version 9.3 of XCode.
As well as installing XCode itself, you will also need to install Cocoapods and the XCode CLI tools. You can do that by running the following commands:
sudo gem install cocoapodsxcode-select --installOnce you have installed XCode, make sure to open it at least once so that it can install the necessary components.
3. Install the LTS Version of NodeJS
You will need to have Node installed on your machine in order to use Capacitor. I would recommend downloading the LTS version of NodeJS from the NodeJS website.
It is also a good idea to install the n library. This is a version manager for Node, and allows you to easily switch to whatever version of Node you want to use. Capacitor requires at least Node 8.6.0 for example, but other tools you use may require different versions. Using n allows you to run a one line command to switch between versions. To install n just run the following command:
npm install -g n
Then you can switch to whatever Node version you like using the following command format:
n 8.11.14. Create Your Web Application
At this stage, you will need your web application that you want to deploy to iOS. If you would like to follow along with Ionic as an example, you should first install ionic:
npm install -g @ionic/cliand then create a new application with the following command:
ionic startWhen you are asked if you want to enabled Capacitor you can say yes, but we will also cover adding it manually in a moment in case you say no at this stage. Once the project is generated, you should make it your working directory:
cd name-of-appSo that we have some built web code for Capacitor to package into the native application it generates, we should also create a build straight away:
ionic buildIf you are ready to submit a production version of your application, you should make sure that you are creating a production build (i.e. a build that is optimised/minimised). If you are using Ionic, that means you would run:
ionic build --prod5. Install Capacitor
Next, we want to set up Capacitor. To install Capacitor in your project, all you need to do is run the following command:
npm install --save @capacitor/core @capacitor/cliYou will then need to initialise the project by running:
npx cap initMake note of the identifier/bundle ID that you supply to Capacitor in this configuration step (e.g. com.example.yourapp). You will need to use this later to create an identifier for your application with Apple.
Once Capacitor is initialised, you should add the iOS platform:
npx cap add iosand then make sure your project is synced:
npx cap syncYou do not need to run the sync command each time you make changes to your project. If you are only making changes to the web code of your application, you can simply run the following command:
npx cap copywhich will update your native project with your web code. To open your project in XCode, you can run the following command:
npx cap open ios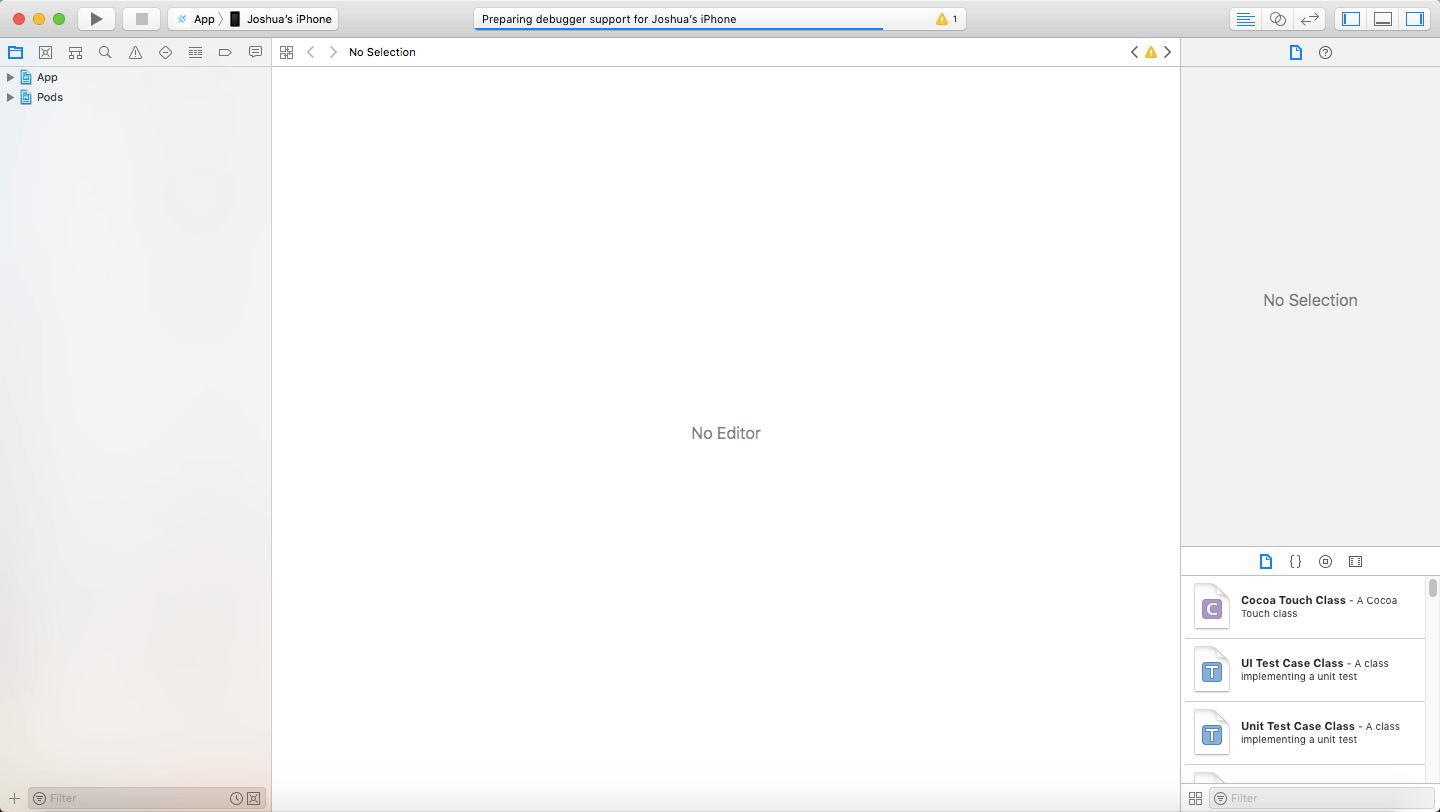
From this point onwards, we are basically just dealing with a normal native project. We just have our web code bundled in there.
6. Running the Application on an iOS Device
In the image above, you will see a little play icon near the top left. This is what you will use to run your application. By default it will be set to ‘Generic iOS Device’, but if you have your own device plugged in via USB you will be able to set it to run on that. You can also choose a simulator to run the application in if you like.
Let’s try and run the application now (make sure to attach and select your iOS device if you have one you want to use). When you are ready, click the ‘Play’ button.
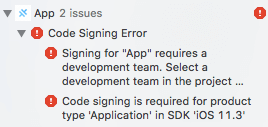
At this point, you should get an error that looks like this:
Signing for "App" requires a development team. Select a development team in the project...Code signing is required for product type 'Application'Apple requires that applications are “signed” in order to run on a device (and to be distributed on the App Store). This is basically a way to prove ownership of that application and to associate it with a particular Apple ID. In order to fix this error, you will need to set up signing for the application.
7. Sign the Application
To set up signing for the application, click App in the file explorer for the project in XCode:
This will bring you to a page that looks like this:

Click the Add account button to add a development team. All you need to do here is sign in with your account that you purchased the Apple Developer Program for.
Once you have signed in, make sure to change the Team to your account:

Hit the ‘Play’ button again, and this time the application should be installed on your device.
Distributing on the App Store
We have the application running on a device now, but there are a few more steps before we can distribute our application to everybody on the app store.
Before distributing your application, make sure you are submitting a production build of your application, and have run npx cap copy to copy that build to your native project (and npx cap sync if required).
NOTE: I will just be walking through the basic steps here. Submitting to the App Store is a lengthy process that involves setting up your splash images appropriately, supplying screenshots for the App Store, providing descriptions of the application, creating icons for the application and so on. If you are submitting your production application to the app store, make sure that you also complete all of these steps.
1. Create an Identifier
We will require an “Identifier” for our application, which is basically just a name/id associated with the application through the developer portal. You should first log in to your Developer Account and then go to:
- Certificates, IDs & Profiles
In this section, we are going to create an Identifier for our application. Under Identifiers, go to the App IDs section and hit the ’+’ button:
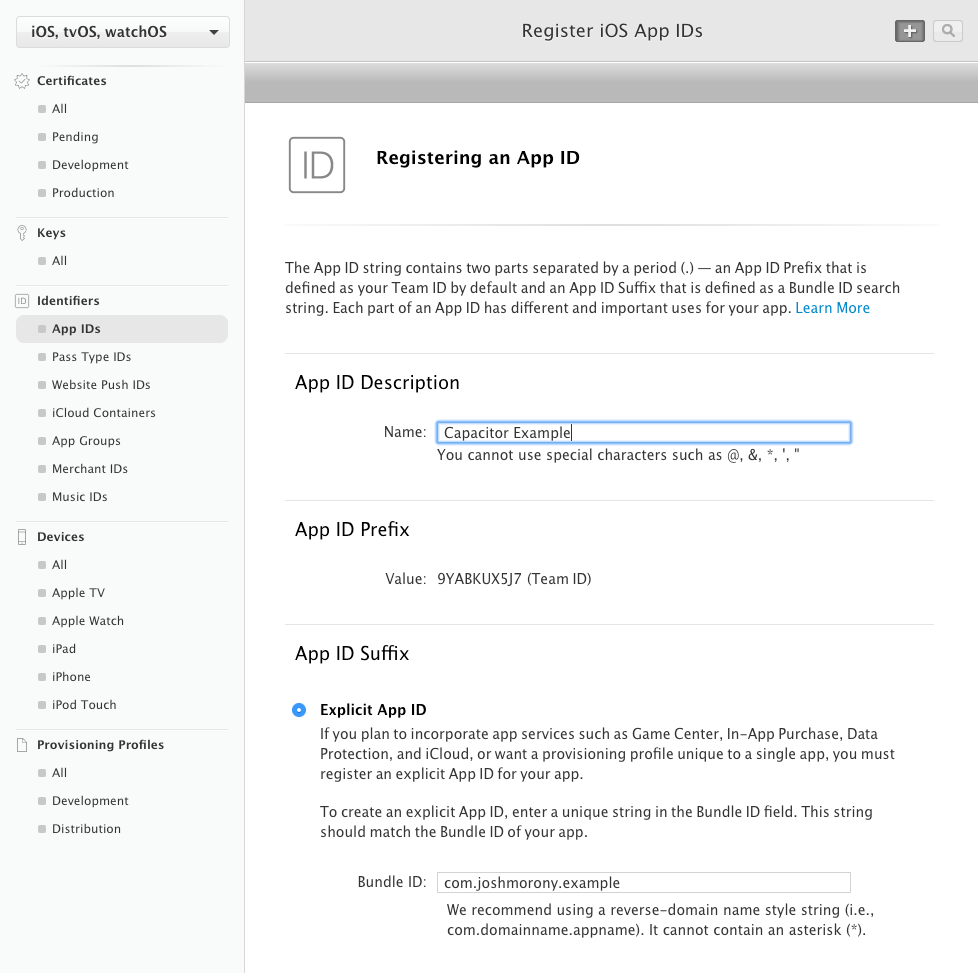
Fill out the details on this screen. When entering an explicit App ID, make sure that it matches the ID that you supplied to Capacitor in the project initialisation (e.g. com.example.yourapp). Make sure that you also enable any services that your app requires. When you are ready, click Continue.
Review the information on the next screen, and hit Register.
2. Create an Application in App Store Connect
In order to submit an application, we need to create a record for it in App Store Connect. This is where we will be able to supply the screenshots, descriptions, pricing, and so on. Basically, all of the “meta” information for the application. It is also the interface you use for submitting your application for review, and for managing updates.
You should now open App Store Connect. From here, you will see an interface that looks like this:
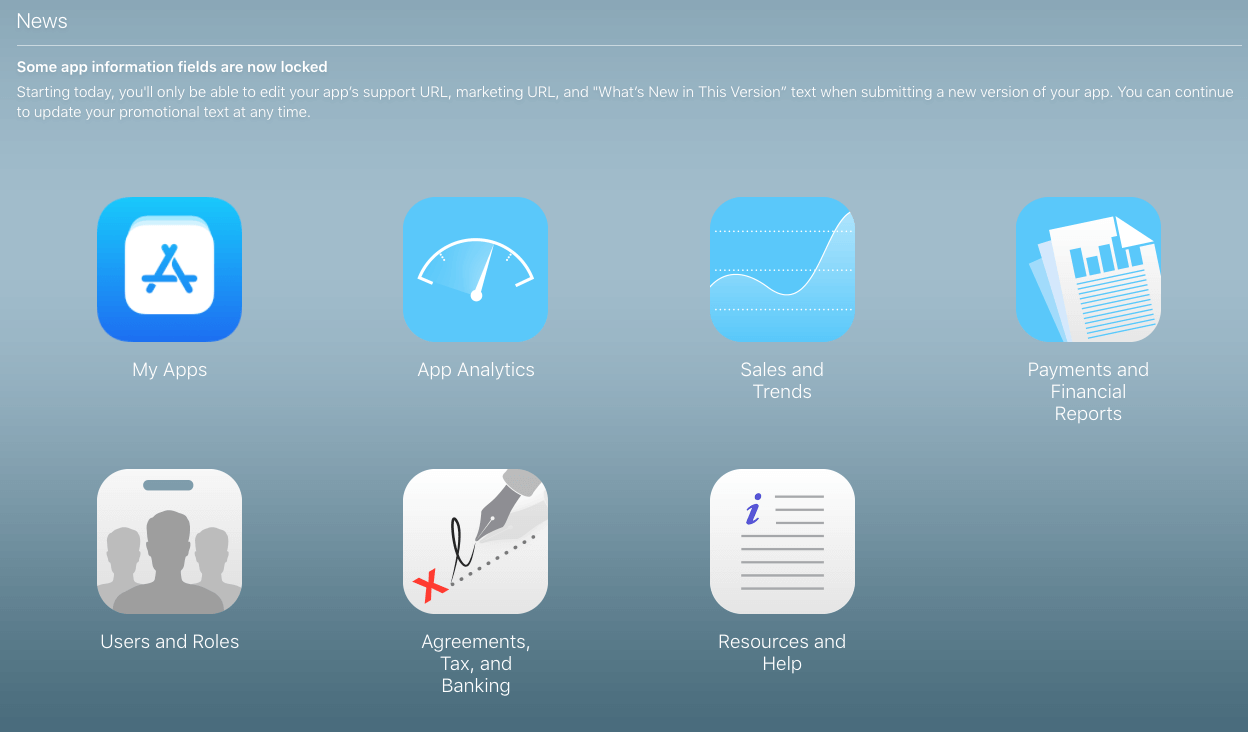
On this screen, click on My Apps, and then click the ’+’ button at the top left on the new page. Fill out the information in the box that pops up:
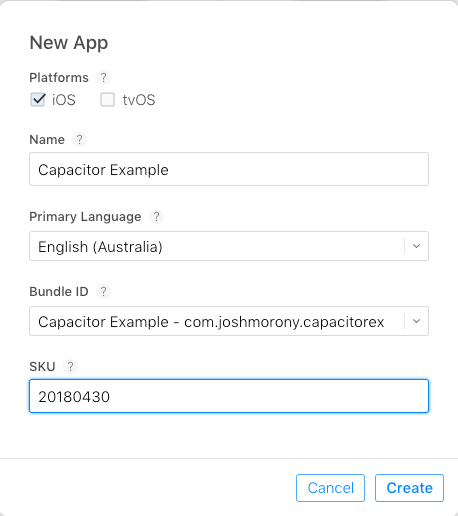
You will need to make sure that you use the identifier that you just created. You can use whatever SKU you like, I just used the date in this example. Once you complete this step, you will be taken to the page that will allow you to specify all of the “meta” information for your application. Feel free to complete this now, or come back later and do it.
3. Sign and Upload the Application to App Store Connect
Let’s head back to XCode now. You should change the target device near the ‘Play’ button back to Generic iOS Device. Once you have done this, go to Product > Archive, and you should see a screen with your application should pop up.
The process of archiving is basically converting your application into the format required to upload it to the App Store. You will still have a chance to test your application through Test Flight once you have uploaded it to App Store Connect (and you should definitely do this to make sure everything is OK before submitting for review). Click Upload to App Store.
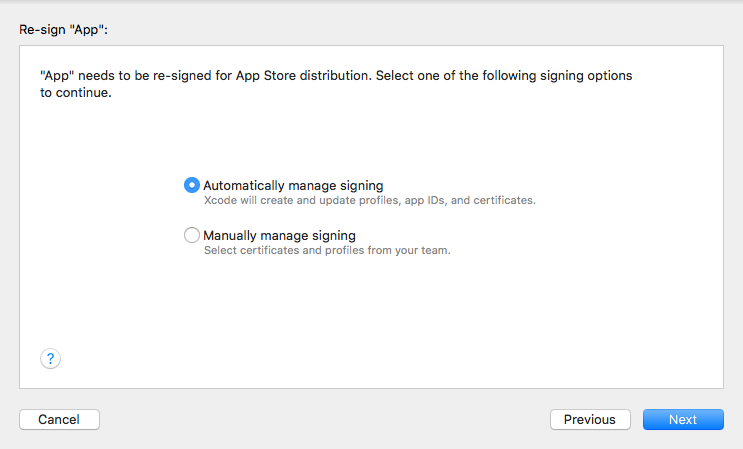
XCode will tell you that this app needs to be resigned for App Store distribution as it requires a distribution certificate, not a development certificate (which we can use to run the application on our own device). Unless you have reason to do otherwise, just use the Automatically manage signing option.
If you do not already have a distribution certificate created, you will see something like this:
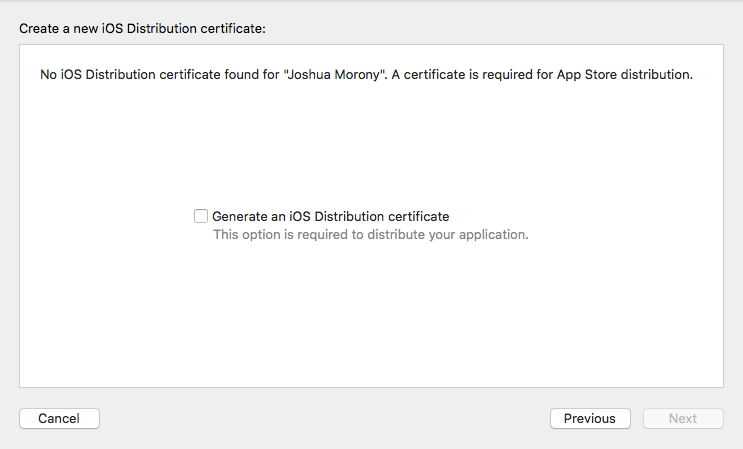
Just select, Generate an iOS Distribution Certificate and then choose Next.
IMPORTANT: The next screen will inform you that the private key for your certificate is stored in the keychain locally on the computer. If something happens to your computer, or you forget your password, it means you will lose access to this. You should export this signing certificate and keep it somewhere safe. Once you have done that click Next.
The next screen will allow you to review your information:
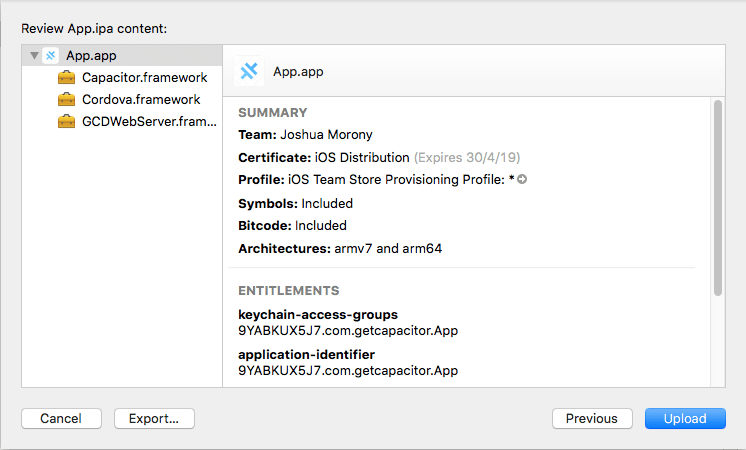
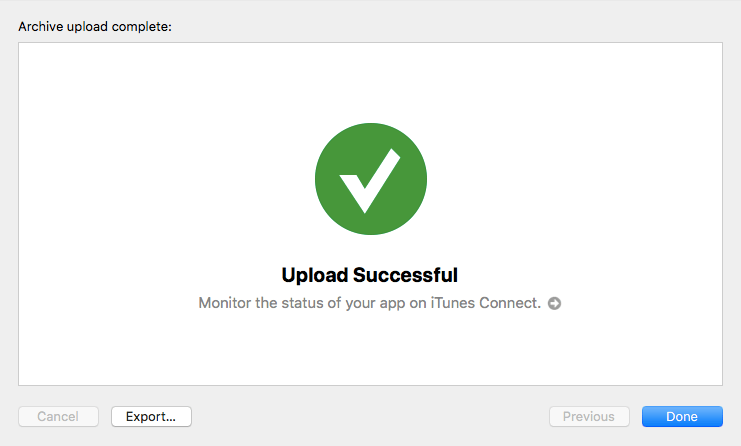
If you are happy, just hit Upload. Once the application has successfully uploaded you should see an upload successful screen:
Woohoo!, almost there. Once the app is uploaded, you will be able to associate it with the app record you created in App Store Connect. To do that, click on the current version of the application on the left of the screen (e.g. 1.0 Prepare for Submission).
Go to the Builds section (you will need to scroll down a little). If your upload has finished processing, you should see a ’+’ icon next to ‘Builds’:

NOTE: You may not see any builds available right away, as it takes some time to process. You should receive an email from Apple when your build is ready to be attached.
Click the add icon, select the build you just uploaded, and then click Done. If you have not already, you should configure the rest of the app information in App Store Connect, which will vary depending on the type of app you are submitting.
Once you have absolutely completed everything, and you have tested your application to ensure everything is working as you expect, hit the Submit for Review button at the top right:

Now you can cross your fingers and hope that your application is approved! You can use App Store Connect to check on the current status of your application (e.g. to see if it has been successfully submitted, rejected, or something else).
Summary
It is quite a lengthy and complicated process to submit to the Apple App Store, but fortunately, XCode does a great deal to simplify this with its automatic signing. A key point to using Capacitor is that you are mostly just working with a standard native iOS project, so most of what we have done here is the same as what any iOS developer would do to submit an application. There isn’t really any specific configuration required for a Capacitor project.