

Not too long ago I downloaded a game called Try Harder which is a fun little running platformer where you play as some kind of penguin-snowman thing and try to get as far as you can.
I love simple games like this and wanted to create a similar one in Phaser, but I’d never actually used Tilemaps in Phaser before to create a level like the one in Try Harder. So I got to work figuring it out and put together this quick proof of concept:
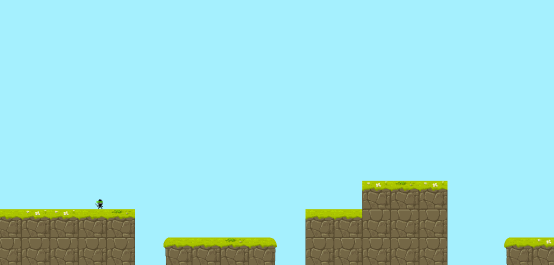
It certainly needs some more work before, you know, anyone would actually want to play it – but – the key concepts are there. There’s a sprite with physics that collide with the tilemap I created.
In this tutorial, I’m going to walk you through how to create your own tilemap, and set up this simple runner game proof of concept in Phaser.
Building a Tilemap with Tiled
Tiled is a great free tilemap editor that you can use to create Tilemaps for Phaser. If you don’t know what a tilemap is, essentially it takes a bunch of blocks like this:
and gives a representation (e.g in a JSON file) of where they should be placed throughout the game. So your Tilemap might look something like this:
{ "height":10,
 "layers":[
        {
         "data":[0, 0, 0, 0, 0, 0, 0, 0, 0, 0, 0, 0, 0, 0],
         "height":10,
         "name":"BackgroundLayer",
         "opacity":1,
         "type":"tilelayer",
         "visible":true,
         "width":100,
         "x":0,
         "y":0
        },
    etc. etc.
which is essentially saying “this block should go here, and that block should go there” which will look something like this when rendered in your game:
As you might imagine, coding up your Tilemap manually in JSON is going to be pretty hard, but programs like Tiled give us a visual editor to design the levels for our game.
There’s different types of Tilemaps too, for example we will be using an orthogonal Tilemap, which means a 2D Tilemap that looks like what we are creating.
This would be used for front on games like Mario, Megaman and so on. But the same approach is also used for top down games like the earlier Pokemon games.
You can also have other styles of Tilemaps like isometric, which gives more of a 3D perspective (think StarCraft, Age of Empires or Sim City). See this StackOverflow post for a good example.
So let’s get started with building our Tilemap. I’m going to walk through creating a very basic Tilemap, so if you want a little more instruction on how you can create a more complex Tilemap I highly recommend checking out this tutorial.
Download and install Tiled
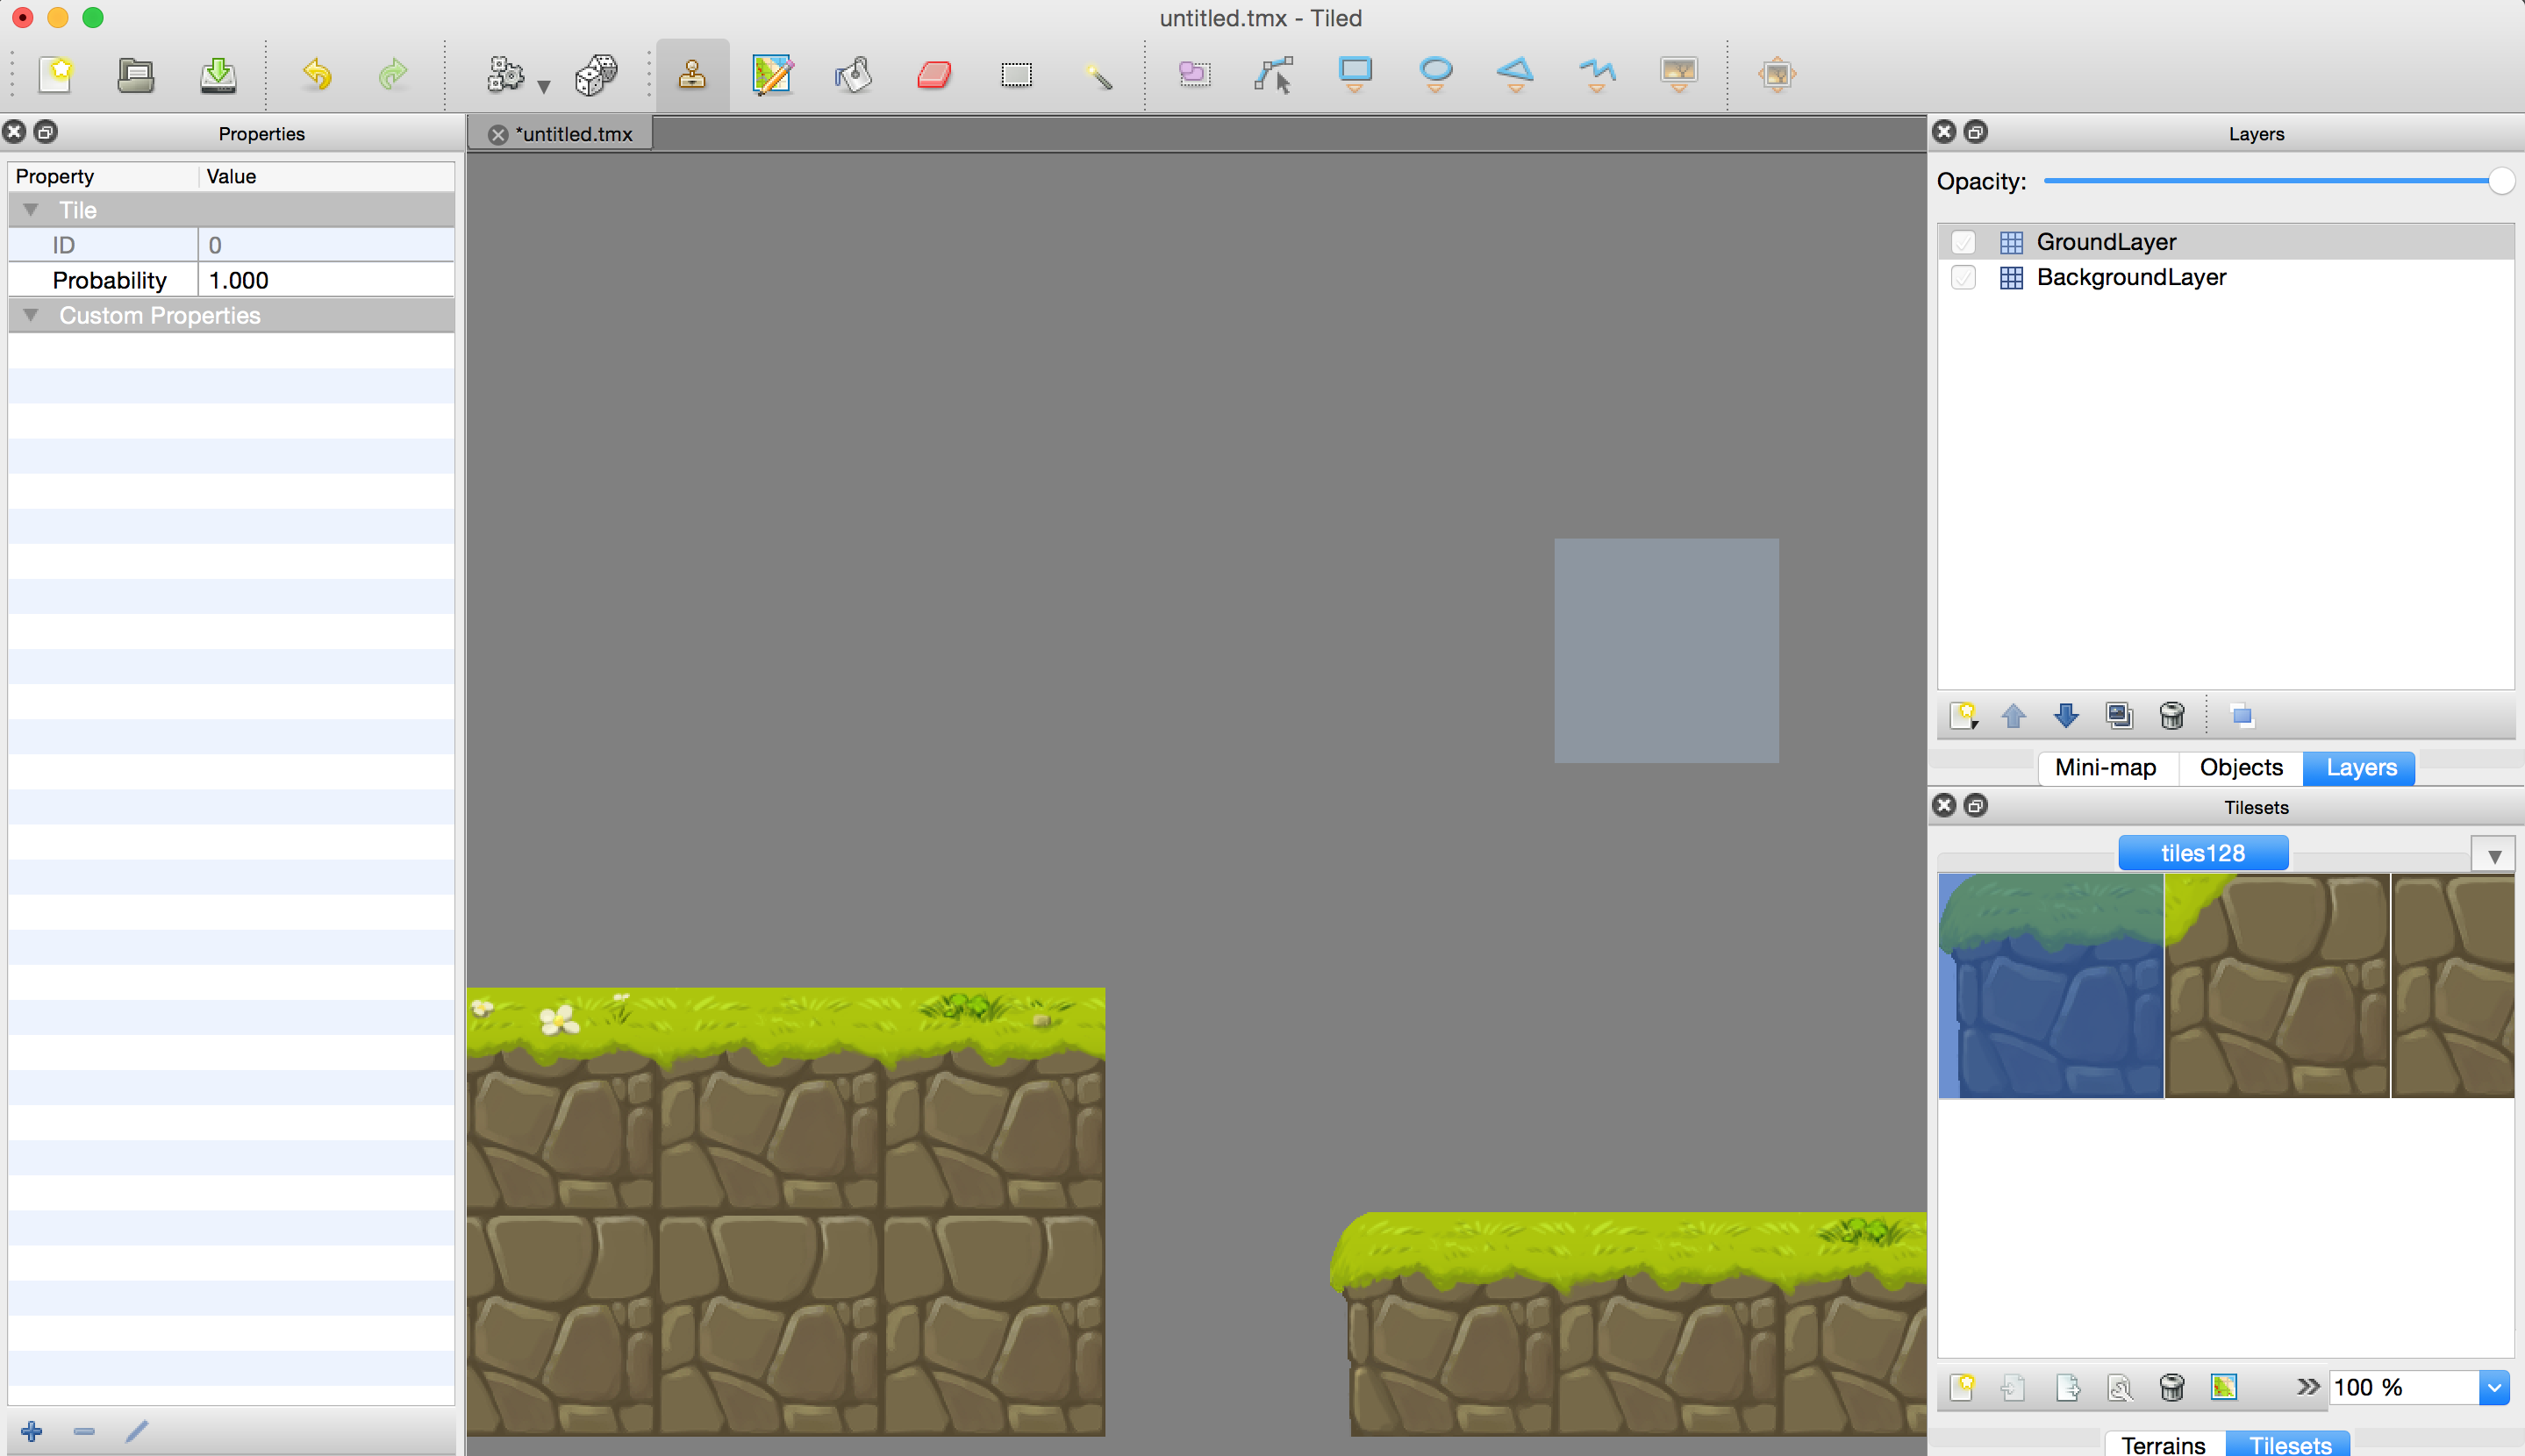
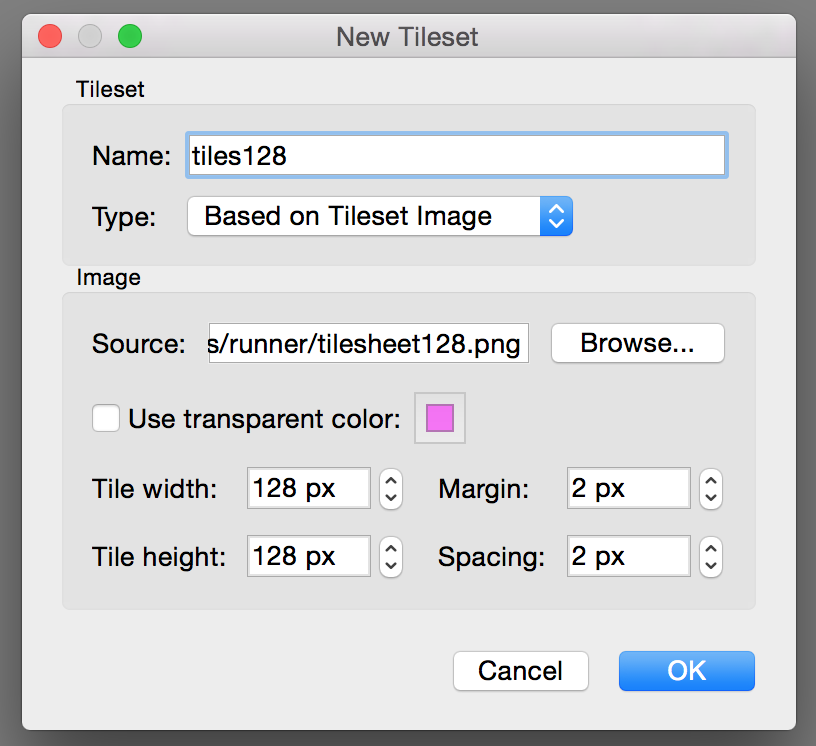
Create a new project in Tiled with these settings
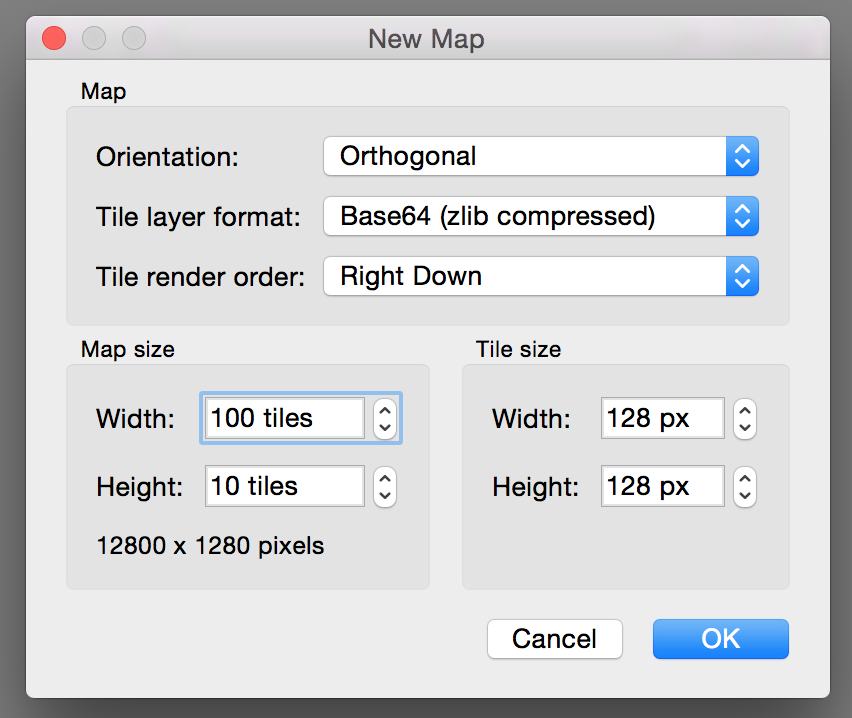
As you can see we have set the map to be orthoganal and have provided a tile size of 128 and a map size of 100 x 10 tiles. I chose 128 for the tile size because that’s the size that the tiles I’m using are, but if you were using tiles that were 32px x 32px you should set it to that instead. The map size is simply how big you want your map to be, since this is a running platformer game I’ve set it to be wider than it is tall.
Create two
Tile Layersusing the layers toolbox in the top right as follows
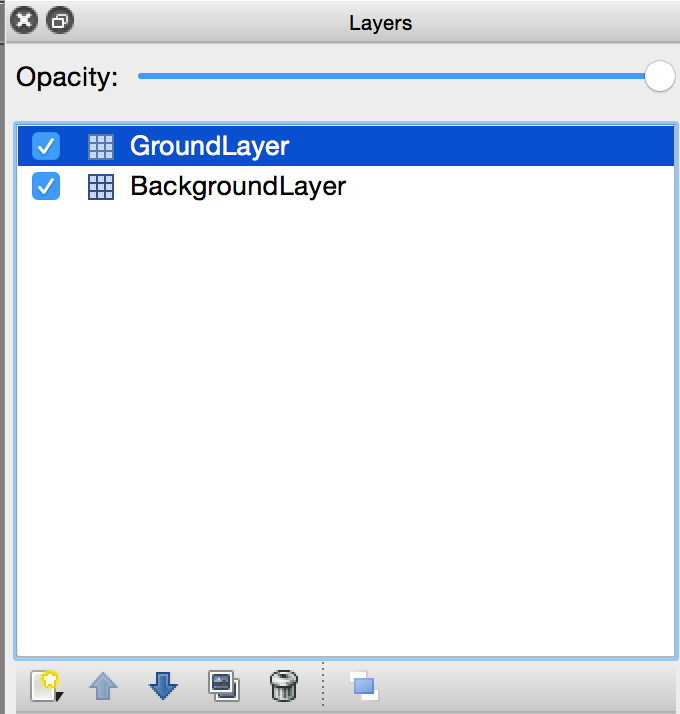
You can create new layers by hitting the little page icon in the bottom left. Although we’re not going to actually put anything in the background, we could use the background layer to add scenery in the background that our player would not collide with, and only have them collide with what is on the GroundLayer. We could make the player collide with things in the background layer if we wanted to though, layers just give us a way to separate things. If you were making a Mario type game then maybe you would want the ground to be in one layer, and all the floating platforms to be in another layer.
Import your Tileset by going to Map > New Tileset…
For this part you will need to download a tileset. I’m using a tileset I’ve purchased from GraphicRiver (hency why I can’t give it to you to use) but you can grab some free tiles from opengameart.org if you like.
You’ll notice again that I have supplied the width and height of the tiles here but I have also supplied a margin and spacing of 2px. This is because in the tileset that I provide the images are spaced 2px apart from each other, so by specifying the margin and spacing Tiled knows to ignore these white spaces.
Draw your Tilemap on the
GroundLayer
Now it’s time for the fun bit. You should have a blank canvas and a set of tiles loaded in. Make sure you have the GroundLayer selected and you can start drawing your level on the screen by switching between the tiles you want to use.
Export your map by going to File > Export As… and save it as a JSON file
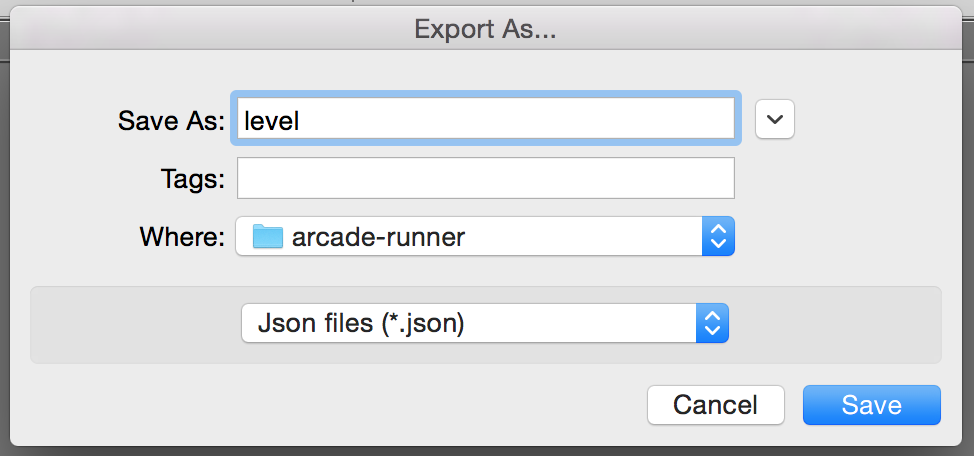
This export is what we will pull into Phaser to create the Tilemap.
Create a new Phaser Project
I won’t walk you through creating a new Phaser project, but if you like you can grab the source code for this example at the bottom of this post if you need some help getting it set up.
Once you’ve got a new Phaser project created, place your level.json file from Tiled and your tilesheet.png in your assets folder.
Importing TileMap into Phaser
To get our Tilemap into Phaser we will need to first preload both the JSON file we created in Tiled and the same tileset that we imported into Tiled.
Add the following code to your preload method
preload: function(){
        this.game.load.spritesheet('player', 'assets/greenninja.png', 38, 48);
        this.game.load.tilemap('tilemap', 'assets/level.json', null, Phaser.Tilemap.TILED_JSON);
        this.game.load.image('tiles', 'assets/tilesheet128.png');
    },
Notice that I have also included a spritesheet for the player we will be creating. You can learn more about how to use a spritesheet to create an animated sprite in Phaser – I won’t cover exactly how to do that in this tutorial.
Once you have these assets loaded you will need to add them into the main create method for your game like this:
create: function() {

        //Start the Arcade Physics systems
        this.game.physics.startSystem(Phaser.Physics.ARCADE);

        //Change the background colour
        this.game.stage.backgroundColor = "#a9f0ff";

        //Add the tilemap and tileset image. The first parameter in addTilesetImage
        //is the name you gave the tilesheet when importing it into Tiled, the second
        //is the key to the asset in Phaser
        this.map = this.game.add.tilemap('tilemap');
        this.map.addTilesetImage('tiles128', 'tiles');

        //Add both the background and ground layers. We won't be doing anything with the
        //GroundLayer though
        this.backgroundlayer = this.map.createLayer('BackgroundLayer');
        this.groundLayer = this.map.createLayer('GroundLayer');

        //Before you can use the collide function you need to set what tiles can collide
        this.map.setCollisionBetween(1, 100, true, 'GroundLayer');

        //Change the world size to match the size of this layer
        this.groundLayer.resizeWorld();

    },
Creating a Player
We also want to create a player with a running animation, so to do that we are going to add some more code to the same create method.
Modify your create method to reflect the following
create: function() {

        //Start the Arcade Physics systems
        this.game.physics.startSystem(Phaser.Physics.ARCADE);

        //Change the background colour
        this.game.stage.backgroundColor = "#a9f0ff";

        //Add the tilemap and tileset image. The first parameter in addTilesetImage
        //is the name you gave the tilesheet when importing it into Tiled, the second
        //is the key to the asset in Phaser
        this.map = this.game.add.tilemap('tilemap');
        this.map.addTilesetImage('tiles128', 'tiles');

        //Add both the background and ground layers. We won't be doing anything with the
        //GroundLayer though
        this.backgroundlayer = this.map.createLayer('BackgroundLayer');
        this.groundLayer = this.map.createLayer('GroundLayer');

        //Before you can use the collide function you need to set what tiles can collide
        this.map.setCollisionBetween(1, 100, true, 'GroundLayer');

        //Add the sprite to the game and enable arcade physics on it
        this.sprite = this.game.add.sprite(50, this.game.world.centerY, 'player');
        this.game.physics.arcade.enable(this.sprite);

        //Change the world size to match the size of this layer
        this.groundLayer.resizeWorld();

        //Set some physics on the sprite
        this.sprite.body.bounce.y = 0.2;
        this.sprite.body.gravity.y = 2000;
        this.sprite.body.gravity.x = 20;
        this.sprite.body.velocity.x = 100;

        //Create a running animation for the sprite and play it
        this.sprite.animations.add('right', [5, 6, 7, 8], 10, true);
        this.sprite.animations.play('right');

        //Make the camera follow the sprite
        this.game.camera.follow(this.sprite);

        //Enable cursor keys so we can create some controls
        this.cursors = this.game.input.keyboard.createCursorKeys();
    },
As well as adding the player, we have also set up some physics on it, set the camera to follow the player and we have also enabled some keyboard controls that we will make use of later.
Creating Collisions Between the Sprite and Tilemap
Now we have both our player and tilemap added to the game, but they don’t collide so the player will just fall right through the map. To change that we need to set the sprite and ground layer to collide in the main update method.
Add the following code to your main
updatemethod:
update: function() {

        //Make the sprite collide with the ground layer
        this.game.physics.arcade.collide(this.sprite, this.groundLayer);

    },
Allowing the Player to Jump
Finally, we want to make use of those keyboard controls so that when the up arrow is pushed the player will jump.
Modify the code in your main
updatemethod to reflect the following
update: function() {

        //Make the sprite collide with the ground layer
        this.game.physics.arcade.collide(this.sprite, this.groundLayer);

        //Make the sprite jump when the up key is pushed
        if(this.cursors.up.isDown) {
          this.sprite.body.velocity.y = -500;
        }

    },
Summary
In this tutorial we’ve learned how to create a simple Tilemap in Tiled and use it in a simple Phaser game. There’s so much more you can do with Tilemaps though, this only just scratches the surface.
In a future tutorial I will show you how to use the Ninja physics system (instead of Arcade) to create more complex tilemaps. Using Ninja physics will allow you to make slopes and ramps instead of just completely square tiles.
UPDATE: The Ninja Physics Game Tutorial is out now.