

When it comes to building iOS applications on a Windows machine, it’s not an easy process. It feels like Apple is fighting you every step of the way, but it is possible. In fact, when I first got into mobile development I did this for about 2 years.
An Ionic 2 application is built with web tech, so you can start building your application using a standard desktop browser on any operating system. In fact, you can just about finish an entire application without ever having to run it anywhere but through the browser. However, if you intend to submit your application to app stores then you will eventually need to create an iOS or Android specific build.
This is where Cordova comes in. It takes your web based code and wraps it up in a native wrapper, for whatever platform you are building for, and adds a web view for your application to run in. This native wrapper is in the same format as any other native application, which is why we are able to submit HTML5 mobile applications to native app stores.
In order to compile an iOS application using Cordova, you need the iOS SDK, which is only possible if you have a Mac and XCode. This is not an issue for Android because the Android SDK can be installed on both Windows and Mac. If you are not using a Mac, you simply can not create iOS builds (unless you are still able to use a Mac OS).
This is where services like PhoneGap Build and Ionic Package come in. These services allow you to build your application on their servers, which have the correct environment set up, instead of your computer which does not. You send the application you want to build into an iOS package to them, and they build it and send it back to you.
It sounds straightforward, and for the most part it is, but as I mentioned it will feel a little like Apple is fighting you every step of the way. Here’s a quick summary of the difficulties of
- Once you need to start testing on a real device, it becomes a slow and painful process. You will need to upload your application to be built, wait for it to build, download it, install it on your device, and then debug using 3rd party software. Ionic View is an option to avoid this, however, it is not the perfect testing environment.
- You need to generate certificates and provisioning profiles to build an iOS application, and this is a little trickier to do without a Mac
- Services that build your application in the cloud are generally paid services or have limitations
- Even once you finally have your built iOS application it doesn’t end there. Usually, iOS applications are submitted to the app store with XCode but, as we established earlier, you need a Mac for that. You can also use an application called Application Loader to submit your application, but guess what… you need a Mac for that. Your options at this stage include just borrowing a friends computer for a few minutes to submit your application, or you could use a service like macincloud.com to rent a virtual Mac that you can use remotely.
If it’s an option for you, I would highly recommend using a Mac if you are building iOS applications. If that’s not an option, and you’re happy to work through these difficulties, then read on!
In this tutorial, I am going to show you how to build an Ionic 2 application for iOS and Android using the Ionic Package service. Building your application with Ionic Package is free for up to 100 builds.
Before We Get Started
Before you go through this tutorial, you should have at least a basic understanding of Ionic 2 concepts. You must also already have Ionic 2 set up on your machine.
If you’re not familiar with Ionic 2 already, I’d recommend reading my Ionic 2 Beginners Guide first to get up and running and understand the basic concepts. If you want a much more detailed guide for learning Ionic 2, then take a look at Building Mobile Apps with Ionic 2.
1. Generate a New Ionic 2 Application
We are going to start off by generating a new blank Ionic 2 application.
Run the following command to generate a new Ionic 2 application:
ionic start ionic-package-example blank --v2Once that has finished generating, you should make it your working directory.
Run the following command:
cd ionic-package-exampleWe are just going to be building the blank application so we don’t need to create any other pages or services.
2. Set up Ionic Cloud
We need to set up the Ionic Cloud platform services in order to use Ionic Package. Ionic Cloud is Ionic’s paid platform that provides additional services for your application like push notifications – not to be confused with the framework itself which is free to use.
Run the following command in install Ionic Cloud
npm install @ionic/cloud-angular --saveOnce that has installed, you will need to initialise cloud services which involves signing in with your cloud services account – if you do not already have one, you will need to create one.
Run the following command:
ionic io init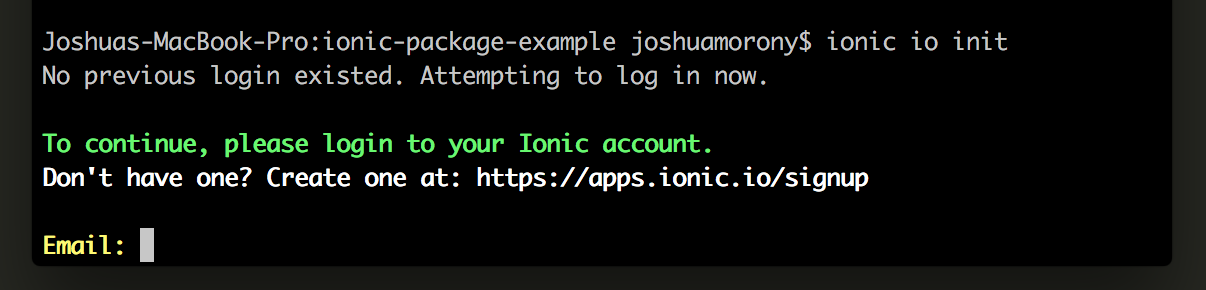
You will also need to make a minor modification to your code to set up the cloud services.
Modify src/app/app.module.ts to reflect the following:
import { NgModule, ErrorHandler } from '@angular/core';
import { IonicApp, IonicModule, IonicErrorHandler } from 'ionic-angular';
import { MyApp } from './app.component';
import { HomePage } from '../pages/home/home';

import { CloudSettings, CloudModule } from '@ionic/cloud-angular';

const cloudSettings: CloudSettings = {
  core: {
    app_id: 'APP_ID',
  },
};

@NgModule({
  declarations: [MyApp, HomePage],
  imports: [IonicModule.forRoot(MyApp), CloudModule.forRoot(cloudSettings)],
  bootstrap: [IonicApp],
  entryComponents: [MyApp, HomePage],
  providers: [{ provide: ErrorHandler, useClass: IonicErrorHandler }],
})
export class AppModule {}
IMPORTANT: You will need to update APP_ID in the example above to reflect the APP_ID for your own application. You can find this by logging in at ionic.io.

3. Generate Certificates and Create a Security Profile
In order to build for both iOS and Android, you will need to create a security profile. This profile will contain the necessary information to sign your applications.
For iOS you will require a .p12 file which is generated from a certificate assigned to you by Apple, and a .mobileprovision file which is a provisioning profile that specifies what kind of application you are creating and where it is allowed to run. For Android, you will just need to create a single keystore file.
Create your security profile
Ionic have a great guide available for generating the necessary files (on both Mac and Windows) here: Security Profiles.
Once you have created the necessary files, you will need to upload them to your account.
Add a security profile by going to Settings > Certificates > New Security Profile in your ionic.io account
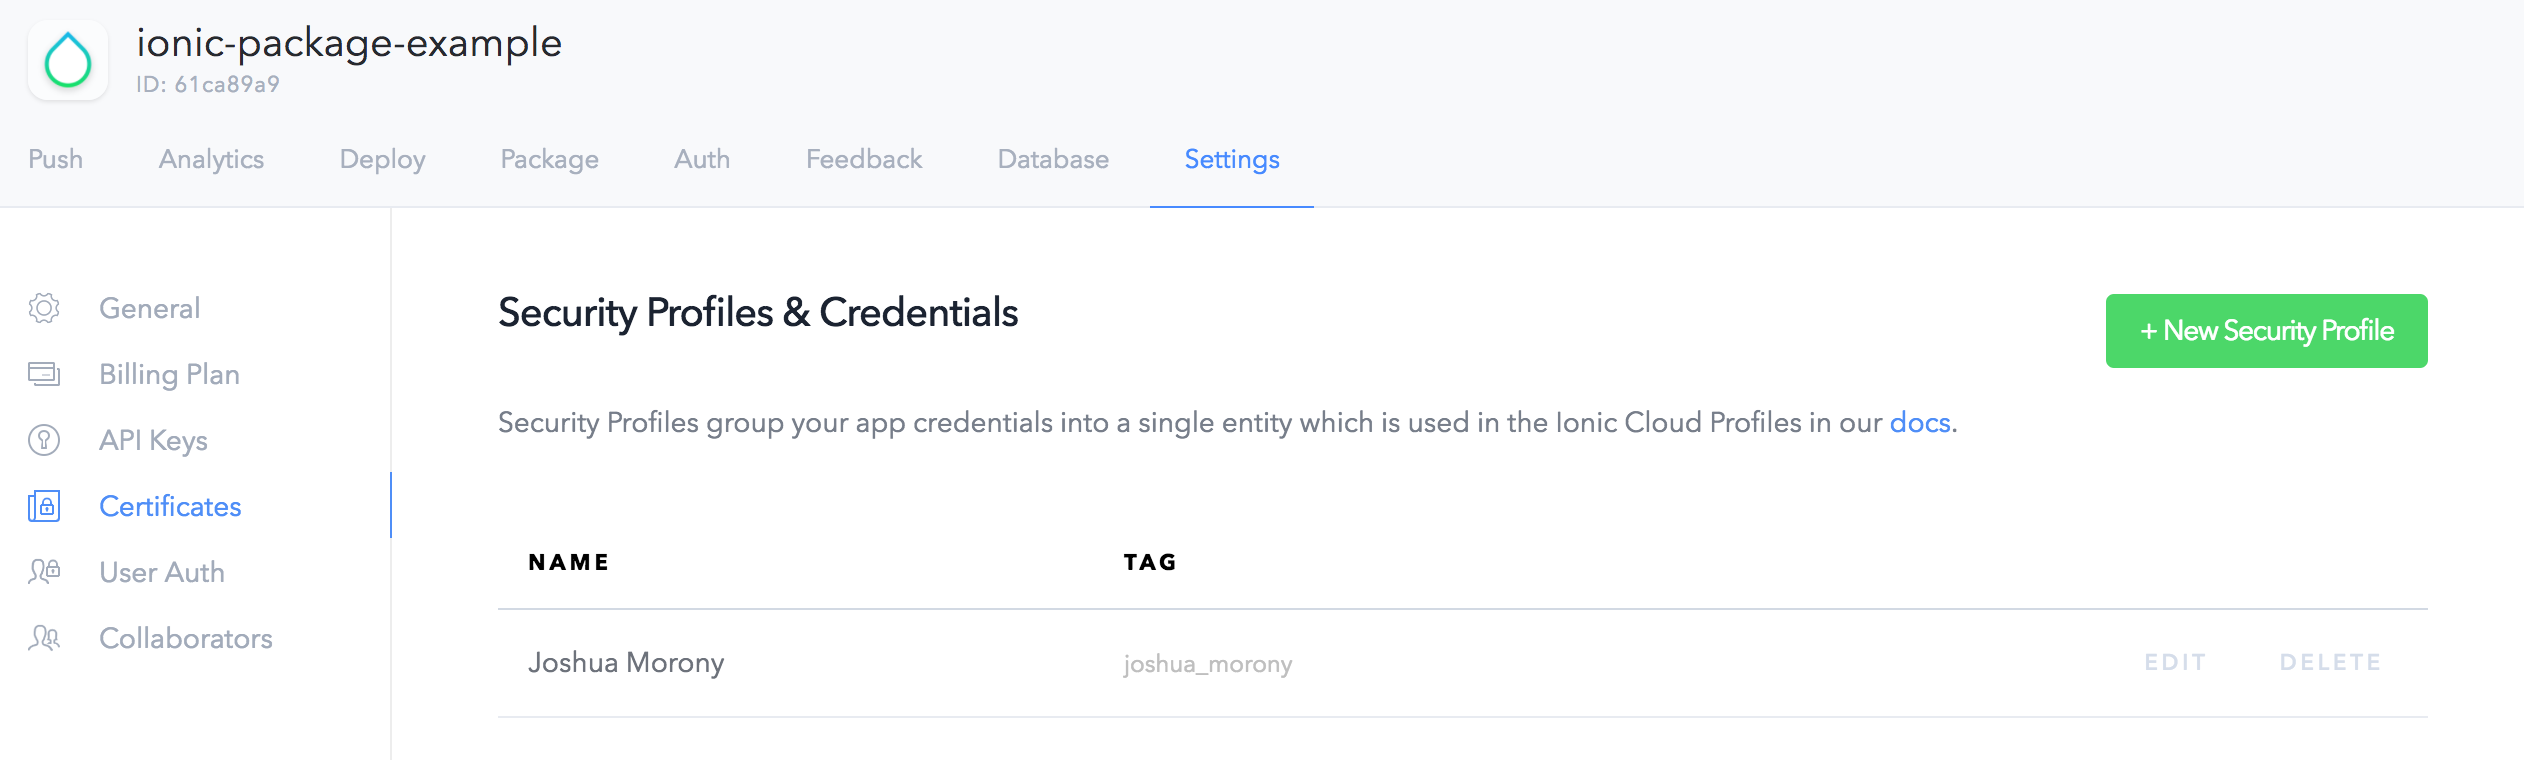
Make note of the TAG entry here, this is what we will use to reference this security profile when running the ionic package command later.
IMPORTANT: Make sure not to lose your credentials for the profile. If you lose the .keystore file for Android, or forget the password, it’s game over. You can not retrieve or reset it in any way and you will not be able to update your application.
4. Use the Ionic Package Command
Now we are ready to generate a build using the Ionic Package service, and it’s quite easy to do. We just need to use the following format:
ionic package build PLATFORM_TAG --profile PROFILE_TAGwhere PLATFORM_TAG is either ios or android and where PROFILE_TAG is the TAG for the security profile you generated earlier. If you want to generate a production application that is ready for app store submission, you can add the --release flag:
ionic package build PLATFORM_TAG --profile PROFILE_TAG --releaseSo, to build an iOS application I would do something like this:
ionic package build ios --profile joshua_morony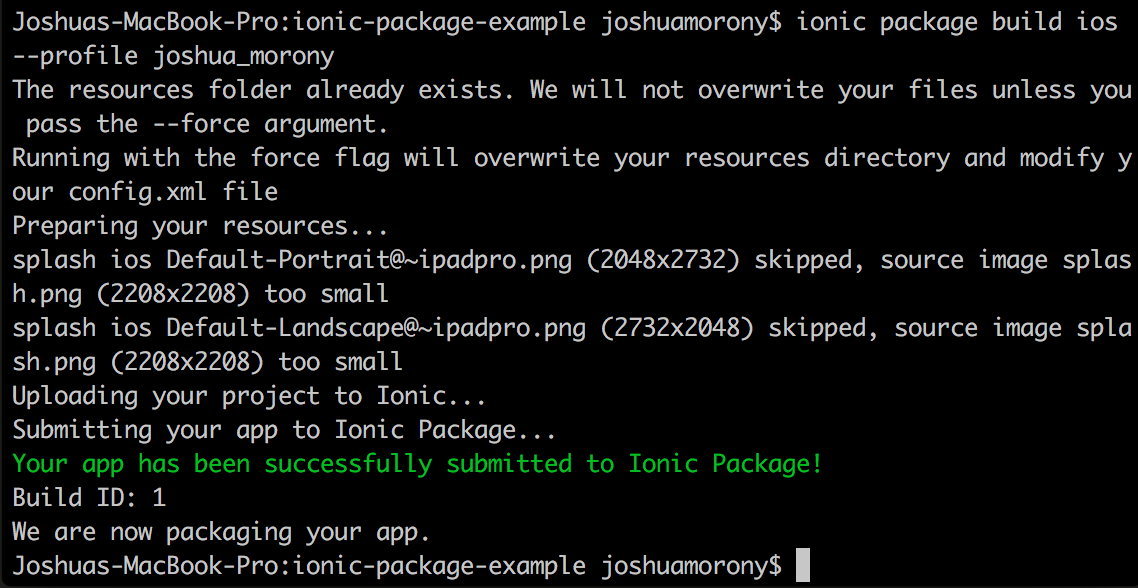
IMPORTANT: Make sure all of your Cordova plugins have been installed with the --save flag, such that they are listed in your package.json file. If the plugins are not listed in package.json then the Ionic Package service will not include them.
You can see the status of any of your builds by running the following command:
ionic package listand if a build fails, you can get more detailed information on why with the following command:
ionic package info BUILD_IDwhere BUILD_ID is the id listed in the list command. Generally, errors you receive will be because of an incorrectly configured security profile.
Once everything has worked, you can download the resulting application with the following command:
ionic package download BUILD_ID5. Install & Debug
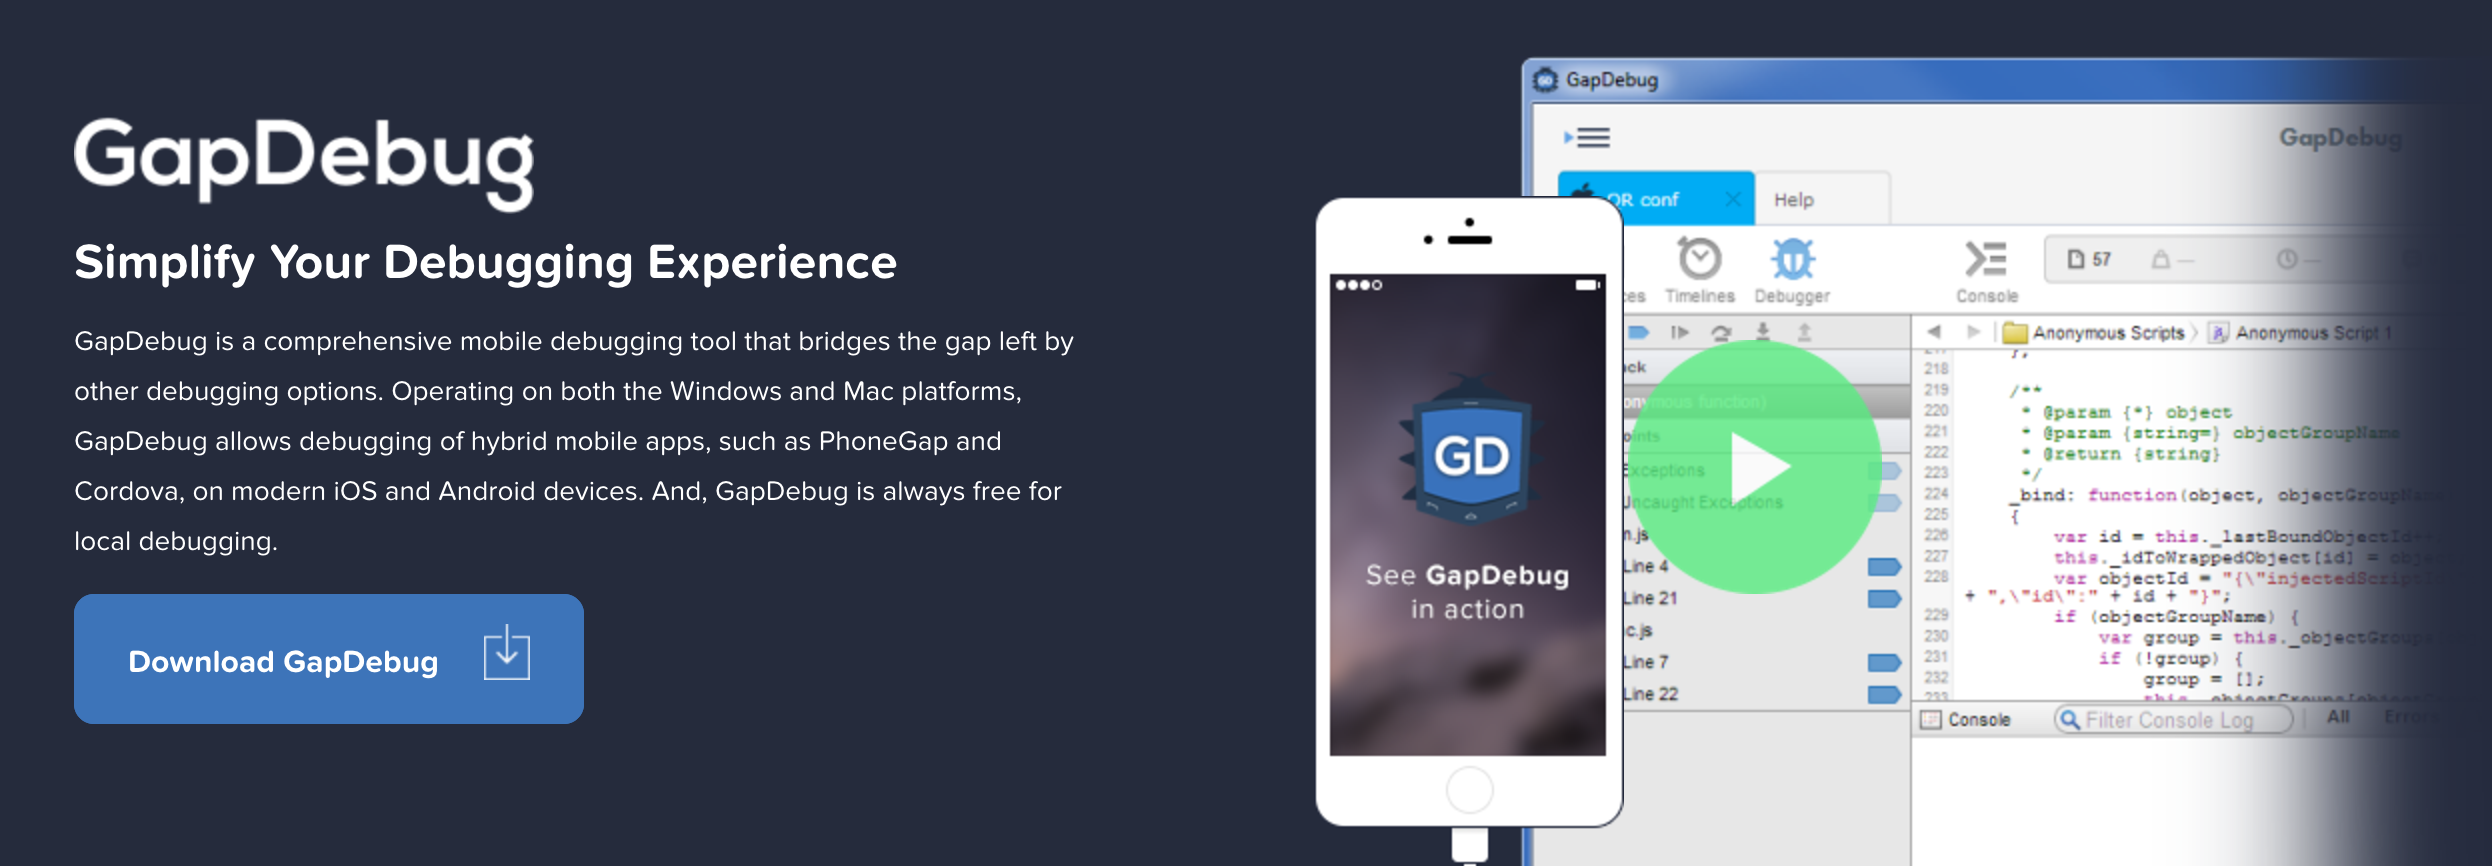
In order to install & debug iOS applications using a Windows machine, you can use this great cross platform debugging tool called GapDebug. It allows for drag and drop installing via USB, and it provides a browser debugging interface which is very similar to using a Safari browser for USB debugging (as you would do when using a Mac). You can also use GapDebug for Android applications.
Summary
Building iOS applications on a Windows machine is not without its difficulties, but the Ionic Package service makes it as easy as it can be. PhoneGap Build is also a great service, but Ionic Package definitely has the advantage given its tight integration with Ionic – there’s a little more set up required for PhoneGap Build.