

A short while ago I wrote a tutorial on how to build a review application in Ionic 2 with the MEAN (MongoDB, Express.js, Angular, and Node.js) stack.
Although this was a reasonably advanced tutorial, since it also served as an introduction to MongoDB and creating a backend with Node I kept the application itself pretty simple. In this tutorial we are going to build a fully featured hotel room booking application in Ionic 2, which will allow users to:
- Search for rooms based on search criteria
- View only rooms that are not booked out for the date range they are booking for
- See descriptions of rooms
- Book a room (which will then make it unavailable to other users for that date range)
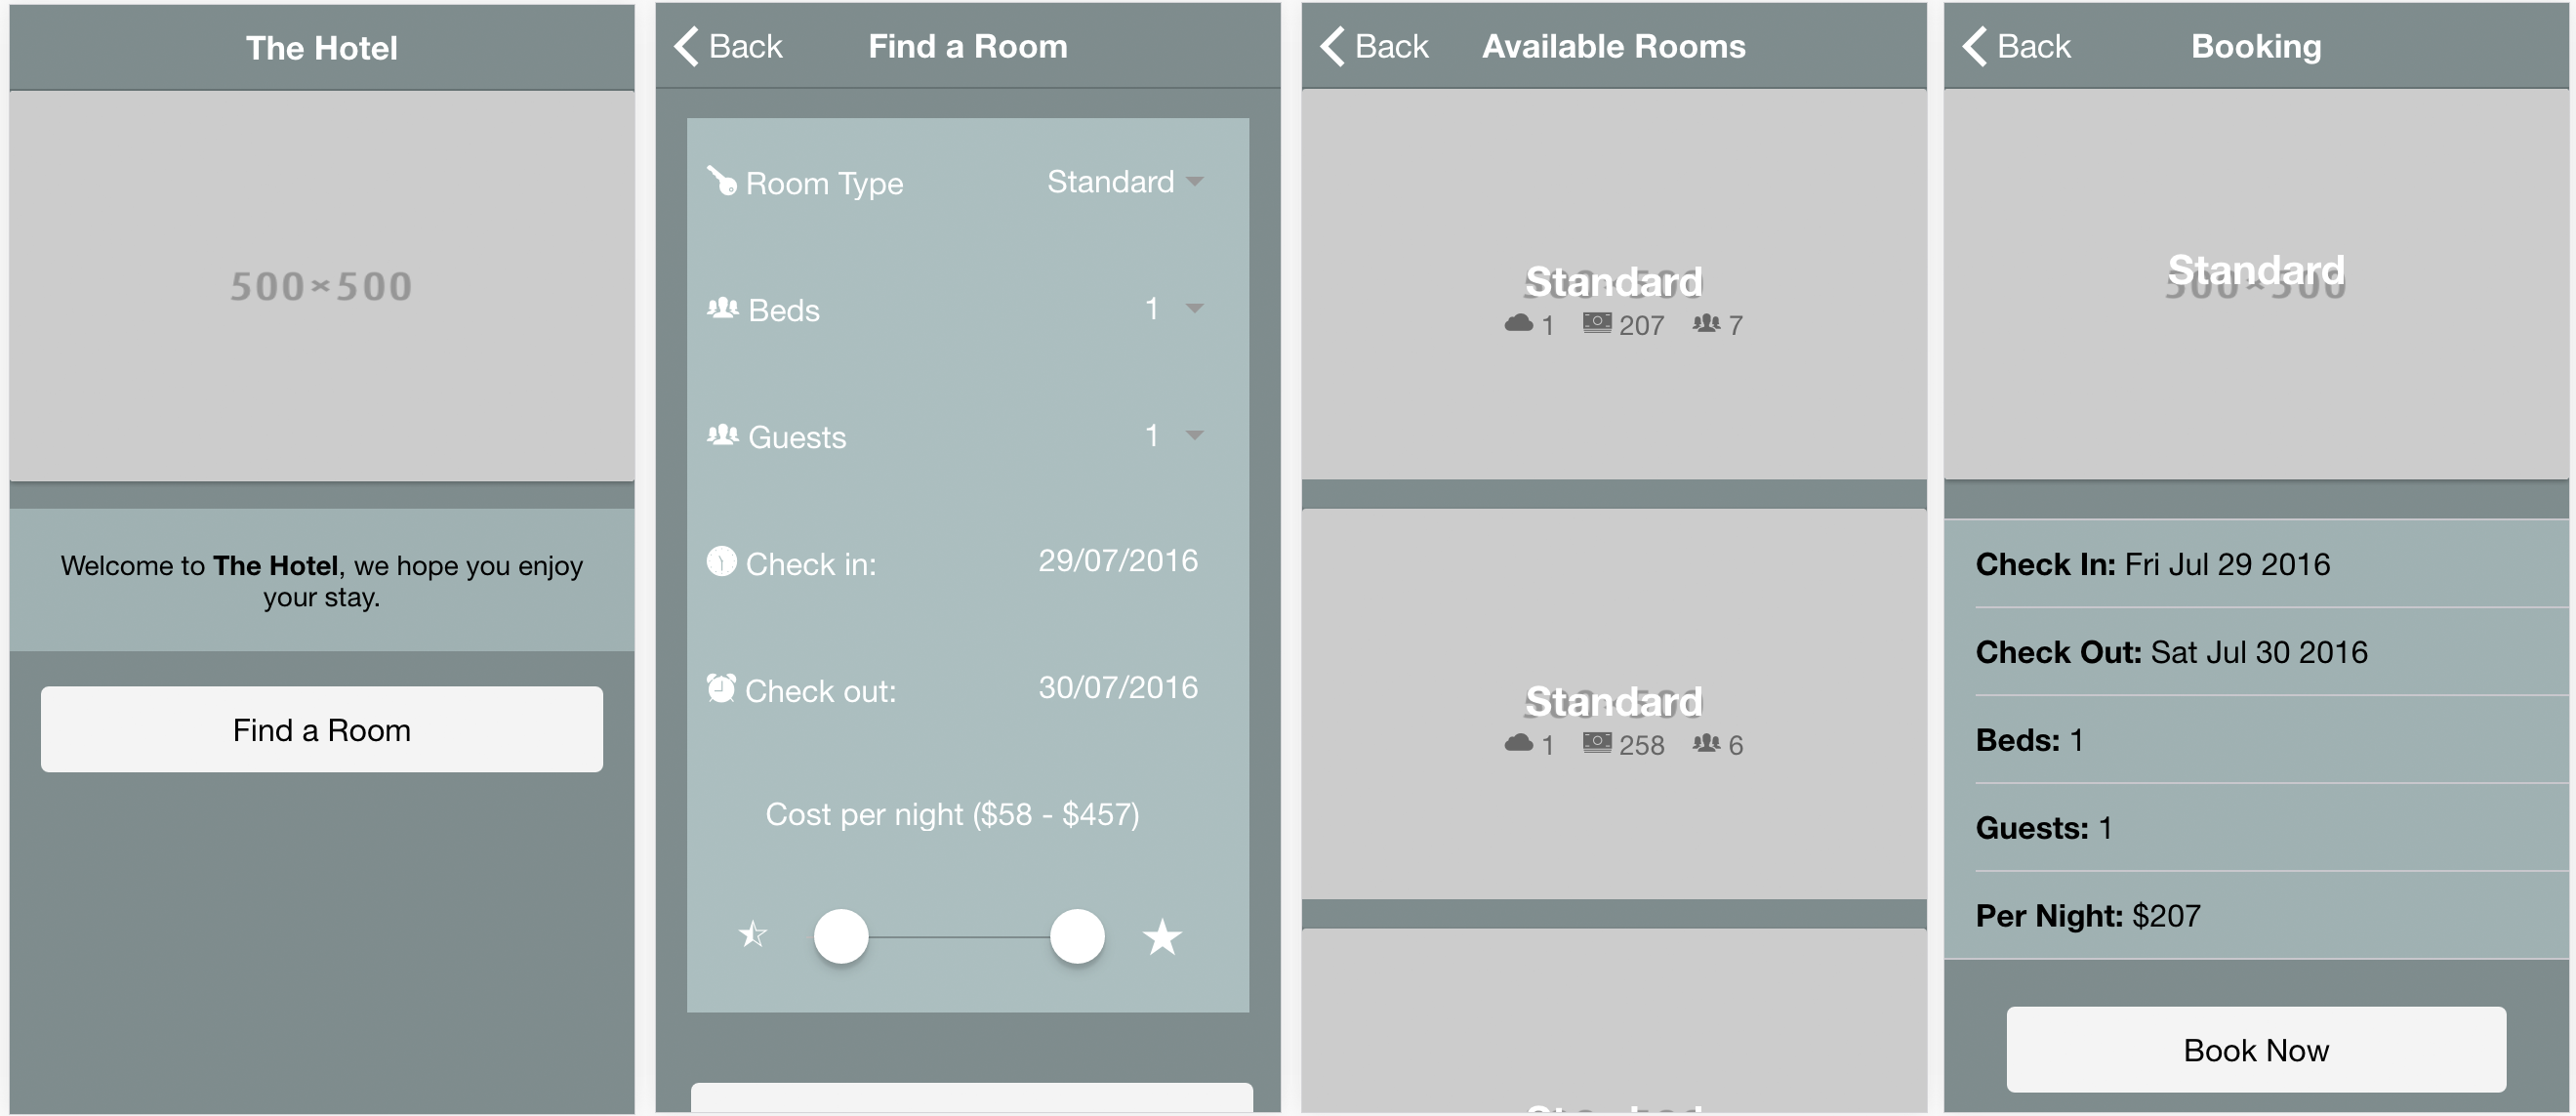
This tutorial will get into more advanced MongoDB concepts, including updating data and running complex queries on data. At the end of the tutorial, you should have something that looks like this:
Before We Get Started
This is an advanced tutorial and there is quite a lot of code, so I won’t be stepping through everything as thoroughly as I do in my more basic tutorials. Instead, I will focus on the “interesting” bits. If you’re struggling to follow along with some of the concepts I would recommend reading the previous tutorial first, which is similar to this tutorial but a little more basic.
Before you go through this tutorial, you should also have at least a basic understanding of Ionic 2 concepts. You must also already have Ionic 2 set up on your machine.
If you’re not familiar with Ionic 2 already, I’d recommend reading my Ionic 2 Beginners Guide first to get up and running and understand the basic concepts. If you want a much more detailed guide for learning Ionic 2, then take a look at Building Mobile Apps with Ionic 2.
1. Creating the Database with MongoDB
The first thing we are going to do is get our MongoDB database set up. We will be setting this up locally (as we will be with the Node server as well), but if you would prefer you could also have your database hosted somewhere else.
The following install steps are specifically for Mac, and we will be using brew. If you don’t have brew installed already just follow the instructions on this page. If you are using a Windows computer, then you can follow the instructions here to install MongoDB.
You can install MongoDB with the following command:
brew install mongodb
and then start it with the following command:
brew services start mongodb
Now you can create a new MongoDB database and connect to it with the following command:
mongo hotels
You will now be able to interact with the hotels database through the terminal, and we will also be able to interact with it through our application once we set up the API. To come back to this same database later you can just run mongo hotels again.
2. Generating a New Ionic 2 Application
We’re going to be creating our Node server before creating the front end, but we will be storing the server code inside of our Ionic 2 project to keep it all in the one place, so we’re going to generate that now.
Run the following command to create a new Ionic 2 application:
ionic start ionic2-hotel blank --v2We are also going to create some pages and a provider that we will be making use of later.
Run the following generate commands:
ionic g page SearchPage
ionic g page AvailableRoomsPage
ionic g page BookingPage
ionic g provider Rooms
In order to make these new components available to use in our application, we will have to make sure that we set them up correctly in the app.module.ts file.
Modify src/app/app.module.ts to reflect the following:
import { NgModule } from '@angular/core';
import { IonicApp, IonicModule } from 'ionic-angular';
import { MyApp } from './app.component';
import { HomePage } from '../pages/home/home';
import { AvailableRoomsPage } from '../pages/available-rooms-page/available-rooms-page';
import { BookingPage } from '../pages/booking-page/booking-page';
import { SearchPage } from '../pages/search-page/search-page';
import { Rooms } from '../providers/rooms';

@NgModule({
  declarations: [MyApp, HomePage, AvailableRoomsPage, BookingPage, SearchPage],
  imports: [IonicModule.forRoot(MyApp)],
  bootstrap: [IonicApp],
  entryComponents: [
    MyApp,
    HomePage,
    AvailableRoomsPage,
    BookingPage,
    SearchPage,
  ],
  providers: [Rooms],
})
export class AppModule {}
Now that we have the basic skeleton of our app set up, let’s jump into the server side of things.
3. Create the Backend API with Node & Express
We are going to implement the code for our Node server, but this is going to live outside of our Ionic 2 project. We will then be able to run the server locally which will allow our app to function, but in a production environment you would need to run this server remotely instead.
I am not going to explain the server in-depth here, so if you would like a more in-depth explanation of how a NodeJS server works I recommend reading Building a Review App with Ionic 2, MongoDB & Node or Creating Role Based Authentication with Passport in Ionic 2. The second tutorial also contains details on how to deploy the NodeJS server, so that you are able to use it in a production environment rather than just locally.
Create a new folder called ionic2-hotel-server outside of your Ionic 2 project
There are some dependencies that we are going to have to install for the server to work. We will do this in the same way that Ionic 2 installs its dependencies, we will create a package.json file, and then run the npm install command.
Create a new file called package.json in the ionic2-hotel-server folder, and add the following:
{
  "name": "ionic2-hotel",
  "version": "0.1.0",
  "description": "A sample Node.js app using Express 4",
  "engines": {
    "node": "5.9.1"
  },
  "main": "server.js",
  "scripts": {
    "start": "node server.js"
  },
  "dependencies": {
    "body-parser": "^1.15.2",
    "cors": "^2.8.1",
    "express": "^4.14.0",
    "mongoose": "^4.6.3",
    "morgan": "^1.7.0"
  }
}
Run the following command from within the ionic2-hotel-server folder to install the dependencies:
npm installNow that we have our dependencies installed, we can set up the server itself.
Create a file called server.js inside of the ionic2-hotel-server folder and add the following code:
// Set up
var express = require('express');
var app = express();
var mongoose = require('mongoose');
var logger = require('morgan');
var bodyParser = require('body-parser');
var cors = require('cors');

// Configuration
mongoose.connect('mongodb://localhost/hotels');

app.use(bodyParser.urlencoded({ extended: false })); // Parses urlencoded bodies
app.use(bodyParser.json()); // Send JSON responses
app.use(logger('dev')); // Log requests to API using morgan
app.use(cors());

// Models
var Room = mongoose.model('Room', {
  room_number: Number,
  type: String,
  beds: Number,
  max_occupancy: Number,
  cost_per_night: Number,
  reserved: [
    {
      from: String,
      to: String,
    },
  ],
});

/*
 * Generate some test data, if no records exist already
 * MAKE SURE TO REMOVE THIS IN PROD ENVIRONMENT
 */

function getRandomInt(min, max) {
  return Math.floor(Math.random() * (max - min + 1)) + min;
}

Room.remove({}, function (res) {
  console.log('removed records');
});

Room.count({}, function (err, count) {
  console.log('Rooms: ' + count);

  if (count === 0) {
    var recordsToGenerate = 150;

    var roomTypes = ['standard', 'villa', 'penthouse', 'studio'];

    // For testing purposes, all rooms will be booked out from:
    // 18th May 2017 to 25th May 2017, and
    // 29th Jan 2018 to 31 Jan 2018

    for (var i = 0; i < recordsToGenerate; i++) {
      var newRoom = new Room({
        room_number: i,
        type: roomTypes[getRandomInt(0, 3)],
        beds: getRandomInt(1, 6),
        max_occupancy: getRandomInt(1, 8),
        cost_per_night: getRandomInt(50, 500),
        reserved: [
          { from: ''1970-01-01'', to: ''1970-01-02'' },
          { from: ''2017-04-18'', to: ''2017-04-23'' },
          { from: ''2018-01-29'', to: ''2018-01-30'' },
        ],
      });

      newRoom.save(function (err, doc) {
        console.log('Created test document: ' + doc._id);
      });
    }
  }
});

// Routes

app.post('/api/rooms', function (req, res) {
  Room.find(
    {
      type: req.body.roomType,
      beds: req.body.beds,
      max_occupancy: { $gt: req.body.guests },
      cost_per_night: {
        $gte: req.body.priceRange.lower,
        $lte: req.body.priceRange.upper,
      },
      reserved: {
        //Check if any of the dates the room has been reserved for overlap with the requsted dates
        $not: {
          $elemMatch: {
            from: { $lt: req.body.to.substring(0, 10) },
            to: { $gt: req.body.from.substring(0, 10) },
          },
        },
      },
    },
    function (err, rooms) {
      if (err) {
        res.send(err);
      } else {
        res.json(rooms);
      }
    }
  );
});

app.post('/api/rooms/reserve', function (req, res) {
  console.log(req.body._id);

  Room.findByIdAndUpdate(
    req.body._id,
    {
      $push: { reserved: { from: req.body.from, to: req.body.to } },
    },
    {
      safe: true,
      new: true,
    },
    function (err, room) {
      if (err) {
        res.send(err);
      } else {
        res.json(room);
      }
    }
  );
});

// listen
app.listen(8080);
console.log('App listening on port 8080');
A lot of this is very similar to the other tutorials, so I am just going to focus on the interesting bits. After setting up all of our dependencies and connecting to the MongoDB database we just created, we define a model with Mongoose:
var Room = mongoose.model('Room', {
  room_number: Number,
  type: String,
  beds: Number,
  max_occupancy: Number,
  cost_per_night: Number,
  reserved: [
    {
      from: String,
      to: String,
    },
  ],
});
This represents the structure of our data, which in this case is the details for our rooms. Most of this is pretty straightforward, we just define some fields to describe the room like the amount of beds it has and the type of room it is, but then we also have an array called reserved. This is what we will use to determine the availability of a room, whenever a room is reserved we will add an entry to this array that will include the data range that it has been booked for. We will be able to compare these dates to the dates a user provides later to see if there is any overlap.
Next, we generate a bunch of test data:
/*
 * Generate some test data, if no records exist already
 * MAKE SURE TO REMOVE THIS IN PROD ENVIRONMENT
 */

function getRandomInt(min, max) {
  return Math.floor(Math.random() * (max - min + 1)) + min;
}

Room.remove({}, function (res) {
  console.log('removed records');
});

Room.count({}, function (err, count) {
  console.log('Rooms: ' + count);

  if (count === 0) {
    var recordsToGenerate = 150;

    var roomTypes = ['standard', 'villa', 'penthouse', 'studio'];

    // For testing purposes, all rooms will be booked out from:
    // 18th May 2017 to 25th May 2017, and
    // 29th Jan 2018 to 31 Jan 2018

    for (var i = 0; i < recordsToGenerate; i++) {
      var newRoom = new Room({
        room_number: i,
        type: roomTypes[getRandomInt(0, 3)],
        beds: getRandomInt(1, 6),
        max_occupancy: getRandomInt(1, 8),
        cost_per_night: getRandomInt(50, 500),
        reserved: [
          { from: ''1970-01-01'', to: ''1970-01-02'' },
          { from: ''2017-04-18'', to: ''2017-04-23'' },
          { from: ''2018-01-29'', to: ''2018-01-30'' },
        ],
      });

      newRoom.save(function (err, doc) {
        console.log('Created test document: ' + doc._id);
      });
    }
  }
});
In a production environment you would remove this, but this is a reasonably complex app and we don’t want to have to manually enter data to test against all the time, so we have this code generate 150 rooms for us. So that we can test if room availability is working as expected, we book all rooms out for 3 date ranges by default.
Each time you restart the node server, all the records will be wiped and regenerated, so you don’t need to worry about messing up the data as you are developing. If you want to keep the data, though, just get rid of the Room.remove({}) call.
The last thing we are doing in the server code is defining the routes that will serve as our API:
app.post('/api/rooms', function (req, res) {
  Room.find(
    {
      type: req.body.roomType,
      beds: req.body.beds,
      max_occupancy: { $gt: req.body.guests },
      cost_per_night: {
        $gte: req.body.priceRange.lower,
        $lte: req.body.priceRange.upper,
      },
      reserved: {
        //Check if any of the dates the room has been reserved for overlap with the requsted dates
        $not: {
          $elemMatch: {
            from: { $lt: req.body.to.substring(0, 10) },
            to: { $gt: req.body.from.substring(0, 10) },
          },
        },
      },
    },
    function (err, rooms) {
      if (err) {
        res.send(err);
      } else {
        res.json(rooms);
      }
    }
  );
});

app.post('/api/rooms/reserve', function (req, res) {
  console.log(req.body._id);

  Room.findByIdAndUpdate(
    req.body._id,
    {
      $push: { reserved: { from: req.body.from, to: req.body.to } },
    },
    {
      safe: true,
      new: true,
    },
    function (err, room) {
      if (err) {
        res.send(err);
      } else {
        res.json(room);
      }
    }
  );
});
The first route is at /api/rooms and if we POST the search criteria to this URL it will return all of the available rooms that match the search criteria. We use find() on your model to query against the data. We have some simple matching going on:
type: req.body.roomType,
            beds: req.body.beds,
which will look for documents where the type and beds match the supplied values, but we also make use of some more advanced query operators like $gt and $lt. These mean “greater than” and “less than”, so we are doing things like checking if the number of guests is less than the max occupancy of the room, and if the cost per night falls within an accepted range.
The most complex part of this query is the following:
$not: {
                    $elemMatch: {from: {$lt: req.body.to.substring(0,10)}, to: {$gt: req.body.from.substring(0,10)}}
                }
This is what figures out if the room is booked out during the supplied date range – it took me way too long to figure out but I think the end result is beautifully simple. The use of $lt and $gt to check the date ranges wouldn’t come as a surprise, but we also use $elemMatch and $not. We use $elemMatch so that the query is run against every element in the reserved array, and it is looking for results where the requested date range overlaps with an existing booking. We then negate that with $not to only return results where that doesn’t happen.
Keep in mind that since we only care about the date, not the time component, we store the date as a simple string (which still allows us to compare dates). The reason we are using substring here is so that we can chop off all the time data that is sent to the API by Ionic.
The second route is at /api/rooms/reserve and simply allows us to find an existing room, and push a new reservation to the reserved array.
Now that the server is ready we can start it by running the following command:
node server.js
after changing to the ionic2-hotel-server folder in the terminal.
4. Implement the Rooms Service
Now we are going to implement the service that will handle interacting with the API we just created. We will be creating two methods in this service, one to retrieve rooms that match the search criteria supplied and one to reserve a room for a specified date range.
Modify src/providers/rooms.ts to reflect the following:
import { Injectable } from '@angular/core';
import { Http, Headers } from '@angular/http';
import 'rxjs/add/operator/map';

@Injectable()
export class Rooms {

  constructor(public http: Http) {

  }

  getRooms(options){

    return new Promise(resolve => {
      let headers = new Headers();
      headers.append('Content-Type', 'application/json');

      this.http.post('http://localhost:8080/api/rooms', JSON.stringify(options), {headers: headers})
        .map(res => res.json())
        .subscribe(data => {
          resolve(data);
        });
    });

  }

  reserveRoom(data){

    return new Promise(resolve => {

      let headers = new Headers();
      headers.append('Content-Type', 'application/json');

      this.http.post('http://localhost:8080/api/rooms/reserve', JSON.stringify(data), {headers: headers})
        .subscribe((data) => {
          resolve(data);
        });

    });

  }

}
Both of these functions post to the relevant API end point and return a promise that resolves with the response. Nothing really interesting is happening here, we are just passing on the data that we will be creating in our pages.
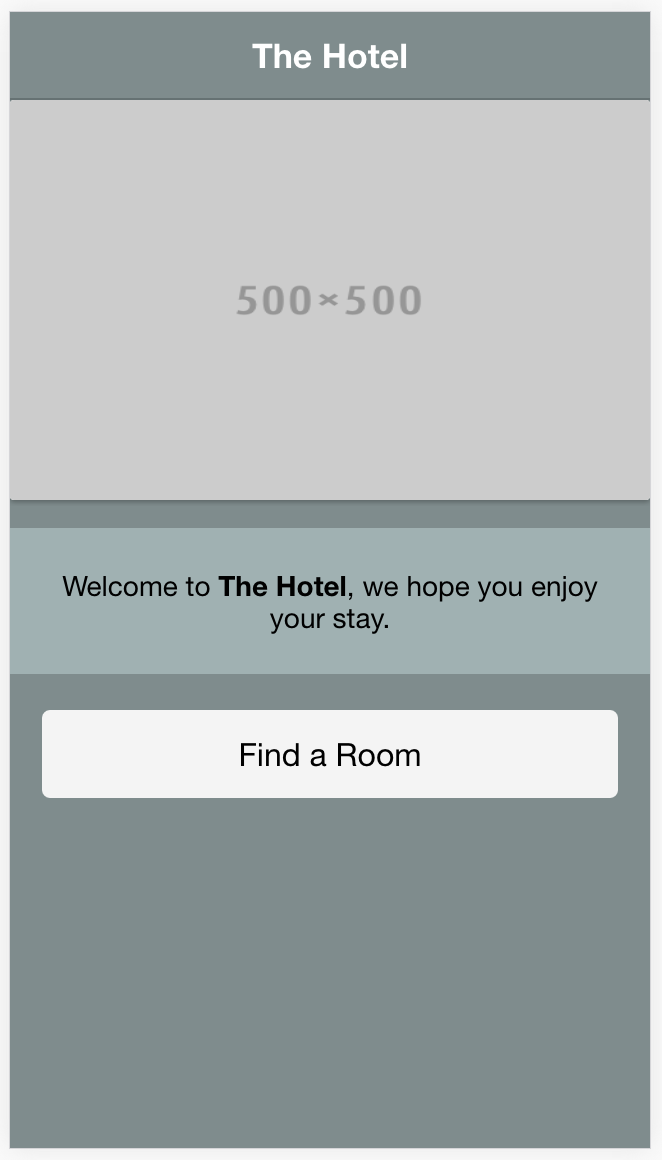
5. Create the Home Page
The home page isn’t anything more than a landing page for now, it’ll just contain a simple button to launch the search functionality. We will implement that now though so that we can start testing the app as we build it.
Modify src/pages/home/home.html to reflect the following:
<ion-header>
  <ion-navbar color="dark">
    <ion-title> The Hotel </ion-title>
  </ion-navbar>
</ion-header>

<ion-content>
  <ion-card>
    <img class="header" src="http://placehold.it/500x500" />
  </ion-card>

  <p>Welcome to <strong>The Hotel</strong>, we hope you enjoy your stay.</p>

  <button (click)="openSearch()" ion-button full color="light">
    Find a Room
  </button>
</ion-content>
Modify src/pages/home.ts to reflect the following:
import { Component } from '@angular/core';
import { NavController } from 'ionic-angular';
import { SearchPage } from '../search-page/search-page';
@Component({
selector: 'home-page',
templateUrl: 'home.html'
})
export class HomePage {
constructor(public nav: NavController) {
}
openSearch(){
this.nav.push(SearchPage);
}
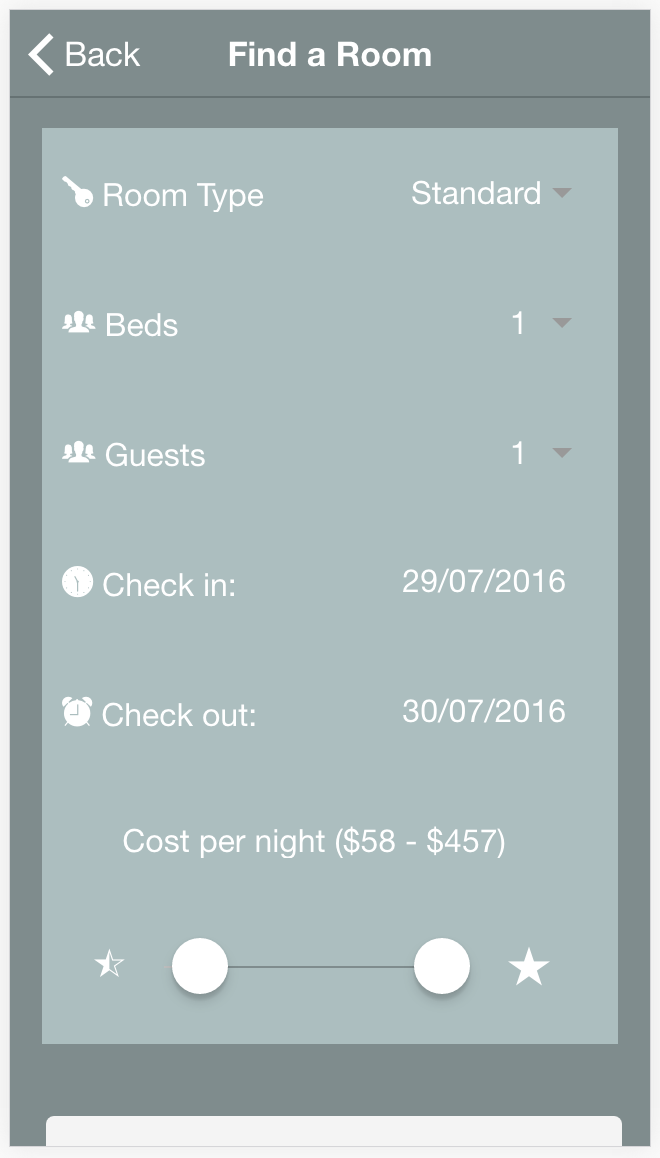
}6. Create the Search Page
The search page will provide a form to the user that will allow them to fill out details for the type of room they want to book, and for the date range they want to book it for:
Modify src/pages/search-page/search-page.html to reflect the following:
<ion-header>
  <ion-navbar color="dark">
    <ion-title>Find a Room</ion-title>
  </ion-navbar>
</ion-header>

<ion-content padding>
  <ion-list no-lines>
    <ion-item>
      <ion-label><ion-icon name="key"></ion-icon> Room Type</ion-label>
      <ion-select [(ngModel)]="roomType">
        <ion-option value="standard">Standard</ion-option>
        <ion-option value="studio">Studio</ion-option>
        <ion-option value="villa">Villa</ion-option>
        <ion-option value="penthouse">Penthouse</ion-option>
      </ion-select>
    </ion-item>

    <ion-item>
      <ion-label><ion-icon name="people"></ion-icon> Beds</ion-label>
      <ion-select [(ngModel)]="beds">
        <ion-option value="1">1</ion-option>
        <ion-option value="2">2</ion-option>
        <ion-option value="3">3</ion-option>
        <ion-option value="4">4</ion-option>
        <ion-option value="5">5</ion-option>
        <ion-option value="6">6</ion-option>
      </ion-select>
    </ion-item>

    <ion-item>
      <ion-label><ion-icon name="people"></ion-icon> Guests</ion-label>
      <ion-select [(ngModel)]="guests">
        <ion-option value="1">1</ion-option>
        <ion-option value="2">2</ion-option>
        <ion-option value="3">3</ion-option>
        <ion-option value="4">4</ion-option>
        <ion-option value="5">5</ion-option>
        <ion-option value="6">6</ion-option>
        <ion-option value="7">7</ion-option>
        <ion-option value="8">8</ion-option>
      </ion-select>
    </ion-item>

    <ion-item>
      <ion-label><ion-icon name="clock"></ion-icon> Check in:</ion-label>
      <ion-datetime
        displayFormat="DD/MM/YYYY"
        max="'2020-12-31'"
        pickerFormat="DD MM YYYY"
        [(ngModel)]="from"
      ></ion-datetime>
    </ion-item>

    <ion-item>
      <ion-label><ion-icon name="alarm"></ion-icon> Check out:</ion-label>
      <ion-datetime
        displayFormat="DD/MM/YYYY"
        max="'2020-12-31'"
        pickerFormat="DD MM YYYY"
        [(ngModel)]="to"
      ></ion-datetime>
    </ion-item>

    <ion-item>
      <ion-label
        >Cost per night (${{priceRange.lower}} -
        ${{priceRange.upper}})</ion-label
      >
      <ion-range
        max="500"
        dualKnobs="true"
        pin="true"
        [(ngModel)]="priceRange"
        dark
      >
        <ion-icon range-left small name="star-half"></ion-icon>
        <ion-icon range-right name="star"></ion-icon>
      </ion-range>
    </ion-item>
  </ion-list>

  <button (click)="findRooms()" ion-button full color="light">
    Find Rooms
  </button>
</ion-content>
The form we’ve added here is pretty straightforward. We have included two <ion-datetime> components to allow the user to select a date range. We also use an <ion-range> with the dualKnobs property to select an upper and lower bound for the price range.
For all of the inputs, we are simply using [(ngModel)] to tie them to values that we are about to define in the class definition for this component. When the user clicks the Find Rooms button, the findRooms() function will be triggered, which we are about to implement now.
Modify src/page/search-page/search-page.ts to reflect the following:
import { Component } from '@angular/core';
import { NavController, LoadingController, AlertController } from 'ionic-angular';
import { Rooms } from '../../providers/rooms';
import { AvailableRoomsPage } from '../available-rooms-page/available-rooms-page';

@Component({
  selector: 'search-page',
  templateUrl: 'search-page.html'
})
export class SearchPage {

    roomType: any;
    guests: any;
    beds: any;
    priceRange: any;
    from: any;
    to: any;

    constructor(public nav: NavController, public roomsService: Rooms, public alertCtrl: AlertController, public loadingCtrl: LoadingController) {

        let today = new Date();
        let tomorrow = new Date();
        tomorrow.setDate(tomorrow.getDate() + 1);

        this.priceRange = {
            lower: 0,
            upper: 500
        };

        this.roomType = 'standard';
        this.guests = 1;
        this.beds = 1;
        this.from = today.toISOString();
        this.to = tomorrow.toISOString();

    }

    findRooms(){

        let loading = this.loadingCtrl.create({
            content: "Finding rooms..."
        });

        loading.present();

        let options = {
            roomType: this.roomType,
            guests: this.guests,
            beds: this.beds,
            priceRange: this.priceRange,
            from: this.from,
            to: this.to
        };

        this.roomsService.getRooms(options).then((data) => {

            loading.dismiss();

            if(typeof(data[0]) === "undefined"){
                let alert = this.alertCtrl.create({
                    title: 'Oops!',
                    subTitle: 'Sorry, no rooms could be found for your search criteria.',
                    buttons: ['Ok']
                });

                alert.present();
            } else {
                this.nav.push(AvailableRoomsPage, {
                    rooms: data,
                    details: options
                });
            }

        }, (err) => {
            console.log(err);
        });

    }

}
We define a bunch of variables that we are using here and set up some default values for the form. Since we want the <ion-datetime> components to have a default value of the current date, we generate a new Date object here and then convert it to an ISO string, since that is the format the component uses.
The findRooms function simply builds an object containing all of the data we need from the form and then sends it off to the getRooms function in the Rooms provider. Whilst this is happening, we display a loading message, and once the provider resolves the promise we either take the user to a page containing the results, or let them know that no results could be found.
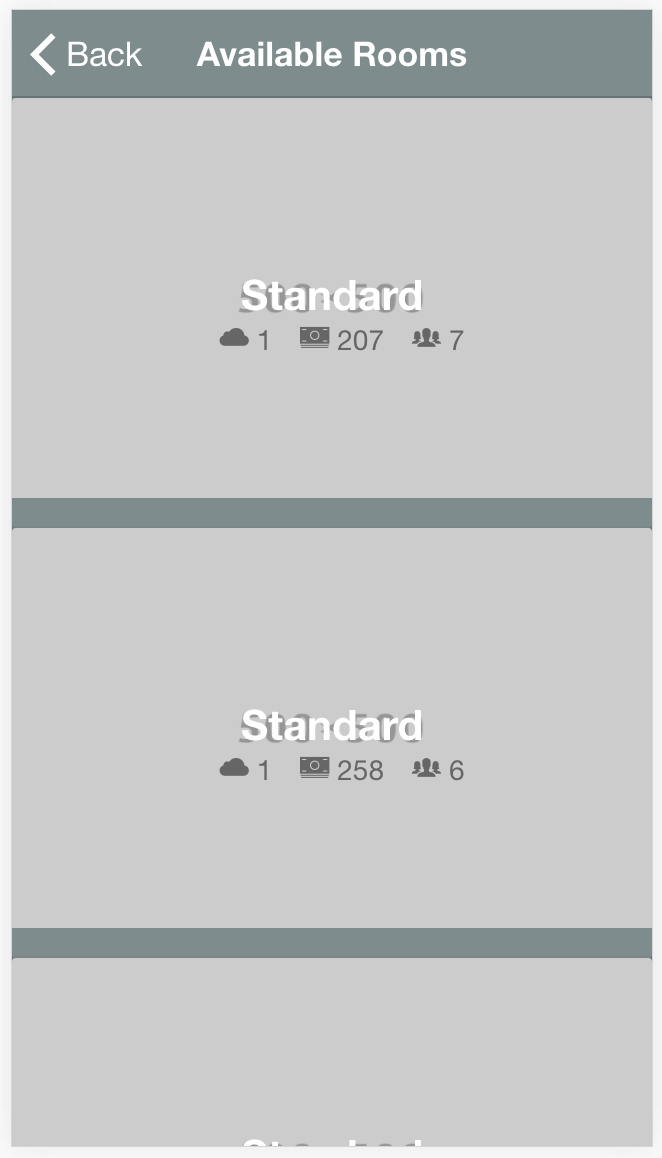
7. Create the Results Page
The last page handled fetching some results, which is then passed on to this results page. This page will display all of the matching rooms and allow the user to select one:
Modify src/pages/available-rooms-page/available-rooms-page.html to reflect the following:
<ion-header>
  <ion-navbar color="dark">
    <ion-title>Available Rooms</ion-title>
  </ion-navbar>
</ion-header>

<ion-content>
  <ion-card tappable (click)="bookRoom(room)" *ngFor="let room of rooms">
    <img class="header" src="http://placehold.it/500x500" />
    <div class="card-title-container">
      <p class="card-title">{{room.type}}</p>
      <p class="room-description">
        <ion-icon name="cloud"></ion-icon> {{room.beds}}
        <ion-icon name="cash"></ion-icon> {{room.cost_per_night}}
        <ion-icon name="people"></ion-icon> {{room.max_occupancy}}
      </p>
    </div>
  </ion-card>
</ion-content>
This template simply loops over all of the results contained on the rooms variable (which we set using **NavParams* to grab the data that was passed in to this page form the search page), and displays each of the rooms. We add a (click) function so that when a user clicks one of the rooms, it will trigger the bookRoom function and pass it the room that was selected.
Modify available-rooms.ts to reflect the following:
import { Component } from '@angular/core';
import { NavController, NavParams } from 'ionic-angular';
import { BookingPage } from '../booking-page/booking-page';

@Component({
  selector: 'available-rooms-page',
  templateUrl: 'available-rooms-page.html'
})
export class AvailableRoomsPage {

    rooms: any;

    constructor(public nav: NavController, public navParams: NavParams) {
        this.rooms = this.navParams.get('rooms');
    }

    bookRoom(room){
        this.nav.push(BookingPage, {
            room: room,
            details: this.navParams.get('details')
        });
    }

}
All we are doing in this class definition is grabbing the details for the room, and also the details for the form that were sent through from the last page. We set the rooms member variable so that we can display information in our template, and we add both the room and details to the bookRoom function because we want to pass both of these on to the final page (since we need details about the room, and also details about when the user wants to book the room for).
8. Create the Booking Page
This is the final page, it will display a confirmation of the detail of the room the user selected, and then allow the user to confirm their booking:
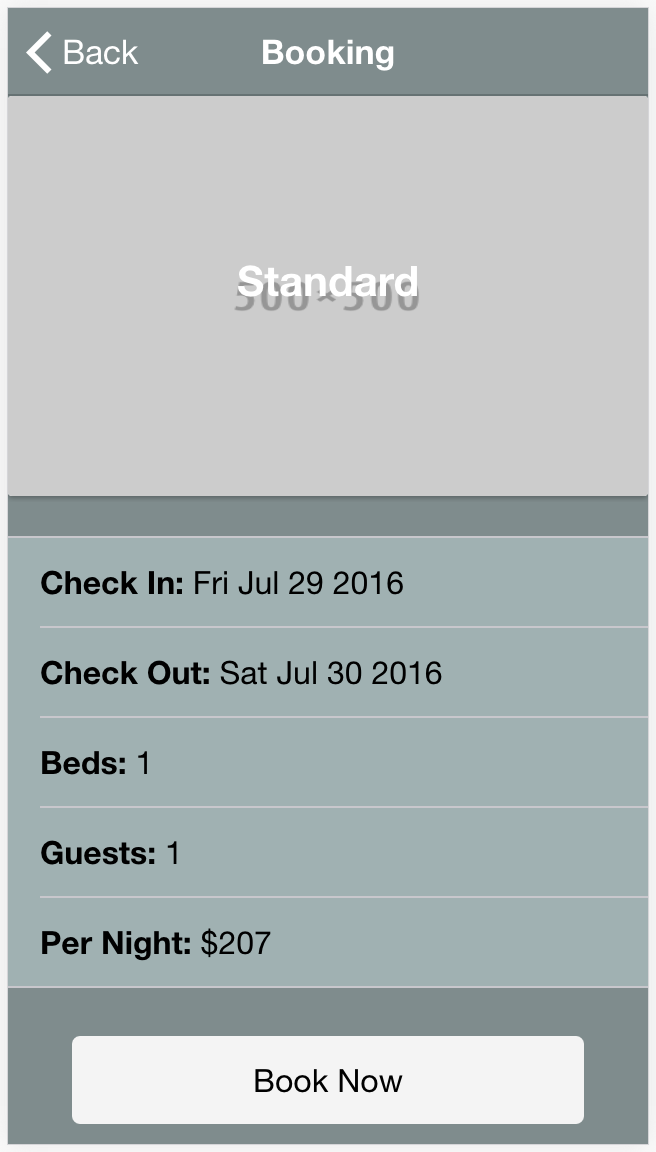
Modify src/pages/booking-page/booking-page.html to reflect the following:
<ion-header>
  <ion-navbar color="dark">
    <ion-title>Booking</ion-title>
  </ion-navbar>
</ion-header>

<ion-content>
  <ion-card>
    <img class="header" src="http://placehold.it/500x500" />
    <div class="card-title-container">
      <p class="card-title">{{room.type}}</p>
    </div>
  </ion-card>

  <ion-list>
    <ion-item> <strong>Check In:</strong> {{checkIn}} </ion-item>

    <ion-item> <strong>Check Out:</strong> {{checkOut}} </ion-item>

    <ion-item> <strong>Beds:</strong> {{room.beds}} </ion-item>

    <ion-item> <strong>Guests:</strong> {{details.guests}} </ion-item>

    <ion-item> <strong>Per Night:</strong> ${{room.cost_per_night}} </ion-item>
  </ion-list>

  <button (click)="book()" full ion-button color="light">Book Now</button>
</ion-content>
Again, this is a pretty simple template. We are just displaying some values and then adding a button that will trigger a book function, which will handle actually booking the room in the backend.
Modify src/pages/booking-page/booking-page.ts to reflect the following:
import { Component } from '@angular/core';
import { NavController, NavParams, LoadingController } from 'ionic-angular';
import { Rooms } from '../../providers/rooms';

@Component({
  selector: 'booking-page',
  templateUrl: 'booking-page.html'
})
export class BookingPage {

    room: any;
    details: any;
    checkIn: any;
    checkOut: any;

    constructor(public nav: NavController, public navParams: NavParams, public roomsService: Rooms, public loadingCtrl: LoadingController) {
        this.room = this.navParams.get('room');
        this.details = this.navParams.get('details');
        this.checkIn = new Date(this.details.from).toString().substring(0,15);
        this.checkOut = new Date(this.details.to).toString().substring(0,15);
    }

    book(){

        let newReservation = {
            _id: this.room._id,
            from: this.details.from.substring(0,10),
            to: this.details.from.substring(0,10)
        }

        let loading = this.loadingCtrl.create({
            content: "Booking room..."
        });

        loading.present();

        this.roomsService.reserveRoom(newReservation).then((res) => {

            loading.dismiss();
            this.nav.popToRoot();

        }, (err) => {
            console.log(err);
        });

    }

}
We are creating a new Date again here, purely for the sake of displaying the date to the user (rather than using the ISO string which isn’t as friendly). In the book function, we create a newReservation object containing the details of the reservation we want to make. We need the _id to find the record for the room in the backend, and we need the from and to values so we can push those dates into the reserved array for the room. We have already coded this on the backend, so we are simply just passing in the values now.
Once we have received a success response from the server, we dismiss the loading overlay and then go back to the home page of the application. The entire process is completed now, and the room that the user booked will now be unavailable to be booked again for the same time.
9. A Bit of Styling
We’ve finished the functionality of the app now, but it doesn’t look very nice. We’re going to run through now and add some styles to make everything look a little bit nicer. Styling is out of scope for this tutorial so I’m just going to run through these changes quickly, but if you’d like more information on styling Ionic 2 application I would recommend reading this post and this post.
Modify the ‘Named Color Variables’ in theme/variables.scss to reflect the following:
$colors: (
  primary: #387ef5,
  secondary: #32db64,
  danger: #f53d3d,
  light: #f4f4f4,
  dark: #7f8c8d,
  favorite: #69bb7b
);
Modify src/pages/available-rooms-page/available-rooms-page.scss to reflect the following:
.ios,
.md {
  available-rooms-page {
    ion-content {
      background-color: map-get($colors, dark);
    }

    .header {
      margin-bottom: 15px;
      width: 100%;
      height: 200px;
    }

    ion-card {
      background-color: map-get($colors, dark);
      position: relative;
      text-align: center;
      margin: 0;
      width: 100%;
    }

    .card-title-container {
      position: absolute;
      top: 40%;
      width: 100%;
    }

    .card-title {
      font-size: 1.5em;
      text-transform: capitalize;
      font-weight: bold;
      display: inline;
      color: #fff;
    }

    .room-description ion-icon {
      margin-left: 10px;
    }
  }
}
Modify src/pages/booking-page/booking-page.scss to reflect the following:
.ios,
.md {
  booking-page {
    ion-content {
      background-color: map-get($colors, dark);
    }

    .header {
      width: 100%;
      height: 200px;
    }

    ion-card {
      position: relative;
      text-align: center;
      margin: 0;
      width: 100%;
    }

    ion-list {
      margin-top: 20px;
      margin-bottom: 20px;
    }

    ion-item {
      background-color: #a0b1b2;
    }

    .card-title-container {
      position: absolute;
      top: 40%;
      width: 100%;
    }

    .card-title {
      text-transform: capitalize;
      font-size: 1.5em;
      font-weight: bold;
      display: inline;
      color: #fff;
    }

    .button-container {
      width: 100%;
      text-align: center !important;
    }

    .button-container button {
      width: 80%;
    }
  }
}
Modify src/pages/home/home.scss to reflect the following:
.ios,
.md {
  home-page {
    ion-content {
      background-color: map-get($colors, dark);
    }

    p {
      background-color: #a0b1b2;
      padding: 20px;
      text-align: center;
    }

    .header {
      width: 100%;
      height: 200px;
    }

    ion-card {
      position: relative;
      text-align: center;
      margin: 0;
      width: 100%;
    }

    .button-container {
      width: 100%;
      text-align: center;
    }

    .button-container button {
      width: 90%;
    }
  }
}
Modify src/pages/search-page/search-page.scss to reflect the following:
.ios,
.md {
  search-page {
    ion-content {
      background-color: map-get($colors, dark);
    }

    ion-label {
      color: #fff;
    }

    ion-item {
      color: #fff;
      padding: 10px;
      background-color: #acbebf;
    }
  }
}
The app should now be finished, and you should have something like this:
Summary
This tutorial was quite advanced and close to something that you might actually build in a real life situation. There are some missing things of course like:
- Accepting payments
- Sending receipts, emails, and confirmation
- A gallery for photos of the room
- More validations and checks
- Keeping records of customers
and so on, but what we have built is a fully functional hotel room booking system. I hope that this tutorial has also highlighted one of the strengths of MongoDB, and that is its powerful data querying capabilities.