In this tutorial, we are going to take a look at creating a directive that will allow us to apply a cool little enter/exit animation to items inside of an Ionic list. We will be able to define a simple CSS class to determine what the animated styles should look like, which might end up looking something like this:
NOTE: The actual end result is smoother than the GIF above looks
In this case, we are modifying the opacity of the list items and applying a transform as they enter or exit the list from the top or bottom of the page. You can apply whatever styles you like to this list (just by changing a simple CSS class), but keep in mind that animating anything other than opacity and transform will have a much greater negative impact on performance. In some circumstances, the performance may still be fine regardless, but just keep that in mind.
If you don’t know why animating height is bad for performance and why animating transform is better for performance, I would recommend watching High Performance Animations in Ionic.
Achieving this animation will rely on adding and removing a particular CSS class as the items come on to the screen (or leave), and to do that we will be using something called the Intersection Observer API.
Before We Get Started
Last updated for Ionic 4.0.0
This tutorial assumes you already have a basic level of understanding of Ionic & Angular. If you require more introductory level content on Ionic I would recommend checking out my book or the Ionic tutorials on my website.
Introducing the Intersection Observer
The Intersection Observer API is a new-ish API and it is the main reason I came up with this tutorial (I’ve wanted an excuse to use the Intersection Observer API for a while now). In short, the Intersection Observer API allows us to easily detect whether an element is currently within the browser’s viewport (i.e. you can see the element on screen). More specifically, the Intersection Observer API allows us to detect/measure the intersection of an element and an ancestor element (with the viewport being the default ancestor if nothing else is specified).
Common examples of using the Intersection Observer API include things like lazy loading images (where we only want to load images as they come on screen), or infinite scrolling (where we only want to load more items as we get towards the bottom of a list).
The basic use of the Intersection Observer API looks like this:
// Create the observer
this.observer = new IntersectionObserver((entries) => {
  entries.forEach((entry: any) => {
    if (entry.isIntersecting) {
      // do something if intersecting
    } else {
      // do something if not intersecting
    }
  });
});

// Use the observer on specific elements
this.items.forEach((item) => {
  this.observer.observe(item.nativeElement);
});
We first create a new instance of an IntersectionObserver which provides a callback function. This function is triggered whenever an element being observed enters or exists the viewport (assuming the viewport is being used). We are provided with an array of entries which will contain any of these elements.
This provides us with some information about the intersection. We can see if isIntersecting is true which indicates that the element is visible, but other information is also available like the intersectionRatio which indicates how much of the element is visible.
Once our observer is set up with a callback, we then tell that observer to observe any items that we want to watch. In this example, we are watching a list of items. I’d recommend taking a look further into the API, but now that we are armed with some basic knowledge, let’s use that to build our directive.
1. Create an AnimateItems Directive
First, we will create a new directive by running the following command:
ionic g directive directives/AnimateItemsYou will need to set this directive up appropriately in your application in order to be able to use it (e.g. by adding it to the module for the page you want to use it on). If you are not aware of how you should include directives/components in your application, I would recommend watching: Using Custom Components on Multiple Pages.
With that directive created, let’s add the code.
Modify src/app/directives/animate-items.directive.ts to reflect the following:
import { Directive, ContentChildren, QueryList, ElementRef, AfterViewInit, Renderer2 } from '@angular/core';
import { IonItem } from '@ionic/angular';

@Directive({
  selector: '[appAnimateItems]'
})
export class AnimateItemsDirective implements AfterViewInit {

  private observer: IntersectionObserver;

  @ContentChildren(IonItem, {read: ElementRef}) items: QueryList<ElementRef>;

  constructor(private renderer: Renderer2) {

  }

  ngAfterViewInit(){

    this.observer = new IntersectionObserver((entries) => {

      entries.forEach((entry: any) => {

        if(!entry.isIntersecting){
          this.renderer.addClass(entry.target, 'exit-enter-styles');
        } else {
          this.renderer.removeClass(entry.target, 'exit-enter-styles');
        }
      })

    }, threshold: 0.5});

    this.items.forEach(item => {
      this.observer.observe(item.nativeElement);
    });

  }

}
The basic idea is that we want to be able to attach this directive to an <ion-list> like this:
<ion-list appAnimateItems>
  <ion-item *ngFor="let item of items"></ion-item>
</ion-list>
and this will handle applying the animation automatically for us. For the animation to work, we need to apply (and remove) a specific CSS class to each of the <ion-item> elements as they enter or exit the screen. To do this, we need to get a reference to those elements, which we do with @ContentChildren:
@ContentChildren(IonItem, {read: ElementRef}) items: QueryList<ElementRef>;Since this directive will be attached to an IonList, we will be able to grab a reference to all of the IonItem elements projected inside of that list by using @ContentChildren. We specifically want a reference to the actual element (not the IonItem) itself, so we supply read: ElementRef. This will return us a list of IonItem elements as a QueryList which will be stored on the items member variable.
In the ngAfterViewInit function we set up our observer. This looks almost identical to the example we just discussed, with a couple of differences. First, we are using the Renderer to apply or remove a class called exit-enter-styles based on whether or not the isIntersecting property is true or false.
The other important difference is that we supply a threshold option to the observer. If the observer is triggered when an element goes off-screen, we can’t really achieve much by animating an item that is already off-screen. Instead, by supplying a threshold of 0.5 the observer will trigger when an item is either 50% on the screen or 50% off the screen (which is the same thing, but I’m talking in the context of entering or exiting the screen). This means that the class will be applied just as the item is about to leave or enter the screen (rather than after it has already left).
2. Define the Styles
Our directive is pretty much done at this point, but we still need to define the styles for the animation. Assuming that you wanted to add an animation to a list on the home page, you might do something like this.
Modify src/app/home/home.page.scss to reflect the following:
ion-item {
  transition: 0.3s ease-in-out;
}

.exit-enter-styles {
  opacity: 0;
  transform: translate3d(20px, 0, 0);
}
It is important to apply the transition property so that the changes in CSS styles are animated rather than just being instantly applied. Otherwise, you can just set up whatever kind of styles you want inside of the exit-enter-styles, but again, make sure you keep performance in mind as I mentioned earlier.
3. Add the Directive to an Ionic List
Finally, we will just need to apply the directive to an Ionic list. If you want to recreate the example I used, just follow these steps.
Modify src/app/home/home.page.ts to reflect the following:
import { Component } from '@angular/core';

@Component({
  selector: 'app-home',
  templateUrl: 'home.page.html',
  styleUrls: ['home.page.scss'],
})
export class HomePage {

  public messages;

  constructor(){

    this.messages = new Array(100).fill({title: 'Hello'});

  }

}
This will create an array with 100 elements prefilled with some dummy data.
Modify src/app/home/home.page.html to reflect the following
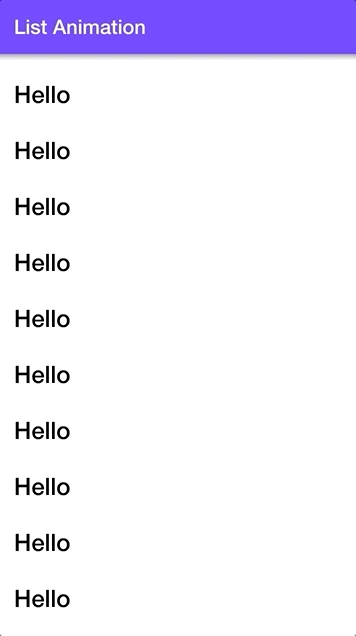
<ion-header>
  <ion-toolbar color="tertiary">
    <ion-title> List Animation </ion-title>
  </ion-toolbar>
</ion-header>

<ion-content>
  <ion-list lines="none" appAnimateItems>
    <ion-item *ngFor="let message of messages">
      <h2>{{ message.title }}</h2>
    </ion-item>
  </ion-list>
</ion-content>
Summary
Although the logic for our animation is somewhat complex, we can now easily apply it to any list simply by adding the appAnimateItems directive to it and defining the styles we want to apply. You could even take this further by making the directive more configurable (e.g. you could add an @Input to the directive that allows you to specify the name of the class to be applied).
The Intersection Observer API is a fantastic addition to the web, and it transforms the previously difficult and expensive task of detecting intersecting/visible elements and makes it relatively simple.