I was browsing through the analytics for this website when I saw that someone had arrived on one of my articles by searching for: “why does Ionic have a node modules folder?”.
The answer to that is simple enough, that’s where most of the dependencies for the application are stored (like the Ionic library itself, the Angular library, and about 100 other things). It made me realise that there is a lot in the Ionic 2 build process that I mostly just take for granted. Ionic makes it easy for developers to get up and running, which is great, but at the same time, it can make parts of the process feel like confusing magic.
In this tutorial, I will give a broad overview of the build process. If you’d like some more specific information on the different files and folders in an Ionic 2 project, I’d recommend watching this video tutorial. This isn’t going to be an in-depth look at how the build process works, we won’t be discussing the specifics of Webpack or Just-in-Time compiling vs Ahead-of-Time compiling, but it should be enough for a beginner to more or less “get” how the build process works in general.
We are going to walk through three distinct stages of application development:
- Generation
- Serving through the browser
- Building for a device
Before We Get Started
Before you go through this tutorial, you should have at least a basic understanding of Ionic 2 concepts. You must also already have Ionic 2 installed on your machine.
If you’re not familiar with Ionic 2 already, I’d recommend reading my Ionic 2 Beginners Guide first to get up and running and understand the basic concepts. If you want a much more detailed guide for learning Ionic 2, then take a look at Building Mobile Apps with Ionic 2.
1. Generation
The first step in the process is to generate the application itself. There’s quite a few files, folders, and dependencies that need to be set up, so fortunately, we don’t have to do it all manually ourselves. We can use the Ionic CLI (which is a separate project to the Ionic Framework) to easily generate a new project. All we have to do is run the following command:
ionic start ionic2-build-example blank --v2This will create a new project called ionic2-build-example and the project will be based on the blank template that Ionic provides, which is just a simple one-page application.
If we take a look at what is happening in the command line now…

We can see that it is downloading the Ionic 2 app base and the blank starter template.
The app base is what contains the generic structure of an Ionic 2 application, including most of the dependencies, and the blank starter template is what contains the code specific to the blank template. The blank template just contains a home page, and the configuration for the root template, but other templates may come with more components built in.
The base and the starter template are combined to give you the full Ionic 2 project, except one very important folder… the node_modules folder.
In the image above, you will see after the base and template have been downloaded that it says the following:
Installing npm packages (may take a minute or two)...As I mentioned before, the node_modules folder contains the dependencies for the application. This is handled by npm which stands for Node Package Manager and is used to install packages in Javascript projects (it’s not specific to Ionic). We have a default set of packages that need to be installed, but you can also install additional packages later, like this:
npm install some-package --saveOnce the npm packages have finished installing, you will be able to start developing the application.
2. Serving
Soon enough, you will want to serve the application so that you can view it through the browser by running the following command:
ionic serveThis actually performs an important part in the build process. Take a look at the folder structure before and after running the serve command:
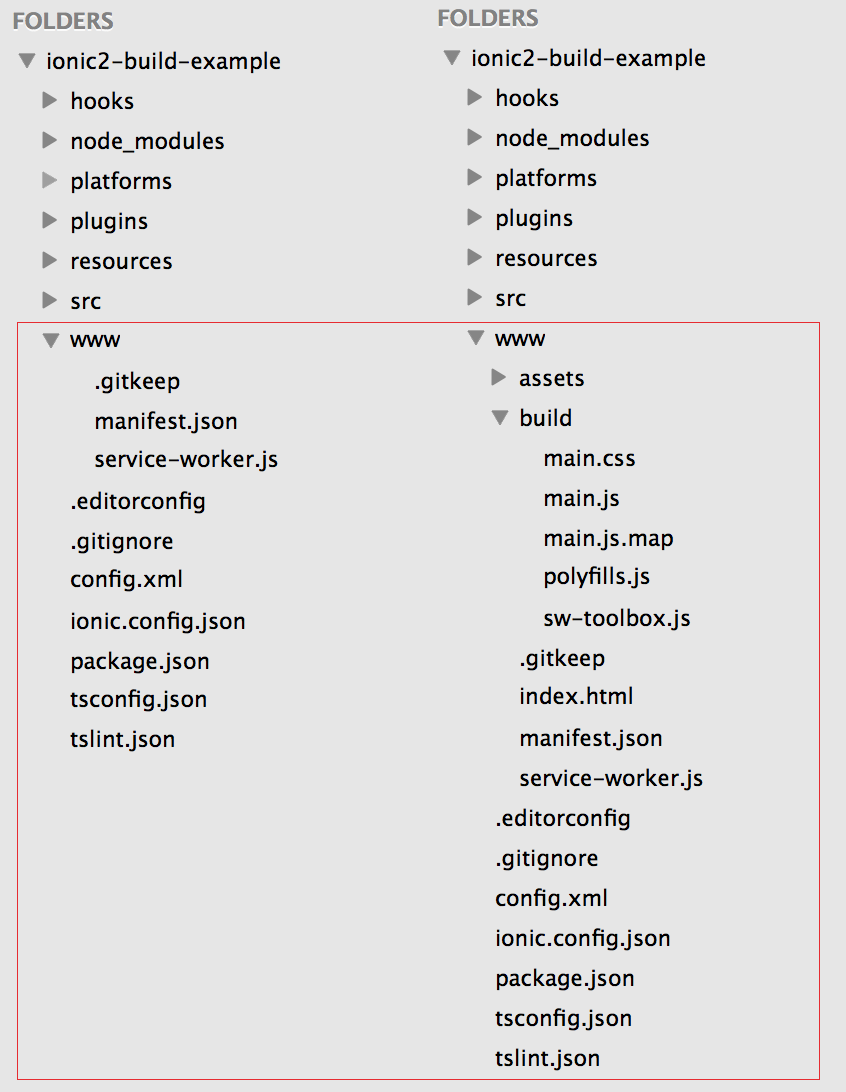
You will notice that some additional files and folders are added to the www folder. This is the code that is actually run through the browser, the code you create inside of the src folder never actually runs.
Let’s take a closer look at what happens…
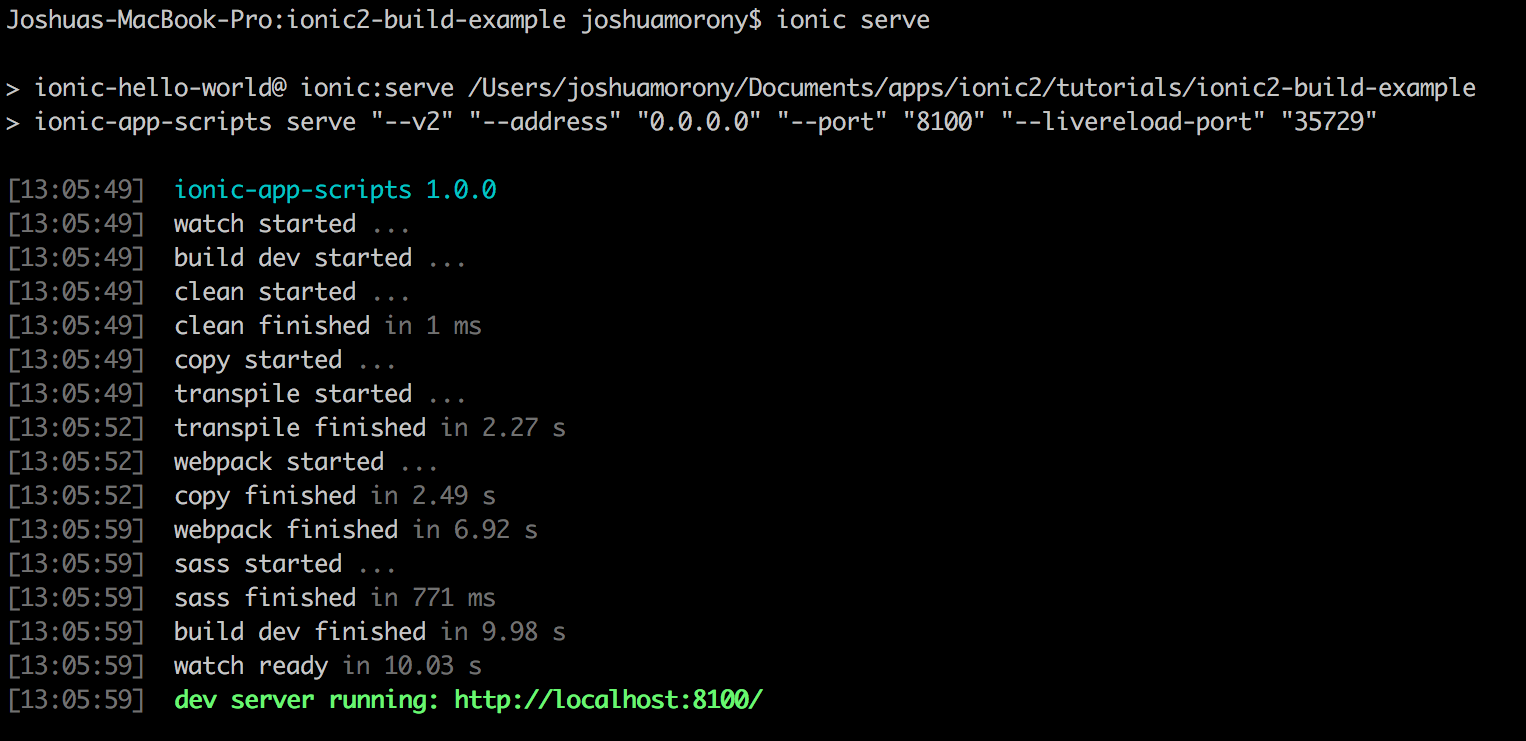
The first thing the serve command does is start a watch. This is what will watch your project for changes, so once you serve the application you can make additional changes to the code and it will update automatically. This is helpful, but not really critical to the build process.
What is important, is the mentions of the code being copied and transpiled. In Ionic 2, we write our code using TypeScript. TypeScript, although similar to JavaScript, can not run directly through a browser (in a sense, TypeScript is a made up language). In order to make our applications work, we first need to transpile the TypeScript code into JavaScript code that browsers can understand. So, the build process transpiles the code for us and copies it over to the www folder in the new format (which will be completely unrecognisable if you open it up). It is the code inside of the www folder which will then be run through the browser.
3. Building
At this point, the application is set up correctly and it is able to run through the browser, but there is (usually) one more step in the process, and that is building the application for a native platform like iOS and Android.
By default, the iOS platform is already added to an Ionic 2 project, and you will find a folder for it under platforms:
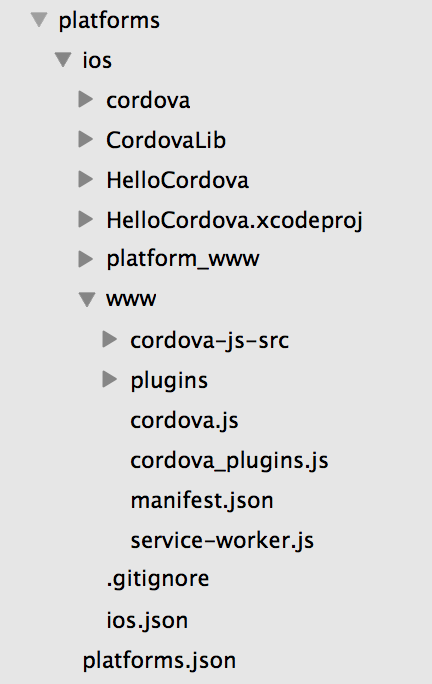
This does not contain any kind of executable code though, we first need to build the application with Cordova by running the following command:
ionic build iosNOTE: There are variations of this command. We can include the --prod flag to create a production build, and/or the --release to create a build that can be signed with a distribution profile that is required to submit to the iOS app store. If you want to upload applications to the app store you will need to go through the process of signing your applications as well which I won’t be covering here.
Once you run this command, it will initially go through similar steps to a normal serve:
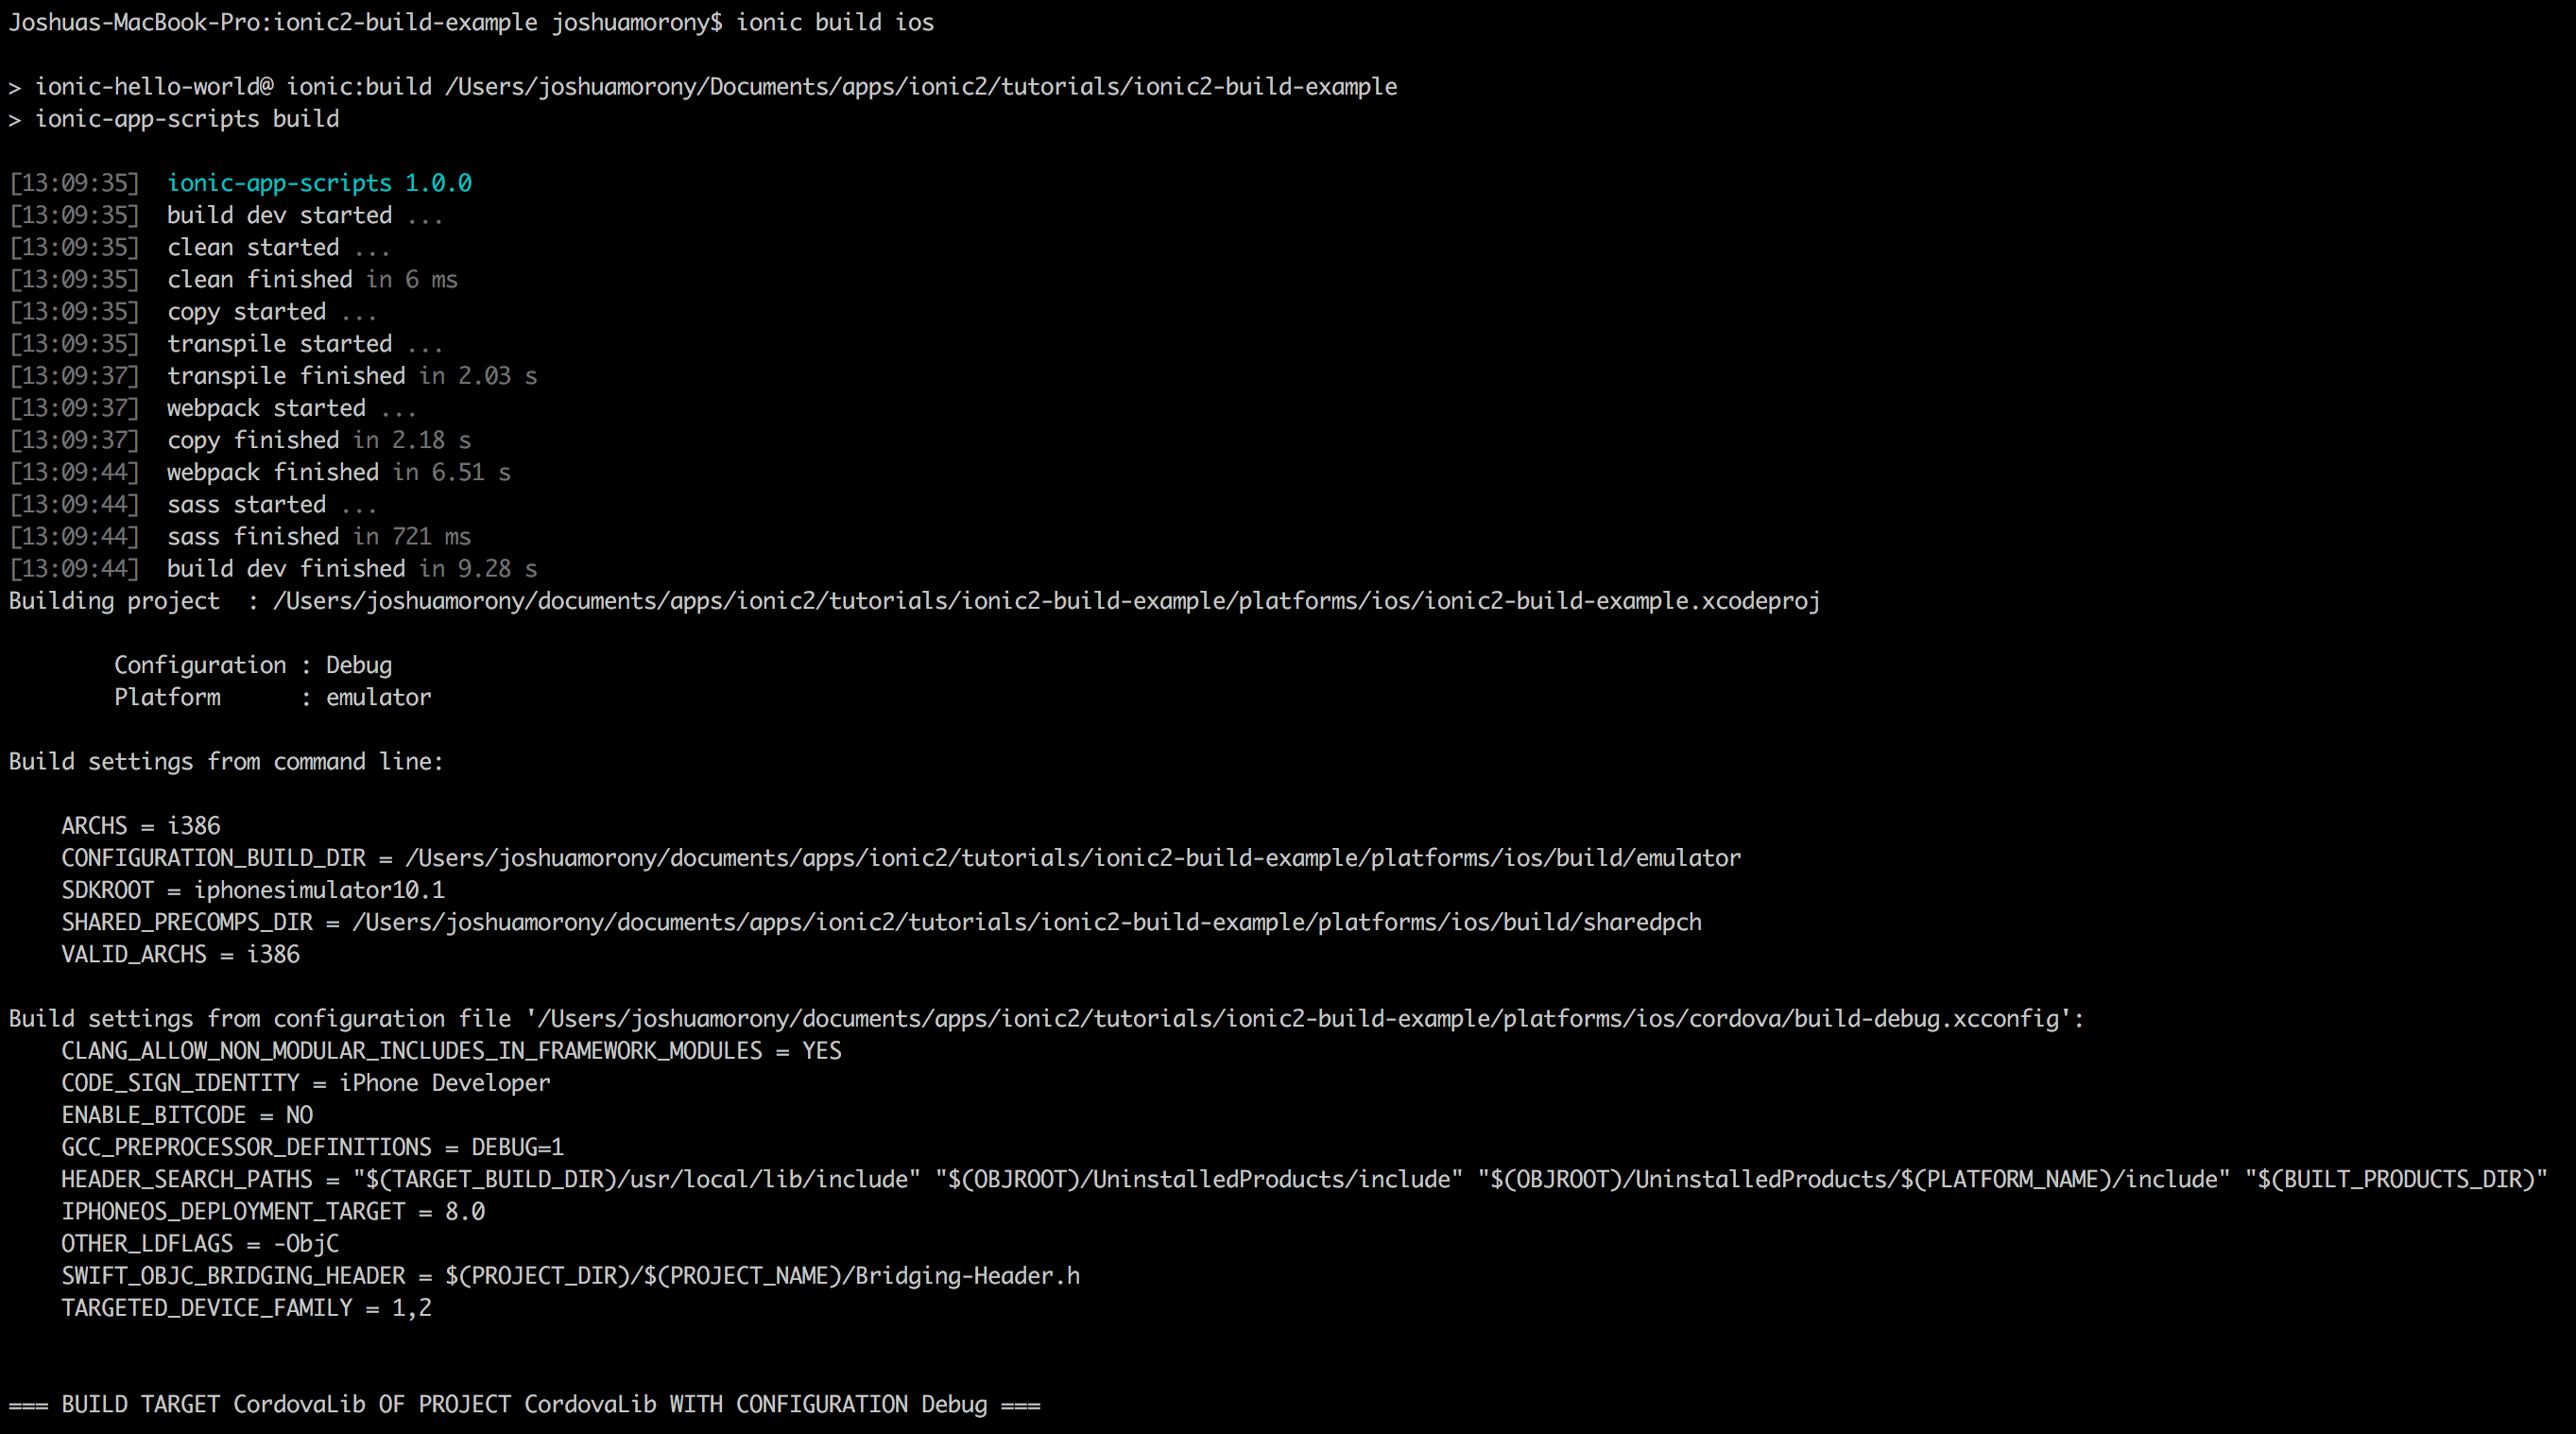
but then it will go through the Cordova build process. Once the command has finished, you will find a few additional files and folders inside of the ios folder:
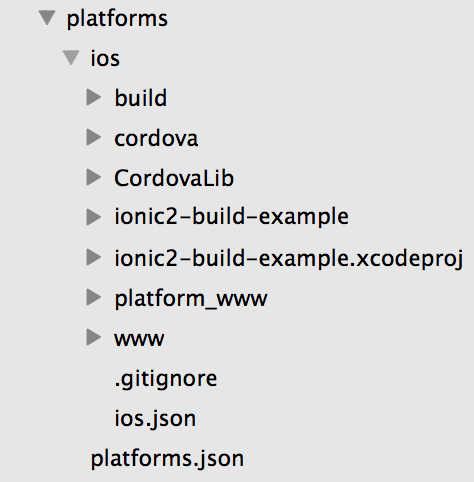
Included in those files and folders is the .xcodeproj file which you can run on an iOS device and you can use it to create an .ipa file which can be uploaded to the app store. Although I haven’t shown the process for Android here, it is essentially the same, except that you would use:
ionic build androidand a .apk file would be generated instead of a .xcodeproj file.
Summary
This is a very simplistic overview of the Ionic 2 build process, and there is quite a lot going on behind the scenes that I haven’t covered, but it should illustrate the general concept of how the build process works.