

Push Notifications can add so much value to an application. They’re used to instantly send updates to your users, let them know when they’ve received a new message or something else has happened in your app and a whole lot more.
Just because you’re not building a native application it doesn’t mean you have to miss out on the action. It’s (reasonably) easy to set up Push Notifications in your PhoneGap Build application using the PushWoosh plugin. In this tutorial we will be walking through how to set up Push Notifications for iOS and Android. I’ll be using Sencha Touch specifically for this tutorial but it should be very easily adaptable to any other framework.
1. Create a PushWoosh Account
First head over to the PushWoosh website and create a new account. There’s a few different pricing packages with a lot of different features but the main difference is:
Free
- Up to 1,000,000 devices
- Broadcast only (can only manually send Push Notifications through the control panel)
Premium ($49/mo)
- As above
- Use of the Remote API (which allows you to send a push notification when something in your app happens for example)
- Use of tags, geozones, beacons and more
There are more features than this and higher packages but for me the main difference is that the free package gives you “dumb” push notifications and the paid version gives you “smart” push notifications. When you first sign up you should receive a free 14 day trial of the Platinum package so you can try out all the features before committing to buying.
2. Add an Application
Now that you’ve set up your account, log in and add a new application:
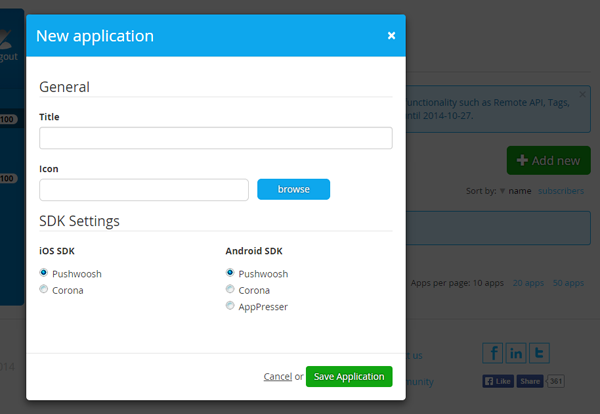
- Enter the title of your application and upload your applications 1024 x 1024 icon.
- Leave the iOS SDK and Android SDK set to Pushwoosh
- Click Save Application
You should now be greeted with a screen like this:
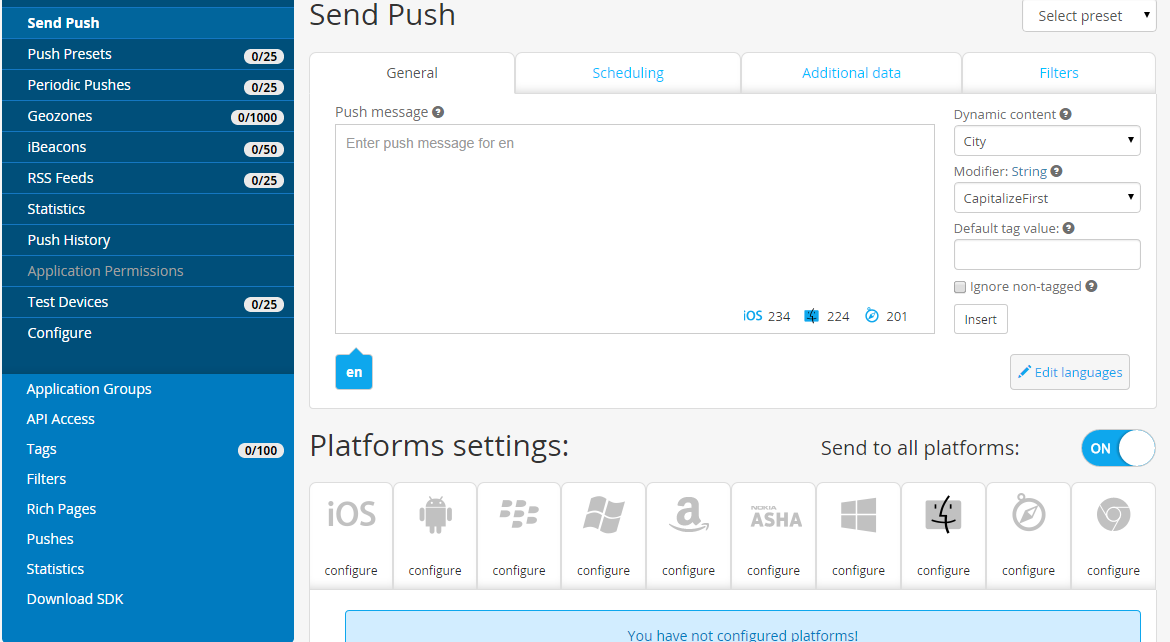
At the top we have the interface for broadcasting push notifications, and below that we have the option to configure different platforms. We’re going to be setting up push notifications for iOS and Android. If you click on ’iOS Configure’ you will get a pop up asking for a Certificate file, Key file and Private key password. We’re going to create these now.
3. Creating an APNS Certificate for iOS
Before we create the certificate you’re going to have to set up an App ID for your application if you haven’t already, as well as registering some devices that the app will be installed on. Read this post for information on how to do that. Make sure when registering your App ID that you check the box that says ‘Push Notifications’. Although you don’t need to do it now, that post also describes how to create a .p12 file which we will be doing shortly. Once you’ve created an App ID and registered at least one device, do the following:
- Log in to the member center at developer.apple.com (this requires that you are already enrolled in the developer program)
- Click on ’Certificates, Identifiers & Profiles’
- Under ’Certificates’ click ’Development’
- Click ‘upload a Certificate Signing Request from your Mac’ (even if you’re using a Windows computer!)
- Choose Apple Push Notification service SSL (Sandbox)
- Click ’Continue’
- Choose your App ID and click ’Continue’
- Create a CSR file by following the instructions in this post, then click ’Continue’ and upload it.
- Download the resulting certificate file
Note: When you are ready to submit your application to the App Store you will need to create a production certificate rather than a sandbox one.
This process is very similar to creating the development or distribution certificates required to install or distribute your application. We will also be creating a .p12 file from this push certificate as we would a normal development or distribution certificate. Again follow the instructions in this post to create a .p12 file from the certificate you just created.
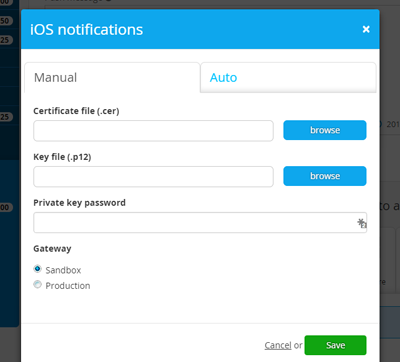
Go back to the PushWoosh control panel, click ’iOS Configure’ again and upload the certificate file, key file and password you just created. Set the Gateway to ’Sandbox’ and click ’Save‘.
If you’ve completed these steps successfully you should now see ‘iOS’ highlighted in blue with ‘0 subscribers’.
4. Generating a Google Cloud Messaging API Key for Android
Now let’s configure push notifications for Android. If you click configure you will notice it asks for a Google Cloud Messaging API Key – let’s set that up.
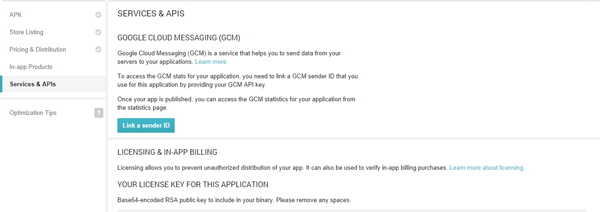
- First go to the Google Play developer console and create a test app if you haven’t created one already
- Click on ’Services & APIs’ and you should see an option for Google Cloud Messaging (GCM):
- To create your sender ID go to https://code.google.com/apis/console/
- Create a new project
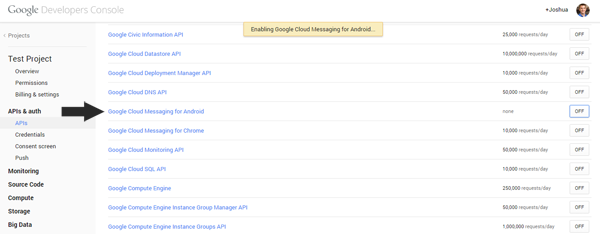
- Go into the new project click ’APIs & Auth’ and then ’APIs’
- Scroll down to ’Google Cloud Messaging for Android’ and turn it ON
- Under ’APIs & Auth’ click ’Credentials’
- Under Public API access click ’Create a new Key‘:
- Choose Browser key
- Leave the field blank and click ’Create’
- Copy & Paste the generated API Key into the ’Link a sender ID’ box in the Google Play console:
- Go back to the PushWoosh control panel, click ’Android Configure’ and enter the same API key
Once again, if everything went OK you should now see Android highlighted in blue with 0 subscribers.
5. Make Code Changes in your Application
Now we’re going to have to make some changes to our code. Open up your config.xml file and make the following changes: (if you don’t know how to set up your app to use PhoneGap Build take a look at this tutorial).
- Add the PushWoosh plugin:
<gap:plugin name="com.pushwoosh.plugins.pushwoosh" version="3.0.2" />- Either set your access origin to all, or specifically the PushWoosh domain:
<access origin="*"/>
<access origin="*.pushwoosh.com"/>
We will also need to include two JavaScript files in our project (one for iOS and one for Android). I’m setting this up specifically for Sencha Touch but this should work the same way for just about any framework – it’s not important that you follow this exactly, just that they are included in some way.
- Create a new folder inside the resources folder called ’js’
- Create a file called PushwooshiOS.js in this folder and add the following code:
function registerPushwooshIOS() {
  var pushNotification = window.plugins.pushNotification;

  //push notifications handler
  document.addEventListener('push-notification', function (event) {
    //event.notification is a JSON push notification payload
    var notification = event.notification;

    //we might want to display and alert with push notification title
    alert(notification.aps.alert);

    //sample code to view full push payload in the alert (test mode)
    //alert(JSON.stringify(notification));

    //reset badges on icon as user has accepted push notification
    pushNotification.setApplicationIconBadgeNumber(0);
  });

  //register for push notifications
  pushNotification.registerDevice(
    {
      alert: true,
      badge: true,
      sound: true,
      pw_appid: '[PUSH WOOSH ID]',
      appname: '[APP NAME]',
    },
    function (status) {
      //this is a push token
      var deviceToken = status['deviceToken'];
      console.warn('registerDevice: ' + deviceToken);

      rungroup.globals.deviceToken = deviceToken;

      //we are ready to use the plugin methods
      onPushwooshiOSInitialized(deviceToken);
    },
    function (status) {
      console.warn('failed to register : ' + JSON.stringify(status));
      alert(JSON.stringify(['failed to register ', status]));
    }
  );

  //reset badges on application start
  pushNotification.setApplicationIconBadgeNumber(0);
}

// the token has been registered, we can use Pushwoosh plugin methods
function onPushwooshiOSInitialized(pushToken) {
  var pushNotification = window.plugins.pushNotification;
  //retrieve the tags for the device
  pushNotification.getTags(
    function (tags) {
      console.warn('tags for the device: ' + JSON.stringify(tags));
    },
    function (error) {
      console.warn('get tags error: ' + JSON.stringify(error));
    }
  );

  //start geo tracking. PWTrackSignificantLocationChanges - Uses GPS in foreground, Cell Triangulation in background.
  pushNotification.startLocationTracking(
    'PWTrackSignificantLocationChanges',
    function () {
      console.warn('Location Tracking Started');
    }
  );
}
Make sure to replace [PUSH WOOSH ID] with your ‘Application Code’ from the PushWoosh control panel and [APP NAME] with your applications name.
- Create a new file called PushwooshAndroid.js in the same folder and add the following code:
function registerPushwooshAndroid() {
  var pushNotification = window.plugins.pushNotification;

  pushNotification.registerDevice(
    { projectid: '[PROJECT ID]', appid: '[PUSH WOOSH ID]' },

    function (status) {
      var pushToken = status;
      console.warn('push token: ' + pushToken);
      alert(pushToken);
    },
    function (status) {
      console.warn(JSON.stringify(['failed to register ', status]));
      alert(status);
    }
  );

  document.addEventListener('push-notification', function (event) {
    var title = event.notification.title;
    var userData = event.notification.userdata;

    if (typeof userData != 'undefined') {
      console.warn('user data: ' + JSON.stringify(userData));
    }

    navigator.notification.alert(title);
  });
}

//This is never been called currently
function onPushwooshAndroidInitialized(pushToken) {
  //output the token to the console
  console.warn('push token: ' + pushToken);

  var pushNotification = window.plugins.pushNotification;

  pushNotification.getTags(
    function (tags) {
      console.warn('tags for the device: ' + JSON.stringify(tags));
    },
    function (error) {
      console.warn('get tags error: ' + JSON.stringify(error));
    }
  );

  pushNotification.setLightScreenOnNotification(false);

  //Pushwoosh Android specific method that cares for the battery
  pushNotification.startGeoPushes();
}
Make sure to replace [PROJECT ID] with your projects ID from the Google Console and [PUSH WOOSH ID] with your ‘Application Code’ from the PushWoosh control panel.
Now we need to include those files in our project, make the following change to index.html:
<script type="text/javascript" src="phonegap.js"></script>
<script type="text/javascript" src="PushNotification.js"></script>
<script type="text/javascript" src="resources/js/PushwooshAndroid.js"></script>
<script type="text/javascript" src="resources/js/PushwooshiOS.js"></script>
You will also notice I’ve included ”PushNotification.js”. This is included automatically by PhoneGap Build and we do not need to include the file in our project, only reference it.
We will also need to initialize the PushWoosh plugin. If you do not have one already, create a ’util’ folder inside of your ’app’ folder. Create a file called ’Pushwoosh.js’ inside that folder and add the following code:
Ext.define('MyApp.util.Pushwoosh', {
  singleton: true,

  initPushwoosh: function () {
    var pushNotification = window.plugins.pushNotification;

    if (Ext.os.is.Android) {
      registerPushwooshAndroid();
    }

    if (Ext.os.is.iOS) {
      registerPushwooshIOS();
    }

    pushNotification.onDeviceReady();
  },
});
Finally, open up your app.js file and add the utility file we just created to the requires array:
requires: [
    'MyApp.util.Pushwoosh'
],
and trigger the following code inside of your launch() function:
MyApp.util.Pushwoosh.initPushwoosh();6. Install and Test
All that is left now is to install the application on your device and give it a shot. Once your app is installed, go to the PushWoosh control panel and try sending a push notification (type a message and then click “Woosh!”). If all has gone well, you should see it pop up on your device almost immediately.