

In a previous tutorial, I have demonstrated how to use Geolocation in an Ionic 2 application. The method used in that tutorial is the “standard” way to use the Geolocation plugin, it will allow you to grab the users current position, or watch their position over time whilst they have the app open.
That is useful in a lot of circumstances, but you may want to access the devices GPS over a long period of time, including when the user closes your application. When using the standard Geolocation plugin, as soon as the user exits the application you lose your ability to track them.
This is a problem I have faced before, and it popped its head up again recently since I am currently building an Ionic 2 application that tracks how far a user has run, and I don’t expect the user to keep the app open the entire time they are running (which would be pretty awkward).
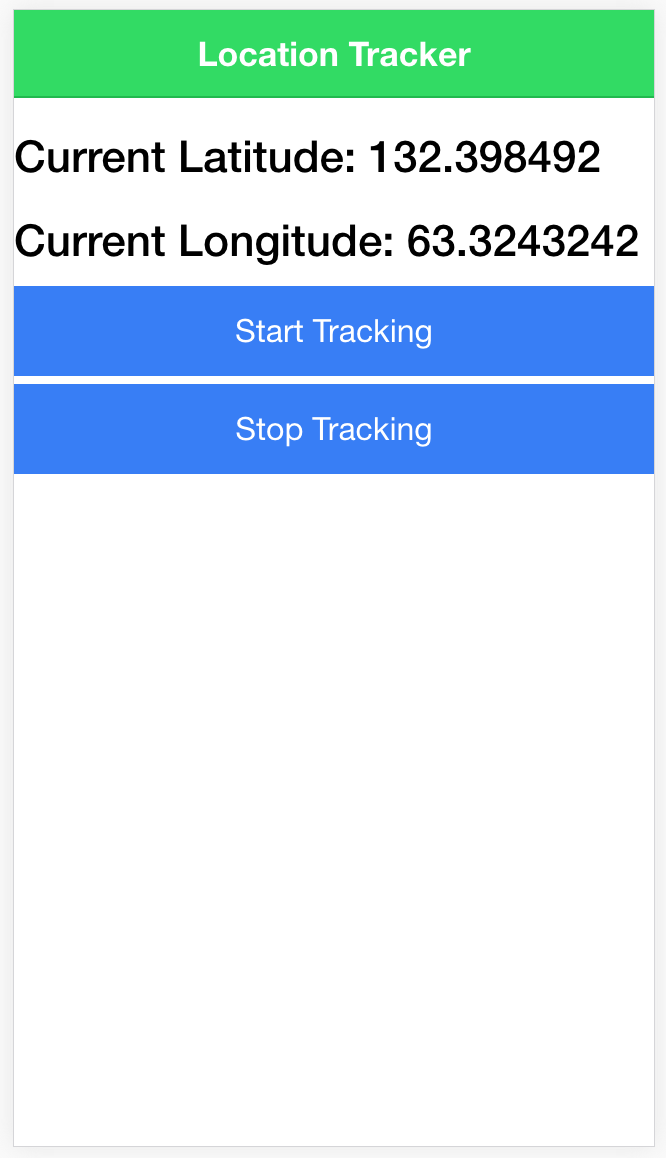
In this tutorial I am going to show you how you can enable Background Geolocation in your Ionic 2 applications. This means that you will be able to continue tracking a user’s location, and executing code in your application, even when the user closes your application. The application we are building will look like this:
Before We Get Started
Last updated for Ionic 3.7.1
Before you go through this tutorial, you should have at least a basic understanding of Ionic concepts. You must also already have Ionic set up on your machine.
If you’re not familiar with Ionic already, I’d recommend reading my Ionic 2 Beginners Guide first to get up and running and understand the basic concepts. If you want a much more detailed guide for learning Ionic, then take a look at Building Mobile Apps with Ionic.
1. Generate a New Ionic 2 Project
First, we will generate a new Ionic 2 project by running the following command:
ionic start ionic2-background-geolocation blankWe are also going to be creating a provider to handle the Geolocation, so once the app has finished generating, first run the following command:
cd ionic2-background-geolocationto make the project your working directory, and then run:
ionic g provider LocationTrackerto generate a new provider. We will also need to add this new provider to the app.module.ts file.
Modify src/app/app.module.ts to reflect the following:
import { BrowserModule } from '@angular/platform-browser';
import { ErrorHandler, NgModule } from '@angular/core';
import { IonicApp, IonicModule } from 'ionic-angular';
import { SplashScreen } from '@ionic-native/splash-screen';
import { StatusBar } from '@ionic-native/status-bar';

import { MyApp } from './app.component';
import { HomePage } from '../pages/home/home';
import { LocationTracker } from '../providers/location-tracker';

@NgModule({
  declarations: [MyApp, HomePage],
  imports: [BrowserModule, IonicModule.forRoot(MyApp)],
  bootstrap: [IonicApp],
  entryComponents: [MyApp, HomePage],
  providers: [
    LocationTracker,
    StatusBar,
    SplashScreen,
    { provide: ErrorHandler, useClass: IonicErrorHandler },
  ],
})
export class AppModule {}
2. Install the Required Plugins
We will be using both the standard Geolocation plugin in this tutorial, as well as this background geolocation plugin. To install these you will need to run the following commands:
ionic plugin add cordova-plugin-geolocationnpm install --save @ionic-native/geolocationionic plugin add cordova-plugin-mauron85-background-geolocationnpm install --save @ionic-native/background-geolocationYou will also need to add these to the app.module.ts file.
Modify src/app/app.module.ts to reflect the following:
import { BrowserModule } from '@angular/platform-browser';
import { ErrorHandler, NgModule } from '@angular/core';
import { IonicApp, IonicErrorHandler, IonicModule } from 'ionic-angular';
import { SplashScreen } from '@ionic-native/splash-screen';
import { StatusBar } from '@ionic-native/status-bar';

import { MyApp } from './app.component';
import { HomePage } from '../pages/home/home';
import { LocationTracker } from '../providers/location-tracker';
import { BackgroundGeolocation } from '@ionic-native/background-geolocation';
import { Geolocation } from '@ionic-native/geolocation';

@NgModule({
  declarations: [
    MyApp,
    HomePage
  ],
  imports: [
    BrowserModule,
    IonicModule.forRoot(MyApp)
  ],
  bootstrap: [IonicApp],
  entryComponents: [
    MyApp,
    HomePage
  ],
  providers: [
    LocationTracker,
    BackgroundGeolocation,
    Geolocation,
    StatusBar,
    SplashScreen,
    {provide: ErrorHandler, useClass: IonicErrorHandler}
  ]
})
export class AppModule {}
3. Create the Location Tracker
We’re going to implement our Location Tracker provider now. We want this service to allow us to track a user’s location, and we also want the ability to stop tracking the user.
Let’s start out with a basic template for the provider, and slowly build some functionality into it.
Modify src/providers/location-tracker.ts to reflect the following:
import { Injectable, NgZone } from '@angular/core';
import { BackgroundGeolocation } from '@ionic-native/background-geolocation';
import { Geolocation, Geoposition } from '@ionic-native/geolocation';
import 'rxjs/add/operator/filter';

@Injectable()
export class LocationTracker {

  public watch: any;
  public lat: number = 0;
  public lng: number = 0;

  constructor(public zone: NgZone) {

  }

  startTracking() {

  }

  stopTracking() {


  }

}
We’ve imported both the Geolocation and BackgroundGeolocation plugins from Ionic Native, but you will notice that we have also imported Geoposition. This describes the type of the data that the Geolocation plugin returns, and will help us avoid issues with the TypeScript compiler.
We will be making use of NgZone in this tutorial, which allows us to force code to run inside of Angular’s zone. If you would like to know more about zones in Angular 2, I recommend reading Understanding Zones and Change Detection in Ionic 2 & Angular 2. The reason we need to do this is because, in the case of the plugin we are using, location changes don’t run inside of Angular’s zone, and thus they do not trigger change detection and our layout won’t update with the correct values. Using NgZone is not usually required.
We import the filter operator, which we will use to filter out certain data from the observable Geolocation returns us later, and we set up some member variables to hold some data. We’ve also set up two additional functions that we will finish implementing now.
Modify the
startTracking()function to reflect the following:
startTracking() {

    // Background Tracking

    let config = {
      desiredAccuracy: 0,
      stationaryRadius: 20,
      distanceFilter: 10,
      debug: true,
      interval: 2000
    };

    this.backgroundGeolocation.configure(config).subscribe((location) => {

      console.log('BackgroundGeolocation:  ' + location.latitude + ',' + location.longitude);

      // Run update inside of Angular's zone
      this.zone.run(() => {
        this.lat = location.latitude;
        this.lng = location.longitude;
      });

    }, (err) => {

      console.log(err);

    });

    // Turn ON the background-geolocation system.
    this.backgroundGeolocation.start();


    // Foreground Tracking

  let options = {
    frequency: 3000,
    enableHighAccuracy: true
  };

  this.watch = this.geolocation.watchPosition(options).filter((p: any) => p.code === undefined).subscribe((position: Geoposition) => {

    console.log(position);

    // Run update inside of Angular's zone
    this.zone.run(() => {
      this.lat = position.coords.latitude;
      this.lng = position.coords.longitude;
    });

  });

  }
This function allows us to start tracking the user’s location. You will notice we have two distinct sections of code here: Foreground Tracking and Background Tracking. The “Foreground Tracking” code handles tracking the user whilst they have the open and just uses the standard watchPosition function the Geolocation plugin provides. The “Background Tracking” code handles tracking the user when the app is in the background and uses the background Geolocation plugin instead.
There’s actually quite a lot to the background geolocation plugin and I’d recommend reading up on the documentation, but the configuration options we have supplied here control when the application will be notified of the user’s position and how accurate it should be. The plugin has been optimised to take it easy on the user’s battery, but in general: the more accurate you want the data to be, the more battery power it is going to use.
The code for handling standard Geolocation updates looks a little strange. The watchPosition function returns an observable, which we can subscribe to in order to handle updates from it, but we can also filter an observable first if we like. This will get rid of any updates that we do not want, and in this case, we are filtering out any updates that return an error. We also assign a type of Geoposition to the data the observable emits, so that we don’t run into any issues with the TypeScript compiler when accessing the latitude and longitude properties on the position object.
In both cases, whenever we get an update we update the lat and lng member variables, and we force this to run inside of Angular’s zone so that it triggers change detection.
Also, note that we have set the debug option to true for the background geolocation, this means that the app will use local notifications to notify you whenever a background geolocation update occurs (handy for debugging!).
IMPORTANT: Whilst the standard Geolocation plugin can actually run through the browser, the background geolocation plugin can not. You must install the application on a device or emulator before being able to test this functionality. If you try to run it through a browser you will just receive errors.
Modify the
stopTrackingfunction to reflect the following:
stopTracking() {

    console.log('stopTracking');

    this.backgroundGeolocation.finish();
    this.watch.unsubscribe();

  }
This is actually a pretty simple function. We call the finish method for the background geolocation plugin to stop tracking the user, and by simply unsubscribing from the watch observable it will cancel tracking the user with watchPosition.
4. Use the Location Tracker
Now that we have our fancy schmancy location tracker built, we just need to make use of it. To do that we are just going to add a simple implementation to our home page.
Modify src/pages/home/home.ts to reflect the following:
import { Component } from '@angular/core';
import { NavController } from 'ionic-angular';
import { LocationTracker } from '../../providers/location-tracker';

@Component({
  selector: 'page-home',
  templateUrl: 'home.html'
})
export class HomePage {

  constructor(public navCtrl: NavController, public locationTracker: LocationTracker) {

  }

  start(){
    this.locationTracker.startTracking();
  }

  stop(){
    this.locationTracker.stopTracking();
  }

}
We’ve imported the location tracker here and injected it into our constructor so that we can use it throughout the class. We’ve also added two simple functions here to start and stop tracking.
The start function calls the startTracking function we added to the location tracker and the stop function calls the stopTracking function in the location tracker to stop tracking the users location. Now we just need to modify the home template so that we can call the two functions we just created.
Modify src/pages/home/home.html to reflect the following:
<ion-header>
  <ion-navbar color="secondary">
    <ion-title> Location Tracker </ion-title>
  </ion-navbar>
</ion-header>

<ion-content>
  <h3>Current Latitude: {{locationTracker.lat}}</h3>
  <h3>Current Longitude: {{locationTracker.lng}}</h3>
  <button ion-button full primary (click)="start()">Start Tracking</button>
  <button ion-button full primary (click)="stop()">Stop Tracking</button>
</ion-content>
Now you should be able to hit ‘Start Tracking’ and watch the position values update in your app, and the values will continue to update whether the app is in the foreground or in the background!
Summary
The ability to track a user’s location and continue doing stuff whilst your application is in the background opens up a big range of options when using Geolocation. Hopefully, this tutorial also highlights how creating providers in Ionic 2 can help modularise your code and allow you to simplify the use of more complex functionality – now that we’ve created this provider we can easily track the user’s location, background or not, simply by calling a single function.