

It’s holiday season, and I thought I’d get into the spirit of things with a little Christmas themed content. I’ve been putting out a lot of Ionic 2 content lately so I’ve been meaning to put out some more Phaser content and figured this would be the perfect opportunity to make a Christmas themed gamed with Phaser.
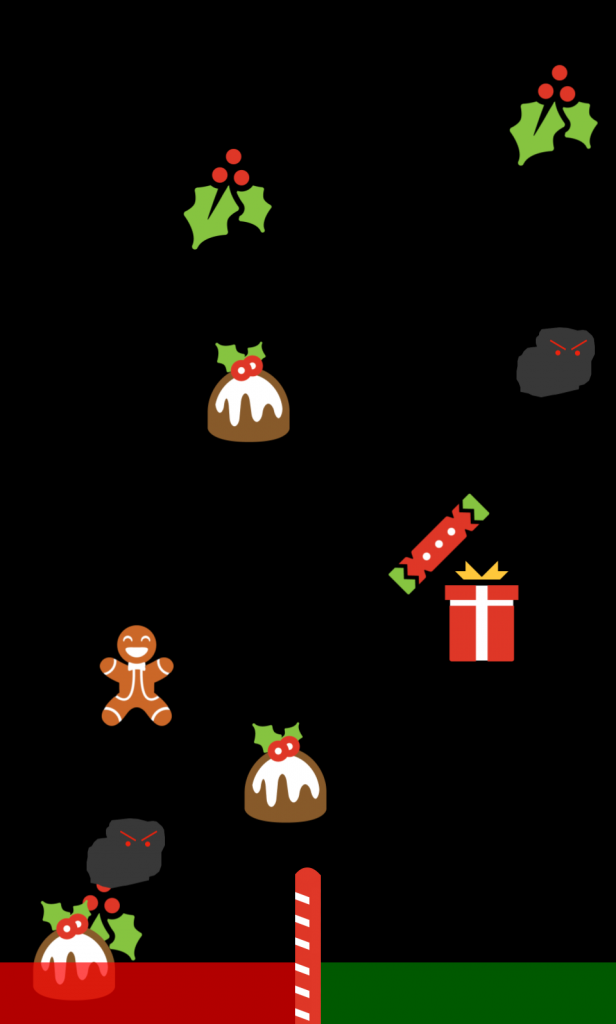
Let’s take a look at the game we’re going to build:
It’s pretty simple: there’s lots of goodies for the nice kids, and lumps of coal for the naughty kids. Your job is to sort them into the appropriate side of the screen (all the coal goes to the red section, all the presents to the green section). If you sort any of the items into the wrong side, it’s game over.
We’re going to use a bunch of free resources for this game, all of which will be included in the source code for the game, but you can also find them here:
- Freebie Festive Christmas Icon Pack from Smashing Magazine
- Snow Effect from Richard Davey
- Deck the Halls Song from Singing Bell
The coal and candy cane divider sprites were made by yours truly, and you can find them in the download pack below… not really much to be proud of!
Before We Get Started
If you don’t already know how to get a Phaser project set up you can check out the free preview lesson from my Mobile Development for Web Developers course which covers how to get started with Phaser.
I’m also not going to cover how to structure a Phaser application in this tutorial, but if you would like to use the same structure I am using in the tutorial you can download a skeleton template for a mobile game in Phaser which scales to any screen size below:
If you are using this template, just change:
this.game.state.start('GameTitle');in preload.js to:
this.game.state.start('Main');because we will not be creating a title screen for the game in this tutorial and we want the game to launch right into the main state.
1. Preparing the Assets
For this game we are going to have a few assets, and your assets folder should reflect the following:
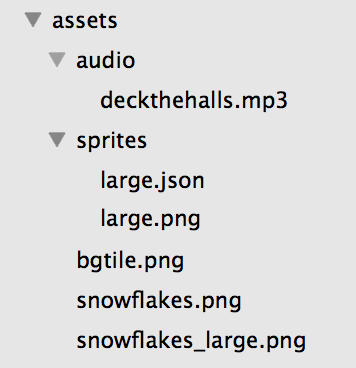
Most of these assets are pretty standard images or audio files, but there’s one asset I’d like to bring your attention to. We have large.png and large.json files inside of the sprites folder. This is a texture atlas that includes all of the sprites for the presents in one file – this helps to increase performance and it also makes the code a little cleaner.
To create a texture atlas you can use a program like TexturePacker or the Leshy SpriteSheet Tool. I’ve written more about what a texture atlas is and how to create one in a past tutorial about creating animations in Phaser with a texture atlas so I won’t cover that here. If you like, you can just copy the assets from the download pack if you don’t want to create them yourself.
Make sure to set up your assets folder as indicated above before continuing.
2. Loading the Assets
Now that we’ve got all of the assets included in the project, we need to load them into Phaser.
Modify preload.js to reflect the following:
var Preload = function (game) {};

Preload.prototype = {
  preload: function () {
    this.game.load.audio('song', 'assets/audio/deckthehalls.mp3');
    this.game.load.atlas(
      'presents',
      'assets/sprites/large.png',
      'assets/sprites/large.json'
    );
    this.game.load.image('bgtile', 'assets/bgtile.png');
    this.game.load.spritesheet('snowflakes', 'assets/snowflakes.png', 17, 17);
    this.game.load.spritesheet(
      'snowflakes_large',
      'assets/snowflakes_large.png',
      64,
      64
    );
  },

  create: function () {
    this.game.state.start('Main');
  },
};
If you’ve made a Phaser game before this should all look pretty familiar to you. Note that we are using both a spritesheet and an atlas here. The snowflakes spritesheets will provide a range of different snowflakes for us to use when we create the snow effect. A spritesheet and an atlas are very similar (and sometimes people even refer to an atlas as a spritesheet), an atlas is just a bit more flexible in general, but that doesn’t mean using a spritesheet is bad.
Both a spritesheet and an atlas need to be given some information so that they know how to split up the single image provided into multiple different sprites. In the case of the atlas we provide a JSON file that does this, but for the spritesheets we just hardcode some dimensions (this is why an atlas is a bit more flexible, because the sprites don’t have to all be the same size).
Ok, enough of the set up stuff – let’s get into the fun bits.
3. Spawning Presents
We’re going to start off by randomly spawning some presents into the game that will fall from the ceiling. Before we do that though we are going to have to set up some sprites to use.
Modify the create method in main.js to reflect the following:
create: function() {

        var me = this;

        var seed = Date.now();
        me.random = new Phaser.RandomDataGenerator([seed]);

        //Enable the Arcade physics system
        me.game.physics.startSystem(Phaser.Physics.ARCADE);

        me.presentKeys = [
            'bonbon.png',
            'bow.png',
            'candycane.png',
            'coal.png',
            'decoration.png',
            'gingerbread.png',
            'mistletoe.png',
            'present.png',
            'pudding.png',
            'stocking.png'
        ];

        me.presents = me.game.add.group();
        me.initPresents();

        //Add a present every 2 seconds
        me.timer = game.time.events.loop(500, me.addPresent, me);

    },
We’ve done a few things here. We have:
- Created a random data generator that we will be able to access throughout this state
- Enabled the arcade physics system (take a look at this post for more information on the different physics system)
- Created an array of keys to our various assets in the atlas
- Created a group to hold all of our present sprites
- Added a call to a initPresents() function that will fill the group with sprites (this doesn’t exist yet)
- Created a timer that will call the addPresent() function every 0.5 seconds (this function also doesn’t exist yet)
All we need to do now is set up those two functions that don’t exist yet, and then we can start spawning presents.
Add the following function to your main.js file:
initPresents: function(){

        var me = this;

        //Initialise presents
        for(var i = 0; i <= 20; i++){
            var sprite = me.presents.create(-200, -200, 'presents', null, false);
            me.game.physics.arcade.enable(sprite);
            sprite.enableBody = true;
            sprite.body.bounce.set(0.8);
            sprite.body.gravity.y = 500;
            sprite.body.collideWorldBounds = true;
        }
    },
The idea here is that we create a bunch of sprites and then add them to the presents group. The reason we do this is because it makes it easier later to just spawn a sprite from this group, and this will also keep track of “dead” sprites. Since we won’t have more than 20 sprites on screen at a time, we can be sure that when we try to spawn a sprite from this group there will always be a “dead” sprite available (as long as we remember to kill it when it is no longer in use).
As well as creating the sprite we also set some physics properties on it, so that it has a bounce effect when it collides with things, it is effected by gravity, and so that it will also collide with the edges of the screen (rather than flying off the screen).
Also note that when we are creating the sprites, we are using the presents key which references the atlas we loaded before. The cool thing about this is that we can modify what any of these sprites are at any time by changing its frameName. The frameName references the area of the atlas which contains the sprite you want to use (you’ll see this in action soon).
Add the following function to your main.js file:
addPresent: function(){

        if(Phaser.Utils.chanceRoll(50)){
            var me = this;

            var present = me.presents.getFirstDead();

            var x = me.random.integerInRange(20, me.game.world.width - 10);

            present.reset(x, 1);
            present.body.velocity.y = me.random.integerInRange(50, 300);
            present.body.velocity.x = me.random.integerInRange(-100, 100);

            var frame = me.presentKeys[me.random.integerInRange(0, me.presentKeys.length - 1)];
            present.frameName = frame;

            //When the present leaves the screen, kill it
            present.checkWorldBounds = true;
            present.outOfBoundsKill = true;
        }

    },
Now we’re dealing with adding a sprite to the screen – this is the function that gets called every 0.5 seconds. First we use Phaser.Utils.chanceRoll to add a bit of randomness to the game. What this utility function does is allow you to create a ‘chance’ factor, by setting it to 50 it will evaluate to true 50% of the time. The reason we’re adding this is that so presents don’t consistently spawn every 0.5 seconds – that’d be a bit boring – instead sometimes they will spawn slow and sometimes they will spawn fast. You can tweak this to get a spawning rate you like.
Next we grab a sprite from the presents group by using the getFirstDead function. This will return a “dead” sprite from the group, i.e. one that is not currently in use. We “revive” this dead sprite by resetting it to a random x coordinate (using the random generator we created before) and then we also give it a random x and y velocity. This will make it so that the presents fly in random directions, rather than just falling in the same predictable pattern.
As I mentioned before, we can change the sprite to be anything that is on our atlas simply by changing the frameName. Here we get a random frame name from the array we created before and set it on the sprite.
Finally, we set the checkWorldBounds and outOfBoundsKill flags so that the sprite is killed if it goes off screen (making it available to the getFirstDead function). We actually don’t really need this, since the sprites can’t leave the screen and we will be manually killing them ourselves later, but it is a very useful flag in general for games so I wanted to include that here.
If you load the game in the browser now, you should see something like this:
4. Creating a Naughty and Nice Side
Now that we have the presents falling from the sky, we need to add the two sections for them to fall into: the nice side and the naughty side.
To do this we are going to add in an immovable sprite to serve as a divider between the two sides, and then we are going to detect which side of the screen the presents have fallen on. Let’s start off with the divider.
Add the following function to main.js
addDivider: function(){

        var me = this;

        //Create a red box for the bad side
        var badSection = me.game.add.bitmapData(me.game.world.width / 2, 100);

        badSection.ctx.rect(0, 0, me.game.world.width / 2, 100);
        badSection.ctx.fillStyle = 'red';
        badSection.ctx.globalAlpha = 0.7;
        badSection.ctx.fill();

        var badSectionSprite = me.game.add.sprite(0, me.game.world.height - 100, badSection);

        //Create a green box for the good side
        var goodSection = me.game.add.bitmapData(me.game.world.width / 2, 100);

        goodSection.ctx.rect(0, 0, me.game.world.width / 2, 100);
        goodSection.ctx.fillStyle = 'green';
        goodSection.ctx.globalAlpha = 0.7;
        goodSection.ctx.fill();

        var goodSectionSprite = me.game.add.sprite(me.game.world.centerX, me.game.world.height - 100, goodSection);

        //Create a divider to split the two
        me.dividerSprite = me.game.add.sprite(me.game.world.centerX, me.game.world.height, 'presents');
        me.dividerSprite.frameName = 'divider.png';
        me.dividerSprite.anchor.setTo(0.5, 1);
        me.game.physics.arcade.enable(me.dividerSprite);
        me.dividerSprite.enableBody = true;
        me.dividerSprite.body.immovable = true;

    },
We’re doing three things with the function. We are creating coloured boxes for both the good and the bad side so that the player knows where to throw the coal and where to throw the good presents. Instead of just using a sprite, we are using bitmapData. With bitmapData we can draw our sprite programatically using the HTML5 canvas, and we can then use that bitmapData to create a sprite, rather than using an image asset. The benefit of this is that we don’t need to create another image asset, and we can create the sprite to whatever dimensions we need depending on the platform the game is running on – in this case, we are making the sprite half the width of the game space.
Next we add the divider, and we do this the same way we have been creating all of the other sprites: we add the sprite using our atlas and then we set the appropriate frameName. We’ve done a couple things different here as well though. We are setting the anchor so that the sprite is positioned relative to the bottom of the sprite, rather than the center (because we want it to sit flush against the bottom of the game space) and we also set the immovable flag to true. This means that when any other sprite collides with the divider, the other sprite will be physically effected, but the divider will remain in the same place.
Now that we have a method to create the divider, we will need to call it from the create method as well.
Add the following call inside of the create method in main.js:
me.addDivider();If you take a look at your game now, you should have both the naughty and the nice side in place:
But the presents will just fall to the bottom and not do anything. Eventually, your game will cause an error and freeze as the presents build up as we only have 20 in total. Once all 20 are on screne, there will be no dead sprites in our presents group, so when we try to create a new present it will cause an error.
What we want to do is detect when a present has reached the bottom of the screen, then we want to detect which side of the screen it has fallen on. This is something we will want to do in the update method, as this method runs all the time and is used for checking what is happening in the game and responding to it.
Modify the update method in main.js to reflect the following:
update: function() {

        var me = this;
        me.game.physics.arcade.collide(me.presents, me.dividerSprite);

        me.presents.forEachAlive(function(present){

            if(present.body.y > me.game.world.height - 200){

                if(present.body.x > me.game.world.centerX && present.frameName != "coal.png"){
                    //A good present has landed on the good side
                }
                else if(present.body.x < me.game.world.centerX && present.frameName == "coal.png"){
                    //A bad present has landed on the bad side
                }
                else {
                    //A present went to the wrong section
                    //me.game.state.restart();
                }

                present.kill();

            }
        });
    },
Before we run the code that checks the position of the presents, we set up a collision for the presents group and the **divider. Without this, there would be no interaction between the sprites when they collide. You can also set up a collision so that presents collide with other presents as well, but I found that didn’t work very well for this game.
Let’s talk through the present checking now. The forEachAlive method will loop through each present that is alive, i.e. any sprite that is currently on screen. It’s important to use this method rather than just looping through all the presents because there is no point in checking the position of a sprite that is not currently in play, and it will use up processing power.
For each of these alive sprites, we check if they are at the bottom of the screen. If they are, we then perform the following checks:
- If the present is on the right side of the screen and it is not coal, do nothing
- If the present is on the left side of the screen and it is coal, do nothing
- For any other case, restart the game (the player loses if any presents go in the wrong area) – we’ve commented this out for now though so we can see what is happening better
No matter what happens, we always kill the sprite when it reaches the bottom of the screen. This will remove it from the screen and make it available to be reused.
If you take a look at the game now, you should see something like this happening:
Summary
This is a pretty big tutorial, so we’re going to leave it there for now. In the next part, I will walk through finishing off the game which will include:
- Enabling input events so that the player can fling items
- Adding a snow effect
- Adding music
- Adding scoring
As always, I’d encourage you to have a bit of a play around with the game. Change some physics properties, add some new sprites and so on. See you soon for Part 2!
UPDATE: Part 2 is out now!