

Recently I wrote a tutorial on building an infinite climbing game in Phaser which borrowed some concepts from Thomas Palef’s tutorial on building a Flappy Bird clone but kind of flipped it on its head a little bit by generating the game vertically rather than horizontally.
This game is going to be similar again in some ways because it will also have randomly generated platforms with holes that the player has to get through, but it’s kind of going to be more like a Flappy Bird cross Jetpack Joyride hybrid, take a look:
Rather than just having holes, we have breakable areas that the player can smash through and we also add some more interesting physics and particle effects. The controls are also very different (which is where the Jetpack Joyride angle comes in) in that the player will more gently rise and fall, opposed to the quick jumping of Flappy Bird.
Before we Get Started
If you don’t already know how to get a Phaser project set up you can check out the free preview lesson from my Mobile Development for Web Developers course which covers how to get started with Phaser.
I’m also not going to cover how to structure a Phaser application in this tutorial, but if you would like to use the same structure I am using in the tutorial you can download a skeleton template for a mobile game in Phaser which scales to any screen size below:
If you are using this template, just change:
this.game.state.start('GameTitle');in preload.js to:
this.game.state.start('Main');because we will not be creating a title screen for the game in this tutorial and we want the game to launch right into the main state.
1. Set up the Game Assets
We’ll be using the following four sprites in the game:


![]()
The two box sprites come from Kenney’s Game Assets which is a great source of royalty free assets. The red player sprite is just a sprite I created that I seem to use all the time until I replace it with something more interesting, and the small red sprite is what we will use for the particle effects we will create later.
You should save all of these in your games assets folder with file names of tile1.png, tile2.png, player.png and explode.png respectively. Or you can just grab the complete source code with assets below:
Once you have those assets saved, you should also load them into the game.
Modify the preload method in your preload.js file to reflect the following:
preload: function(){
        this.game.load.image('tile', 'assets/tile.png');
        this.game.load.image('tile2', 'assets/tile2.png');
        this.game.load.image('explode', 'assets/explode.png');
        this.game.load.image('player', 'assets/player.png');
    },
Now we’re ready to move on to building the game.
2. Add the Player to the Game
First, we are going to add the player to the game as well as some controls so that we can move around. To do this we are going to add a new function called createPlayer.
Add the following function to your main.js file:
createPlayer: function(){

        var me = this;

        //Add the player to the game by creating a new sprite
        me.player = me.game.add.sprite(me.game.world.centerX / 2, me.game.world.centerY, 'player');

        //Set the players anchor point to be in the middle horizontally
        me.player.anchor.setTo(0.5, 0.5);

        //Enable physics on the player
        me.game.physics.arcade.enable(me.player);

        //Make the player fall by applying gravity
        me.player.body.gravity.y = 2000;

        //Make the player collide with the game boundaries
        me.player.body.collideWorldBounds = true;

        //This means the players velocity will be unaffected by collisions
        me.player.body.immovable = true;

    },
The code above will take care of adding the player to the game and setting some properties, the comments should be reasonably self explanatory. We still need to call this function though, which we will do in the create method.
Add the following code to your create method in main.js:
create: function() {

        var me = this;

        //Set the speed for the platforms
        me.tileSpeed = -450;

        //Set the initial score
        me.score = 0;

        //Get the dimensions of the tile we are using
        me.tileWidth = me.game.cache.getImage('tile').width;
        me.tileHeight = me.game.cache.getImage('tile').height;

        //Set the background colour to blue
        me.game.stage.backgroundColor = '479cde';

        //Enable the Arcade physics system
        me.game.physics.startSystem(Phaser.Physics.ARCADE);

        //Add the player to the screen
        me.createPlayer();

    },
We’ve done a little bit more here than just calling that createPlayer function. We’re also creating a bunch of variables that we will make use of later like the speed with which the platforms will move towards the player, the initial score and we also store the width and height of the tile assets so that we will be able to figure out how many tiles we need to fill the screen.
The background colour for the game is also set, we enable the Arcade physics system and then we finally call our createPlayer function.
Our player should be rendered on screen now but we can’t do anything with it yet, so let’s create some controls. Basically, our player is only ever going to move up and down. Rather than moving forwards, the platforms will move towards the player (which gives the effect of making it look like the player is moving).
We’re going to create some basic keyboard controls that will allow the player to hold the up arrow to move up and release it to go down.
Before we can use keyboard controls we need to enable cursor keys though.
Add the following code to the create method in main.js:
//Enable cursor keys so we can create some controls
me.cursors = me.game.input.keyboard.createCursorKeys();
and now in the update method we will be able to listen for when the up arrow is being pressed and adjust the players vertical velocity accordingly:
Add the following code to the update method in main.js
var me = this;

//Make the sprite jump when the up key is pushed
if (me.cursors.up.isDown) {
  me.player.body.velocity.y -= 80;
}
Now when the up arrow is being held down the players y velocity will constantly decrease by 80, making the player move upwards. When the up arrow is released gravity will do its work to bring the player back down again.
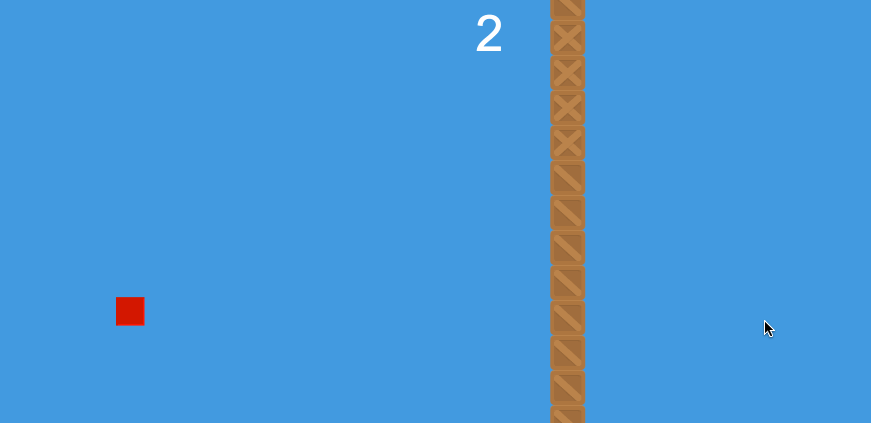
If you fire up the game in your browser now it should look something like this:
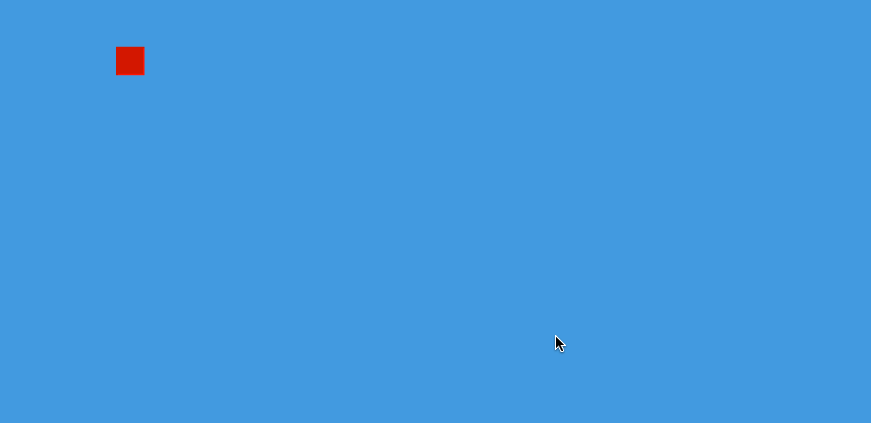
Not a whole lot going on yet but it’s a good start!
3. Create the Platforms
This is where things will start to get interesting. We are going to create platforms, or walls, that will be randomly generated and constantly move toward the player. Each platform generated will have a breakable section that the player can smash through and the game will go on until the player finally crashes.
To create the platforms we are going to create two functions called addTile and addPlatform. The first will be responsible for placing individual tiles on the screen, and the second will be responsible for generating a whole column of tiles (by repeatably calling the addTile function).
Before we create those functions though, we are going to create some groups to hold all of the tiles we will be using. We are going to create two separate groups: one to hold the tiles that will break when hit, and one to hold the tiles that will kill the player when collided with.
Add the following code to the create method in main.js
//Add a platforms group to hold all of our tiles, and create a bunch of them
me.platforms = me.game.add.group();
me.platforms.enableBody = true;
me.platforms.createMultiple(50, 'tile');

me.breakables = me.game.add.group();
me.breakables.enableBody = true;
me.breakables.createMultiple(20, 'tile2');
We create 50 tiles in the normal group, and 20 in the breakables group because there will be less breakable tiles (we just need to make sure we create enough tiles so that we have enough for however many are on screen at any given time).
Now let’s create those two functions I was just talking about.
Add the following functions to your main.js file:
addTile: function(x, y, immovable){

        var me = this;

        //Get a tile that is not currently on screen
        if(immovable){
            var tile = me.platforms.getFirstDead();
        } else {
            var tile = me.breakables.getFirstDead();
        }

        //Reset it to the specified coordinates
        tile.body.gravity.y = 0;
        tile.reset(x, y);
        tile.body.velocity.x = me.tileSpeed;
        tile.body.immovable = immovable;

        //When the tile leaves the screen, kill it
        tile.checkWorldBounds = true;
        tile.outOfBoundsKill = true;
    },

    addPlatform: function(){

        var me = this;

        //Speed up the game to make it harder
        me.tileSpeed -= 40;

        //Work out how many tiles we need to fit across the whole screen
        var tilesNeeded = Math.ceil(me.game.world.height / me.tileHeight);

        //Add a hole randomly somewhere
        var hole = Math.floor(Math.random() * (tilesNeeded - 3)) + 1;

        //Keep creating tiles next to each other until we have an entire row
        //Don't add tiles where the random hole is
        for (var i = 0; i < tilesNeeded; i++){
            if (i != hole && i != hole + 1 && i != hole + 2 && i != hole + 3){
                me.addTile(me.game.world.width - me.tileWidth, i * me.tileHeight, true);
            } else {
                me.addTile(me.game.world.width - me.tileWidth, i * me.tileHeight, false);
            }
        }

    },
The addTile function takes in an x coordinate and a y coordinate and places a tile there, setting its velocity to whatever the current tileSpeed is. This function also takes in a third parameter of “immovable” which is the way we define whether or not the tile should be breakable, if immovable is true then it will grab the tile from the normal group, but if it is set to false then it will grab the tile from the breakable group. We also use this value to determine the tile.body.immovable property.
So that we can recycle the tiles when they go off screen we set checkWorldBounds and outOfBoundsKill to true, so when the tile leaves the screen it will be killed and then available to be chosen by the getFirstDead function.
The addPlatform function is a little more complicated, this handles creating an entire column of tiles and also randomly creates an area 4 tiles long where the breakable tiles will be used. We figure out how many tiles we need based on how tall the tiles are (this allows us to easily swap out the tiles to something else rather than hard coding in a value) and then choose a random number to decide where the breakable area will start. Then we just have a for loop that creates all the tiles needed, and if the tile being added is the randomly chosen hole, or the 3 tiles after it, the immovable property will be set to false.
We also increase the the speed (or more accurately decrease since the tiles are moving backwards) the tiles move at every time a new platform is created so the game progressively gets harder.
Now we need to call the addPlatform function whenever we want a new column added. To do that we will add the following code to the create method.
Add the following code to the create method in main.js
//Add an initial platform
me.addPlatform();

//Add a platform every 3 seconds
me.timer = game.time.events.loop(3000, me.addPlatform, me);
Now the first column will be added right away, and then a new column will be created every 3 seconds after that. Timers like this are a great way to to continually spawn things like enemies into your game.
We also need to set up collisions between the player and the tiles, otherwise they will just pass right through each other.
Add the following code to the update method in main.js
//Make the sprite collide with the ground layer
me.game.physics.arcade.overlap(me.player, me.platforms, me.gameOver, null, me);
me.game.physics.arcade.collide(
  me.player,
  me.breakables,
  me.collideTile,
  null,
  me
);
me.game.physics.arcade.collide(me.breakables, me.platforms);
This sets up collisions for everything but also calls some custom functions. When the player collides with a normal tile we call the gameOver function, which will restart the game. When the player collides with a breakable tile though we want to do some extra stuff, so we call the collideTile function. Let’s create that now.
Create the following function in main.js
collideTile: function(player, tile){
        tile.body.gravity.y = 2000;
    },
Before the breakable tiles are hit they have no gravity, but when the player hits them we will set the gravity to 2000 so that they will fall downwards as you would expect them to.
If you take a look at the game now it should look like this:
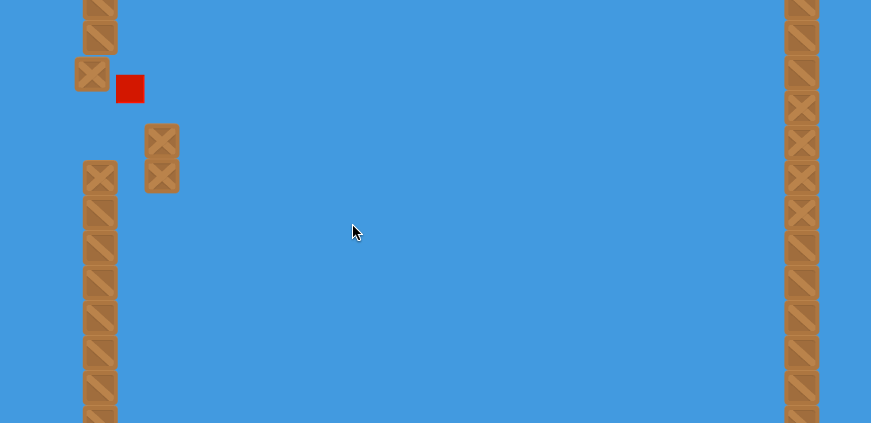
Pretty cool, but the game just restarts pretty abrubtly when the player dies so now we are going to add a bit of a death sequence.
4. Add Particle Effects
We’re going to use an Emitter to create a particle effect when the player dies. We are going to use the explode sprite we added earlier to make it look like the player breaks into a bunch of little pieces. To do this, we are first going to create a new emitter in our game.
Add the following code to the create method in main.js
//Add particle emitter for death animation
me.emitter = game.add.emitter(0, 0, 20);
me.emitter.makeParticles('explode');
me.emitter.gravity = 200;
Now we can trigger that emitter to relase particles whenever we want, but we are going to need another function to define where these particles should be released from (i.e. where the player died) since we want it to occur where the player was when they died.
Create the following function in main.js
particleBurst: function(x, y){
        var me = this;

        me.emitter.x = x;
        me.emitter.y = y;

        me.emitter.start(true, 2000, null, 20);
    },
This function simply just sets the location of the emitter to the values we pass in and then starts the emitter. Setting the first parameter to true sets the emitter to “explode” so that all particles are released at once (you can also use emitters to release particles over a long period of time).
Now all we need to do is trigger this function when the player dies.
Modify the gameOver function in main.js to reflect the following:
gameOver: function(){
        var me = this;

        me.particleBurst(me.player.body.position.x + (me.player.body.width / 2), me.player.body.position.y + (me.player.body.height / 2));
        me.player.kill();

        //Wait a little bit before restarting game
        me.game.time.events.add(1000, function(){
            me.game.state.start('Main');
        }, me);

    },
When the player dies we call the particleBurst function with the coordinates of the player (more specifically, the coordinates of the center of the player) and then kill the player so that the player sprite disappears from the screen. We wait 1 second to give the emitter some time to do its thing and then we restart the game.
5. Add Scoring
Finally, we are going to add a scoring mechanism to the game. We will increase the players score every time that a new platform is created. To do this we will create two more functions, one to render the score on the screen and one to increment the users score.
Add the following functions to main.js
createScore: function(){

        var me = this;

        var scoreFont = "100px Arial";

        me.scoreLabel = me.game.add.text((me.game.world.centerX), 100, "0", {font: scoreFont, fill: "#fff"});
        me.scoreLabel.anchor.setTo(0.5, 0.5);
        me.scoreLabel.align = 'center';

    },

    incrementScore: function(){

        var me = this;

        me.score += 1;
        me.scoreLabel.text = me.score;

    },
We will need to call the createScore function from our create method so that it is rendered on the screen.
Add the following code to the create method in main.js (just after defining me.score)
me.createScore();and finally we will need to trigger the incrementScore function every time a new platform is added.
Add the following code to the addPlatform function in main.js
me.incrementScore();and that’s it! Your finished game should now look like this:
Summary
This game is conceptually similiar to the infinite climbing game tutorial so if you’ve already completed that tutorial then you probably wouldn’t have found anything ground breaking here.
But this tutorial does highlight how little extra things like particle effects and more interesting physics interactions can make a game feel a lot more fun.
I actually took this concept a lot further and ended up creating this:
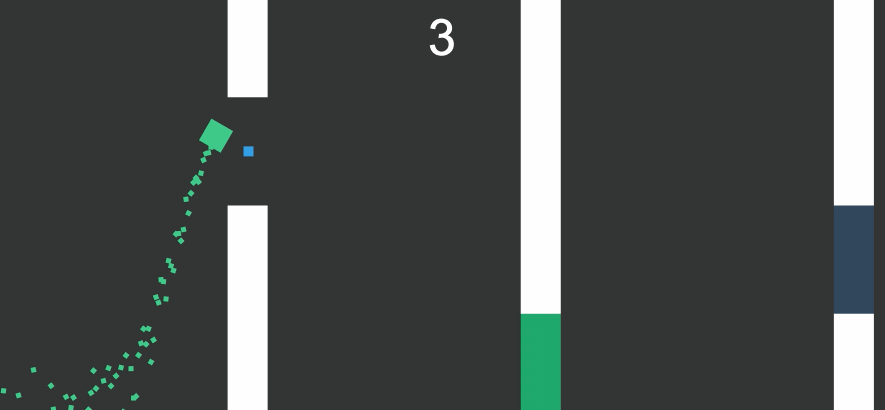
I won’t be releasing a tutorial for that any time soon, but you can see that it’s still essentially the same concept but is a lot more fun with the little extra details.